Categories
DIY Parties and Events Printables

DIY Paper Globes

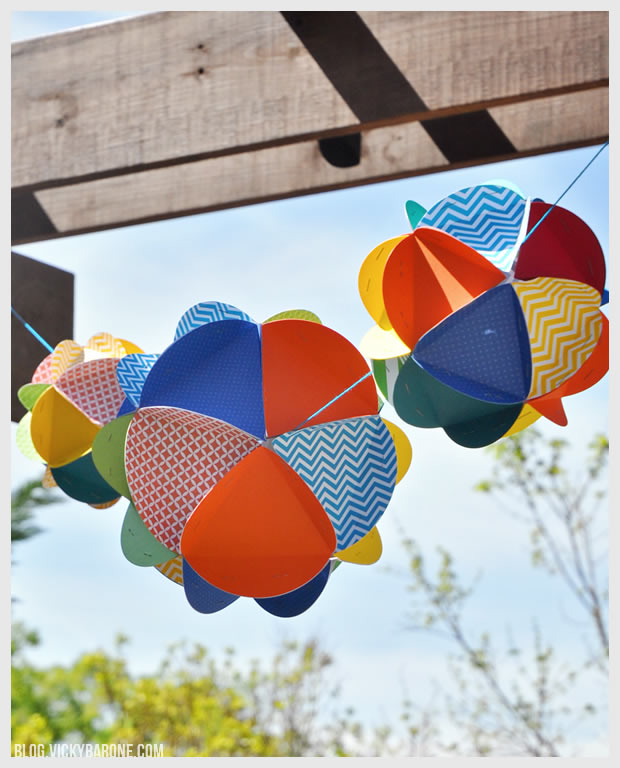
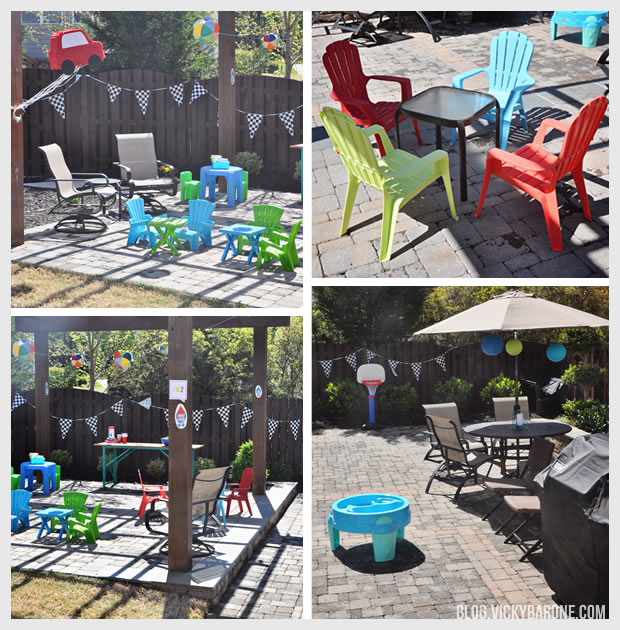
Here is another detail from my son’s 2nd Birthday party! I got the idea for these paper globes here and decided to make them a little bigger and turn them into a garland!

DIY Paper Globes | Vicky Barone

I hung them from the arbor in our backyard where they added a colorful and unique touch to the whole party. I’ve included a free printable template to help create the globes if you’d like to make your own! Here is how to do it:

DIY Paper Globes | Vicky Barone

Supplies: Scrapbook paper, circle cutter, triangle template, X-Acto knife, stapler*, and ribbon.

*Other tutorials suggest using glue, rather than a stapler, to assemble the globe. Since this garland would be hanging up high, I knew no one would notice the staples. Stapling the circles saves a lot of time, but if you don’t want to see the staples, a strong glue stick or craft glue would work great!

Directions:
1. Using the paper cutter (or scissors), cut out 20 circles from different scrapbook paper (I made one globe with 4″ circles and one with 6″ circles).
2. Line up the triangle template inside each circle and score around it using the X-Acto knife.
3. Fold along score lines.
4. Arrange five circles to form the top of the globe. Use the stapler to attach them to one another.
5. Arrange ten circles in a row to form the middle of the globe. Staple them together.
6. Repeat step 4 to create the bottom of the globe. Attach the top, middle, and bottom together with the stapler.
7. Hang using ribbon!

DIY Paper Globes | Vicky Barone
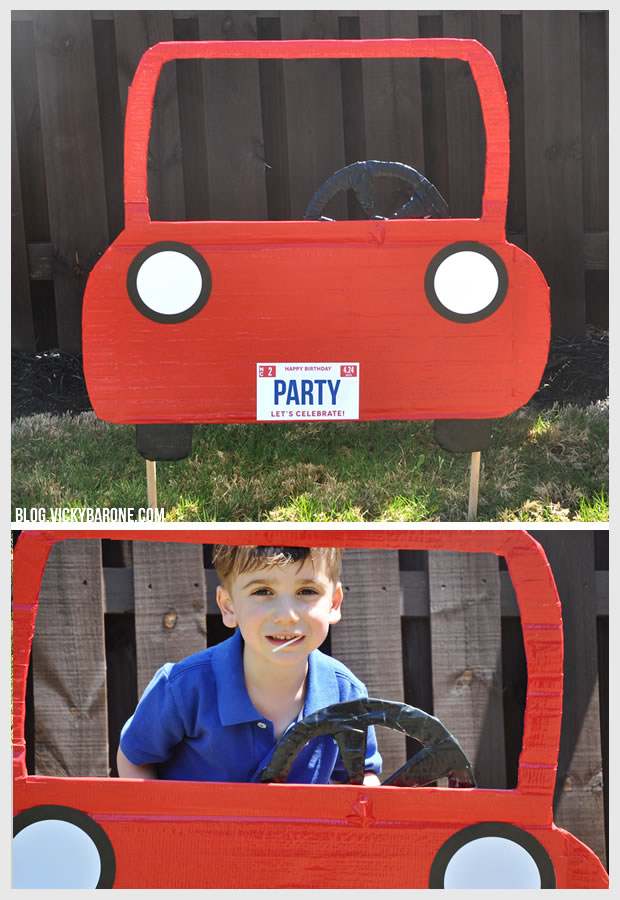
Click here to see the rest of the race car birthday party!


Categories
DIY Kids Parties and Events

DIY Car Photo Booth

This post contains affiliate links. If purchased, I will receive a commission.

We saw this AMAZING idea for a photo booth here and knew we had to try and re-create it for the Race Car Birthday Party!

DIY Car Photo Booth | Vicky BaroneThe kids loved it and it made for great pictures! Using the pictures from this blog post as inspiration, we did our best to create our own free standing car photo booth. Here’s how we did it:

Materials: cardboard, an X-acto knife or scissors, red duct tape, black duct tape, two wooden dowels, a brad pin, and paper cut outs for the headlights and license plate.

Some of the supplies above contain affiliate links. If purchased, I will receive commission.

Directions:
1. On a large piece of cardboard, trace the shape of a front-facing car with a large windshield. Cut this out with an Exacto knife or scissors.
2. On a smaller piece of cardboard or with your cardboard scraps, trace and cut out two slightly squared off ovals (these will be the wheels!) and a steering wheel.
3. Wrap the car in red duct tape and the wheels and steering wheel with black duct tape. Attach the wheels to the bottom of the car with more tape.
4. I made my own head lights and license plate, printed them out, and glued them to the car. You can recreate this on the computer or by cutting out two black circles and two slightly smaller white circles for the headlights and a rectangle with any combination of letters and numbers you’d like for the license plate!
5. Flip the car over and tape the wooden dowels to the back. We attached ours midway up the sides of the car to support the flimsy outline if the windshield.
6. We attached the steering wheel by punching a hole in the car and in the center of the steering wheel and inserting a plastic brad from a DIY Pinwheel kit (you can use any kind of brad pin or paper fastener). This helped the wheel spin, which made it extra fun! Then we added a piece of red duct tape to the front of the car to cover where the brad stuck out.
7. Using a stake or sharp object, make holes in the ground outside and insert the wooden dowels.

DIY Car Photo Booth | Vicky Barone

We had so much fun with the photo booth we might make another one some day!

Check out the rest of the Race Car Birthday Party here!

Categories
DIY Family Kids Parties and Events

Racecar Birthday Party

I can’t believe my baby is 2! It truly feels as though his first birthday party was yesterday.

A couple weeks ago, we threw him a little racecar-themed get-together with some of his friends, family, and classmates. The weather was beautiful and everyone, especially the birthday boy, had a great time!

We set up a little area on the back patio under the arbor, complete with miniature tables and chairs for all the little ones to sit in. We had party trays from Chick-fil-A, applesauce pouches, juice boxes, brownies, and a Lightning McQueen cake! Here are some more pictures if you’d like to see all the details!

Racecar Birthday Party | Vicky Barone
Buffet Table | Water Table | Kids Adirondack Chairs

Racecar Birthday Party | Vicky BaroneMe and the Birthday Boy | Custom signs | Paper Globes | Foam Flag | Racing Bunting

Racecar Birthday Party | Vicky BaroneLightning McQueen Cake | Chick-fil-A Catering | Stoplight Brownies | Custom Cupcake Toppers

Racecar Birthday Party | Vicky BaroneCustom Favor Tags | Bubble Wands | Sticker & Tattoo Station | Car Piñata | Car Photobooth

Throughout the month we’ll be showing DIY tutorials on everything from the cake to the piñata, so be sure to subscribe via email (in the right sidebar!), or follow on Bloglovin’, Instagram, or Pinterest!

You can also subscribe to Places for Faces to be the first to know when it launches! Sign up below and you’ll be making custom cake toppers and favor tags in no time!


Categories
DIY Holidays Parties and Events Recipes Things I Love

Feliz Cinco de Mayo!

1. Shrimp Tacos | 2. Tequila Sunrise | 3. Piñata Cookies
4. Mexican Street Corn | 5. Papel Picado | 6. Horchata
7. Fiesta Chalkboard | 8. Lime Jello Shots | 9. Mini Piñatas

There are just too many amazing Cinco de Mayo ideas out there to cram into one post! From tasty food and drinks, to colorful party decor, this list has got you covered.

Are you having a Cinco de Mayo party today? We’d love to see the details!

Categories
DIY Holidays Parties and Events

DIY Mardi Gras Garland

Here’s a super simple DIY decoration for Mardi Gras! We made this garland with matte and glittery scrapbook paper in yellow, green, and purple along with some emerald green thread.

You can find the instructions to make your own paper garland here!

Happy Mardi Gras and laisser les bons temps rouler!

Categories
DIY Holidays Parties and Events Recipes

Tinsel Swizzle Sticks and Pomegranate Champagne

Christmas may be over, but the holiday season is still in full effect! We have the perfect drink to sip on while you’re ringing in the new year, complete with festive drink stirrers!

DIY Tinsel Swizzle Sticks and Pomegranate ChampagneMaterials: Plastic drink stirrers, tinsel garland, scissors, and glue.

Directions:
1. Using scissors, cut off a small piece of tinsel (about an inch and a half).
2. Put glue on the top of the drink stirrer.
3. Hold piece of tinsel onto glue until it sets (if your tinsel garland has wire in it, bend the wire around the drink stirrer to help hold its place).
4. Let dry completely and serve in a champagne glass!

Pomegranate ChampagneThe pomegranate champagne is so delicious and simple! Pour an ounce or two of pomegranate juice in a champagne glass and fill the rest with your favorite champagne. For a kid-friendly version, swap out the champagne for sparkling cider or try these magic cotton candy drinks!

Check out our NYE Pinterest board for more New Year’s Eve ideas!


Categories
DIY Holidays Parties and Events

DIY Happy New Year Garland

This post contains affiliate links. If purchased, I will receive a commission, but the price stays the same for you!

We made a garland for our New Year’s Eve party! It’s our go-to bunting that works for every holiday. Check out our Christmas and Thanksgiving garlands too!

DIY Happy New Year GarlandMaterials: Black scrapbook paper, glittery adhesive chipboard alphabet letters (similar, similar), mini clothespins, a black marker or paint, a paper cutter and/or scissors, and gold trim.

The above supplies contain affiliate links. If purchased, I will receive a commission, but the price stays the same for you!

Directions:
1. Using a paper cutter, cut scrapbook paper into 4×6 inch rectangles.
2. Cut a triangle out of the bottom of each paper rectangle using scissors. We made a stencil out of scrap paper to make sure each triangle cut was the same.
3. Remove the backing from the letters and attach to each paper flag.
4. Paint clothespins black, or color them in with a black marker.
5. Cut one long piece of trim (or three pieces like we did) and attach each flag with a clothespin, leaving equal space between the flags and extra trim on each end for hanging.

DIY Happy New Year Garland

DIY Happy New Year Garland

See more New Year’s Eve inspiration on our NYE Pinterest board!

Categories
DIY Holidays Lifestyle Parties and Events

Ribbon Tied Silverware

We’ve been seeing a lot of pretty place settings on Pinterest that have silverware tied with ribbon or twine. We think it is just the sweetest thing (and the easiest!), so we adopted it for our own Thanksgiving table!

DIY Ribbon Tied SilverwareAll you need is your flatware, and a piece of ribbon! We tied ours in a knot and curled the ribbon a little. You can also tie a bow or even tie a name tag into the ribbon for a place setting.

Here are some of our other favorites from around the web:
DIY Ribbon Tied Silverware

one | two | three | four

Don’t forget to check out the rest of our Thanksgiving details! Happy decorating!