Categories
DIY Holidays Kids

DIY Paper Plate Shamrocks

We are so sad that Valentine’s Day is over, but what luck that St. Patrick’s Day is just around the corner! Today we’re sharing a fun and simple kids craft to get you in the lucky spirit.

DIY Paper Plate Shamrocks | St. Patrick's Day | Vicky Barone

Supplies: green paper plates, scissors, a pencil, a single hole punch, white yarn, and a plastic sewing needle (optional).

Directions:
1. Draw or trace a shamrock shape onto the back of a plate.
2. Cut the shape out with scissors.
3. Use a single hole punch to create holes around the edge of the shamrock shape.
4. Give your kiddos a piece of yarn (plastic sewing needle optional) and a prepped plate and let them get to sewing!

DIY Paper Plate Shamrocks | St. Patrick's Day | Vicky Barone

This St. Patrick’s Day craft is a fun way to pass the time and be creative by sewing different patterns! They also look great if you hang them up as decoration. What are your favorite St. Patrick’s Day crafts or treats? We’d love to hear!

Categories
DIY Holidays Kids Recipes

DIY Candy Tic Tac Toe

Happy Friday! Today we’re sharing a sweet treat you can make (and play with!) this weekend. These tic-tac-toe boards are completely edible and so much fun to make and use. Here’s how…

DIY Candy Tic Tac Toe | Vicky Barone

Supplies: graham crackers, pink candy melts, red candy melts, candy conversation hearts, wax paper, a cookie sheet, and a Ziploc bag.

Directions:
1. Melt pink candy melts in a wide bowl according to directions.
2. Break graham crackers into squares and dip into pink candy melts.
3. Shake off excess chocolate (use a spoon to spread or even it out if necessary) and lay graham crackers on a wax paper lined cookie sheet.
4. Place in fridge to set.
5. Melt red candy melts and scoop into a Ziploc bag.
6. Cut off a small corner of the bag and squeeze out the candy melts onto the graham crackers to create the tic-tac-toe board lines.
7. After each graham cracker is covered, carefully lift each one up to help the red lines fall around the edges.
8. Place back into the fridge to set.
9. Once the chocolate has completely hardened, use conversation hearts to play tic-tac-toe!

DIY Candy Tic Tac Toe | Vicky Barone

The best part? When you’re all done playing, you get to eat the game for dessert!

DIY Candy Tic Tac Toe | Vicky Barone

We hope you have a wonderful weekend! Don’t forget to follow Vicky Barone on Instagram for more Valentine’s Day inspiration!

Categories
DIY Holidays Kids

DIY Lollipop Flowers

Candy bouquets are the best kind of bouquets, don’t you think? These DIY Tootsie Pop flowers are so easy to assemble and make the sweetest gift for Valentine’s Day. Here’s how to make your own…

DIY Lollipop Flowers | Vicky Barone

Supplies: Lollipops, red felt, scissors, and an X-acto knife.

Directions:
1. Cut a flower shape out one shade of felt and a smaller flower shape out of another shade.
2. Use an X-acto knife to cut a small X shape in the center of each flower.
3. Stack the flowers on top of each other and insert the lollipop stick into the center cuts.

That’s it! For extra sturdiness you can add a bit of glue to the base of the lollipop (make sure to keep it on the wrapper!) and press the felt up to create a tighter flower.

DIY Lollipop Flowers | Vicky Barone

Hand out a lollipop to each of your valentines or give one person a giant bouquet!

DIY Lollipop Flowers | Vicky Barone

For more Valentine’s Day ideas, check out Vicky Barone on Instagram!

Categories
DIY Holidays Kids Parties and Events

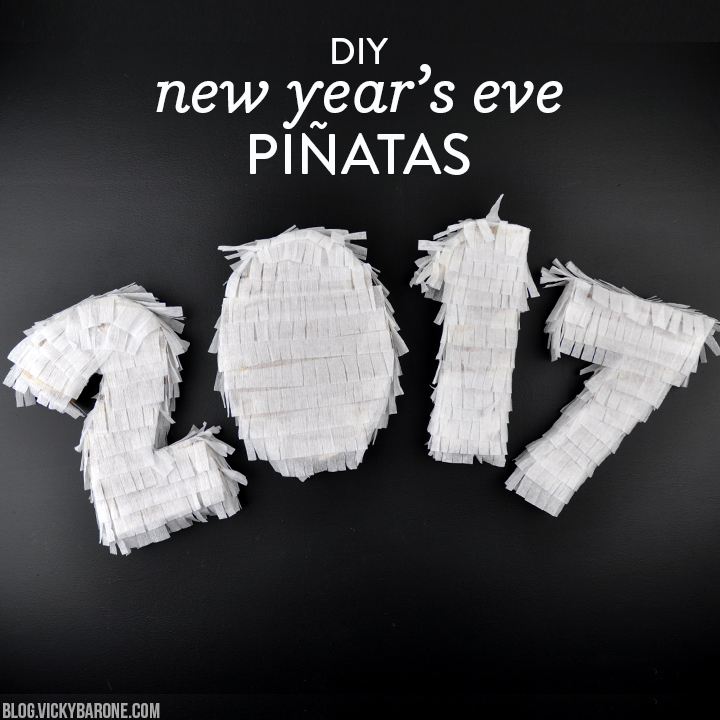
DIY New Year’s Eve Piñatas

New Year’s Eve is just a few days away and we are busy decorating for the festivities! Today we’re sharing a DIY piñata project that’s perfect for candy or simply decor. Here’s how…

DIY New Year's Eve Piñatas | Vicky Barone

Supplies: cardboard, scissors, masking tape, white crepe paper, and Elmer’s glue.

Directions:
1. Cut out the numbers 2017 twice from cardboard.
2. With the remaining cardboard, cut out 1.5″ strips. The strips will go between the numbers to create the 3D shape.
3. Stack two matching numbers on top of one another.
4. Bend cardboard strips around the outside shape of the numbers and tape together.
5. If you want to fill these with candy, cut a hole in the top and pour candy inside before continuing.
6. Cut a length of crepe paper and fold accordion-style.
7. Cut fringe into the crepe paper and unfold.
8. Starting from the bottom of a piñata shape, glue strips of the fringed crepe paper, stacking them on top of one another as you move up the shape.
9. Hang from strings or use to decorate in any way you’d like!

DIY New Year's Eve Piñatas | Vicky Barone

Wishing you all a very happy, healthy, and safe new year!

Categories
DIY Holidays Kids Recipes

DIY Cheese Dip Bats

In honor of National Food Day, we thought we’d take a break from our normal sweet treats to bring you a salty snack (don’t worry, National Chocolate Day is on Friday 😉 )! We found the idea for these adorably cheesy bats on Pinterest and decided to make a version of our own! Here’s how…

DIY Cheese Dip Bats | Vicky Barone

Ingredients:
8oz cream cheese
8oz shredded cheese (use whatever you like! Italian, Parmesan, or even goat cheese!)
poppy seeds
blue torilla chips
candy eyes

Directions:
1. Mix cheeses in a bowl until blended.
2. Scoop out some of the cheese mixture and roll it into a ball.
3. Roll the ball in a bowl of poppy seeds until covered.
4. Break some tortilla chips in half to make wings and stick them into the cheese balls.
5. Press candy eyes into each cheese ball.
6. Serve immediately or leave in refrigerator to keep cool until ready to serve.

DIY Cheese Dip Bats | Vicky Barone

The best part about these cute little guys? You can add Places for Faces to give them even MORE personality!

DIY Cheese Dip Bats | Vicky Barone

Places for Faces now has lots of new Halloween stickers to choose from! Upload a face, add stickers, and choose the dessert topper template. Print and cut out faces and tape them to colorful toothpicks. Serve with your cheese dip bats to excite your little guys and ghouls! Enjoy!

Categories
Kids Lifestyle Products

Kid’s Art Room Tour

[This post contains affiliate links. If purchased, I will receive a commission, but the price stays the same for you!]

Hi, everyone! Today I’m sharing my kids’ art room if you’d like to see! I really wanted to give the boys a place to learn, explore, create, and have fun!  But as they get older, we seem to accumulate SO MUCH STUFF.  I found it necessary to create a room with storage and work spaces to support their creativity and learning.

Kid's Art Room Tour | Vicky BaroneWorld Map Fabric Wall Decal: Vicky Barone Designs on Etsy. Desks: Amazon. Chairs: The Land of Nod.

Kid's Art Room Tour | Vicky BaroneDesk: Amazon. Chair: The Land of Nod.

The desks are reminiscent of old school desks, giving them a place for their stuff (and so it’s not scattered all over the place). I found mine on Amazon, but Pottery Barn Kids has similar ones in stock right now.

Kid's Art Room Tour | Vicky BaroneTable: Pottery Barn Kids. Chairs: The Land of Nod. Rug: Ballard Designs.

Giving them a shared work space/table allows us all to work together on a project.

Kid's Art Room Tour | Vicky Barone

Organizing their stuff into categories helps to keep the clutter at bay (although I have to regularly go in and reorganize, they are getting better at it).  For instance, we have a place where all of the supplies are kept.

Kid's Art Room Tour | Vicky BaroneBookcase: The Land of Nod. Tower Drawers: Ikea.

There’s another shelf that contains non-fiction books and science-related books and projects.  One of the shelves is dedicated to toys we use to build stuff.

Kid's Art Room Tour | Vicky Barone

Games and puzzles are as organized as they can be.  Plastic bins on the shelves help to keep the books more readily accessible and easy to find.

Kid's Art Room Tour | Vicky Barone

Kid's Art Room Tour | Vicky Barone

Multiple places to display recent artwork is great – there are clipboards on the wall making it easy to swap new artwork for old.  There are also magnetic strips (again, making it easy to post new artwork).

Kid's Art Room Tour | Vicky BaroneTable: Pottery Barn Kids. Chairs: The Land of Nod. Rug: Ballard Designs.

The rug is an indoor/outdoor rug made of polypropylene so it’s easy to clean if they spill paint.  Most importantly, I’m trying to teach them that everything has a place and we should always respect our things and put them back where they belong.

Kid's Art Room Tour | Vicky BaroneBookcase: The Land of Nod. Tower Drawers: Ikea. Floating Shelves: The Land of Nod.

The drawer towers are labeled with subjects so at least the older one can read where things should go.  And I keep the supplies stocked so it’s easy to pull out a project or put one away.

Kid's Art Room Tour | Vicky Barone

I am also loving the chalkboard wall I painted! The idea is to write inspirational quotes about learning, being brave, creating, being grateful, making mistakes/artwork, etc. It’s also fun to label certain areas of the room and the boys can decorate it whenever they want!

Kid's Art Room Tour | Vicky Barone
World Map Fabric Wall Decal: Vicky Barone Designs on Etsy.

I used the wall opposite the chalkboard to display one of my own designs! This world map is a fabric wall decal and you can find it here in my Etsy shop. It’s a sturdy and super colorful map that is easy to remove and re-position!

Kid's Art Room Tour | Vicky BaroneChalkboard Easel: Melissa and Doug.

Kid's Art Room Tour | Vicky Barone

There’s my little tour! I hope it inspired you to make space for creativity! I’ve listed the product links below if you’d like to see where some of the furniture and art came from. Enjoy!

White Bookshelves | Center Table | Chalkboard Easel | White Drawer Towers | Floating Shelves | Rug | Chairs | Desks | World Map Fabric Wall Mural

[The above products may contain affiliate links. If purchased, I will receive a commission, but the price stays the same for you!]


Categories
DIY Kids

DIY Pencil Bags

Today we’re sharing a fun DIY project for kids OR teachers! These “Welcome Bags” are painted to look like pencils and can be filled with treats for a new teacher or school supplies for new students. We even personalized ours with Places for Faces! Here’s how to make your own…

DIY Pencil Bags | Back to School Ideas | Vicky Barone

Supplies: yellow gift bags (we used the leftovers from this project!), pink, silver, and tan acrylic paint, a paint brush, painter’s tape, black tissue paper, and custom tags by Places for Faces.

Directions:
1. Tape off the bottom and top of a bag with the painter’s tape.
2. Paint the bottom pink to resemble an eraser, and paint the top tan to resemble the wood of the pencil.
3. Let dry and remove tape carefully.
4. Tape off one more section above the pink eraser and paint silver to resemble the metal.
5. Use Places for Faces to create custom face tags! Print from home, cut them out, and glue them to the bag.
6. Open up the bag and add treats, school supplies, books, and whatever other things you’d like.
7. Finish with some black tissue paper to resemble the graphite!

DIY Pencil Bags | Back to School Ideas | Vicky Barone

Gift these to new teachers this school year with your little one’s faces or, if you are a teacher yourself, create these for your new students and place them on their desks to welcome them on their first day!

DIY Pencil Bags | Back to School Ideas | Vicky Barone DIY Pencil Bags | Back to School Ideas | Vicky Barone

If you’re gearing up for back-to-school, you’ll want to check out our Loop Giveaway going on right now on Instagram!

Categories
DIY Kids

DIY Apple Jars

Back to School season is upon us! Today we’re sharing an easy and inexpensive DIY gift your new teachers will love!

DIY Apple Jars | Back to School | Teacher Gift Ideas | Vicky Barone

Supplies: mini glass jars (our were from the Dollar Spot at Target!), red acrylic paint, green acrylic paint, a paint brush, green felt, brown pipe cleaner, and hot glue.

Directions:
1. Pour red paint into a jar and roll it around to coat the inside. Pour out excess paint into the next jar and repeat!
2. Rest the jars upside down to let the paint dry and let any excess paint drip out. We rested ours on bamboo skewers on top of wax paper overnight.
3. Use a paint brush to paint the lips with green paint. Let dry.
4. Cut leaves out of green felt and hot glue to the lids.
5. Cut pipe cleaner into 1″ pieces, fold in half, and hot glue to the base of each leaf to create the stems.

DIY Apple Jars | Back to School | Teacher Gift Ideas | Vicky Barone

Personalize these gifts with some tags from Places for Faces that you can print from home!

DIY Apple Jars | Back to School | Teacher Gift Ideas | Vicky Barone

Aren’t they cute?? These make great teacher gifts too! Add erasers, paper clips, or other supplies to the insides and gift to your new teachers. If you’d like to add candy to the jars, we recommend painting the red on the outside instead. These jars are not food safe the way we created them.

Looking for more back to school ideas? Check these out!