Categories
DIY

DIY Cheers Banner

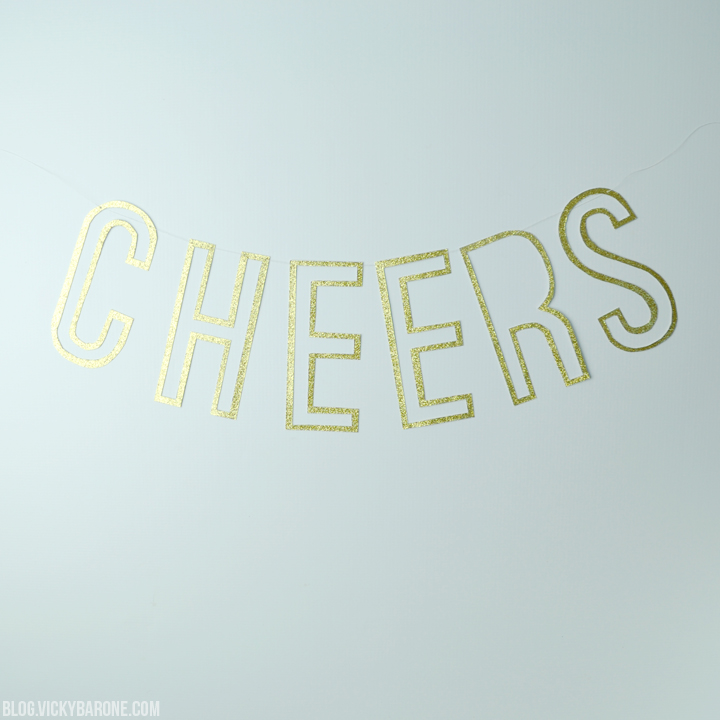
Happy Thursday, party people! We are getting ready to celebrate the weekend with this DIY Cheers banner! Here’s how to make your own…

DIY Cheers Banner | Vicky Barone

Supplies: glitter scrapbook paper, X-acto knife, ruler, letter stencils, a sewing needle, and thread.

Directions:
1. Choose letter stencils. We made our own by printing a font we liked onto card stock and cutting out the letters. You can also use pre-made stencils or free-hand the letters yourself.
2. Trace just the outline of the letters onto the back of the glitter paper. Make sure you are tracing them on backwards!
3. Cut out the letters from the glitter paper.
4. Using an X-acto knife and a ruler, cut away the inside of the letters, creating an outline about 1/8″ thick. It helped us to trace where we would cut first so that we didn’t accidentally cut too far.
5. Use a sewing needle and thread to string the letters together.
6. Hang and enjoy!

DIY Cheers Banner | Vicky Barone DIY Cheers Banner | Vicky Barone

What will your banner say? Hope you’re all having a great week! Don’t forget about the giveaway going on here!

Categories
DIY Kids

DIY Paper Butterflies

Today we’re sharing a simple DIY you can create with your kids! These folded paper butterflies would make an adorable Mother’s Day gift and can be used to create a garland or a mobile, to decorate a frame or even a gift box! There are lots of examples of these accordion butterflies on Pinterest, but here is how we made ours…

DIY Paper Butterflies | Vicky Barone

Supplies: scrapbook paper or cardstock (we used different shades of pink), scissors or a paper cutter, and pine cleaners.

Directions:
1. Cut paper into squares (ours were about 4×4)
2. Fold each square in half and then accordion style, folding from corner to corner.
3. Take two folded squares and set them on top of one another (corner to corner). We made our butterflies two-toned, so each one was made from two squares of paper in different shades of pink.
4. Wrap a pipe cleaner around the middle of the paper squares, leaving 3/4″ for the bottom of the butterfly body.
5. Once the pipe cleaner is secure, use a cylindrical object like a pen or pencil to wrap the excess pipe cleaner around to create swirly antennae.

DIY Paper Butterflies | Vicky Barone

That’s it! Make as many butterflies as you’d like! How will you use yours? We would love to hear!

DIY Paper Butterflies | Vicky Barone

Categories
DIY Holidays

DIY Paper Shamrocks

This week is finally feeling like Spring! We hope that wherever you are, you’re enjoying some nice warm weather too! Today we’re sharing a DIY paper clover project for St. Patrick’s Day.

DIY Paper Shamrocks | Vicky Barone

Supplies: green scrapbook paper, a paper cutter, and hot glue.

Directions:
1. Cut 4 strips of paper 1″ wide by 8″ long and 4 more strips of paper 1″ wide by 10″ long.
2. Fold the 8″ strips in half, patterned side together. Fold the 10″ strips in half, white side together.
3. Glue one end of an 8″ strip to an end of a 10″ strip, white sides together.
4. When the glue is set, glue the opposite ends of both strips together, white sides together again.
5. Glue the folded centers together with a dot of glue.
6. Take the glued ends and curl them in towards each other to create the heart shape. Glue the ends together and hold in place until the glue sets.
7. Repeat with the rest of the strips until you have four hearts.
8. Cut a 6 inch long strip of paper for the stem.
9. Glue the hearts together in a circle to create a shamrock with a stem between two of the hearts!

DIY Paper Shamrocks | Vicky Barone DIY Paper Shamrocks | Vicky BaroneDIY Paper Shamrocks | Vicky Barone DIY Paper Shamrocks | Vicky Barone

Hang these shamrocks from string to create a garland or just set them out on a table to create a runner!

Follow Vicky Barone on Instagram for more St. Patrick’s Day inspiration!

Categories
DIY Holidays

Valentine’s Day Paper Heart Wreaths

We have a full week of Valentine’s Day inspiration leading up to the 14th! Today we’re sharing a little paper project to help decorate for this lovely season. These Valentine’s Day wreaths are made up of lots and lots of hearts! Here’s how you can make your own…

Valentine's Day Paper Heart Wreaths | Vicky Barone

Supplies: scrapbook paper, a paper cutter, and hot glue.

Directions:
1. For the medium wreath, cut 6 strips of paper 1″ wide by 8″ long and 6 more strips of paper 1″ wide by 10″ long.
2. Fold the 8″ strips in half, patterned side together. Fold the 10″ strips in half, white side together.
3. Glue one end of an 8″ strip to an end of a 10″ strip, white sides together.
4. When the glue is set, glue the opposite ends of both strips together, white sides together again.
5. Glue the folded centers together with a dot of glue.
6. Take the glued ends and curl them in towards each other to create the heart shape. Glue the ends together and hold in place until the glue sets.
7. Repeat with the rest of the strips until you have six hearts.
8. Glue the hearts together in a circle to create a wreath!

Valentine's Day Paper Heart Wreaths | Vicky Barone

To make the smallest wreath, repeat the steps above with 6 strips of 6″ paper and 6 strips of 8″ paper.

Valentine's Day Paper Heart Wreaths | Vicky Barone

To make the largest wreath, in addition to the 8″ and 10″ pieces, you will also need 6 6″ strips and 6 12″ strips. Follow the directions above, but have all four the strips glued together in size order.

Valentine's Day Paper Heart Wreaths | Vicky Barone

What shall we do with our wreaths? We are thinking of hanging them up with string, although they look super cute standing up and stacked!

Follow Vicky Barone on Instagram for more Valentine’s Day ideas!

Categories
DIY Parties and Events

DIY Popsicle Garland

Summer is in full swing and so is the HEAT! Since our go-to method for keeping cool is chowing down on some frosty Popsicles, we decided to make a little party decor to celebrate our favorite treat.

DIY Paper Popsicle Garland | Vicky Barone

These paper Popsicles look good enough to eat! We were inspired to make this garland when we saw one made out of pool noodles (!!) here. We loved it so much, we went digging into our scrapbook paper collection for just the right Popsicle-inspired colors.

DIY Paper Popsicle Garland | Vicky Barone

Supplies: scrapbook paper, tongue depressors, a paper cutter and/or scissors, glue stick, hot glue, twine, and clothespins.

Directions:
1. Each Popsicle will be two-toned to mimic the shaded inset of a Popsicle made from a traditional mold. Pick two shades of each color Popsicle you’d like to make.
2. Using a paper cutter, cut the lighter shade of each color into rectangles (ours were about 3×5.5″). Round off the top of each rectangle using scissors.
3. Next, cut the darker shade of each color into thinner rectangles (ours were about 0.5×5″). Round off the top of each of these rectangles. You should have twice the amount of thin rectangles as you do larger rectangles.
4. Glue two thin rectangles to a larger rectangle in a coordinating color using a glue stick.
5. Flip each paper Popsicle over and glue a tongue depressor to the back using a glue gun.
6. When all the glue is dry, clip each Popsicle to a piece of twin using mini clothespins.

Hang your bright Summer garland and enjoy!

Categories
DIY Family Holidays

Candy Flowers for Mother’s Day

Today we’re combining everyone’s go-to gifts, candy AND flowers, into one sweet and thoughtful Mother’s Day present.

Candy Flowers for Mother's Day | Vicky Barone

Supplies: colorful cardstock, floral wire, scissors, felt, glue, and wrapped chocolate candies.

Directions:
1. Cut flower shapes out of the card stock. Poke a small hole into the center of each flower.
2. Cut a length of wire and fold the end a few times to make a loop or knot.
3. Stick a piece of wire through the center of a flower. The loop you made on the end will stop the wire from going all the way through. Fold the wire coming out the back of the flower down.
4. Fold a piece of felt in half and cut a leave shape out of it, leaving the fold intact.
5. Fold the felt leaf around a wire stem and glue to hold in place.
6. Glue the chocolate candies to the centers of the flowers.
7. Carefully fold the flower petals upwards to give them a little depth.

Tada! A chocolately treat for moms to put on display (and eat of course!).

If you’re looking for more Mother’s Day ideas, check out these past posts:
Mother’s Day Gift Guide
DIY Mother’s Day Gifts
Mother’s Day Gifts on Etsy

Categories
DIY Kids

Rain Cloud Craft

April showers indeed! Let’s hope this dreary weather brings those May flowers. In the meantime, we made a rainy day (literally!) craft your kids will love. This Rain Cloud Craft is easy to put together and is cute enough to hang somewhere in your house other than the side of the fridge! Check it out…

Rain Cloud Craft | Vicky Barone

Supplies: blue card stock or scrapbook paper, scissors, glue, mini white pom poms, tape, and blue embroidery floss.

Directions:
1. Cut a cloud shape out of a big piece of card stock. With the scrap pieces, cut out raindrop shapes (we cut out 18).
2. Cover a section of the cloud with glue and arrange the pom poms, filling in every space and adding glue as necessary. Continue section by section until the cloud is covered.
3. Cut different lengths of the blue embroidery floss. Glue two raindrops together with the string in the middle.
4. When all the glue is dry, tape the strings to the back of the cloud.

Rain Cloud Craft | Vicky BaroneWhat are your favorite rainy day activities? Check out this Pinterest board for more ideas!


Categories
DIY Holidays

DIY Paper Heart Garland + A Free Printable

We LOVE paper garlands! Especially this heart-filled one we made for Valentine’s Day. It adds the perfect loving touch to an office space, classroom, or even your kitchen! Hang it anywhere you want to spread the love.

DIY Paper Heart Garland | Vicky BaroneSupplies: card stock in shades of pink, two free Vicky Barone printables, scissors, and a sewing machine.

Click on the templates below to download!

FREE PRINTABLE Heart Template | Vicky Barone

FREE PRINTABLE Heart Template | Vicky Barone

Directions:
1. Download this heart template and this template with smaller hearts.
2. Feed the pink card stock into your printer and print the templates.
3. Use scissors to cut out the hearts.
4. Thread your sewing machine with white, pink, or red thread.
5. From the bottom tip of the hearts, to the top middle, feed each paper heart into the sewing machine one by one.
6. Hang your garland and enjoy!


[This post was shared on The Makers Link Party!]