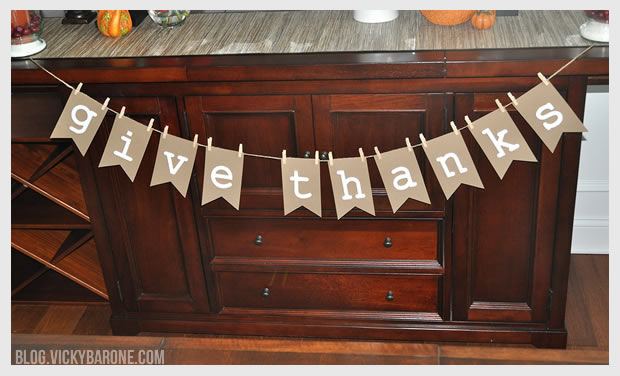
Thanksgiving is only 22 days away! Today we have a garland project that is perfect to make ahead of time. It’s also interchangeable so it’s great for any holiday!
 Materials: Kraft paper, adhesive chipboard alphabet letters, white acrylic paint, a paint brush, scissors, mini clothes pins, and twine (the gold acrylic paint pictured was for the clothes pins, but we decided later to keep them unpainted).
You can find all of these materials at your local craft store!
Directions:
1. Paint each letter white with the acrylic paint (My oldest son helped paint! It was an easy project for him and he enjoyed being a part of the Thanksgiving preparations!).
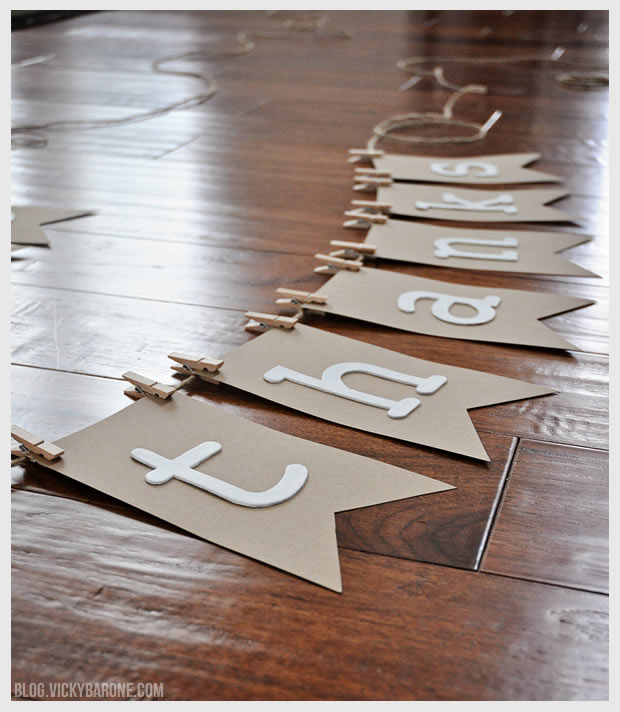
2. Cut kraft paper into 4×7 inch rectangles using a paper cutter.
3. Using scissors, cut a triangle out of the bottom of each paper rectangle. We made a stencil out of scrap paper to make sure each triangle cut was the same.
4. Once the letters are dry, remove the backing and attach one to each piece of kraft paper (the adhesive wasn’t very sticky on ours so we placed heavy books on top of each until they set).
5. Cut one long piece of twine and attach each flag with two mini clothespins, leaving equal space between the flags and extra twine on each end for hanging.
 We first made the garland on one long strand of twine to hang on the bar in the dining room as well as the mantle in the living room.
 You can also put each word on its own piece of twine to create multiple levels!
We love our “Give Thanks” garland and we hope you do too! Subscribe to blog.vickybarone.com by email or on Bloglovin’ to see more of our Thanksgiving coming soon!


13 replies on “DIY Thanksgiving Garland”
Love this! What size letters did you use?
Thanks, Kara!
The letters are “Recollections Adhesive Chipboard.” The packaging doesn’t have dimensions, but we measured the letters and the tallest ones (h, k, t) are about 3.5″ tall and 2.25″ wide. The kraft paper flags we adhered them to are 7″ tall (top to points) and 4″ wide.
Hope that helps! Thanks so much for visiting the blog!
[…] Vicky Barone | 2. Swoon Studio | 3. Make and Do Girl | 4. Lia Griffith | 5. Pretty […]
[…] made another garland for Christmas! Our Thanksgiving garland was so popular, we decided to make another for Christmas. This time we used red and green textured […]
[…] you like this garland, be sure to check out our Thanksgiving, Christmas, and New Year’s Eve garlands as […]
[…] mastered the art of paper buntings (seeing as how we’ve made one for nearly every holiday), and decided to create this Easter garland to add to our collection. And […]
[…] 1st row: 1. How to Make a Pinecone Garland – How to Decorate 2. Thanksgiving Garland – A Beautiful Mess 3. DIY Fall Foliage Garland – Freutcake 4. Reversible Burlap Banner – On Sutton Place 5. Thanksgiving Garland – Vicky Barone […]
[…] last Thanksgiving garland we made is still such a hit that we were more than excited to create a new one this year! We made […]
[…] Vicky Barone | 2. Swoon Studio | 3. Make and Do Girl | 4. Lia Griffith | 5. Pretty […]
[…] Credits: 1 (no source provided- pinterest) 2 3 4 5 […]
[…] “Give Thanks” garland from a few years ago has always been such a hit, that we’ve come up with a new design using felt. This new […]
[…] Tutorial: blog.vickybarone.com […]
[…] Eve party! It’s our go-to bunting that works for every holiday. Check out our Christmas and Thanksgiving garlands […]