Categories
DIY Holidays Lifestyle My Projects Parties and Events Projects

Thanksgiving Pumpkin Place Cards

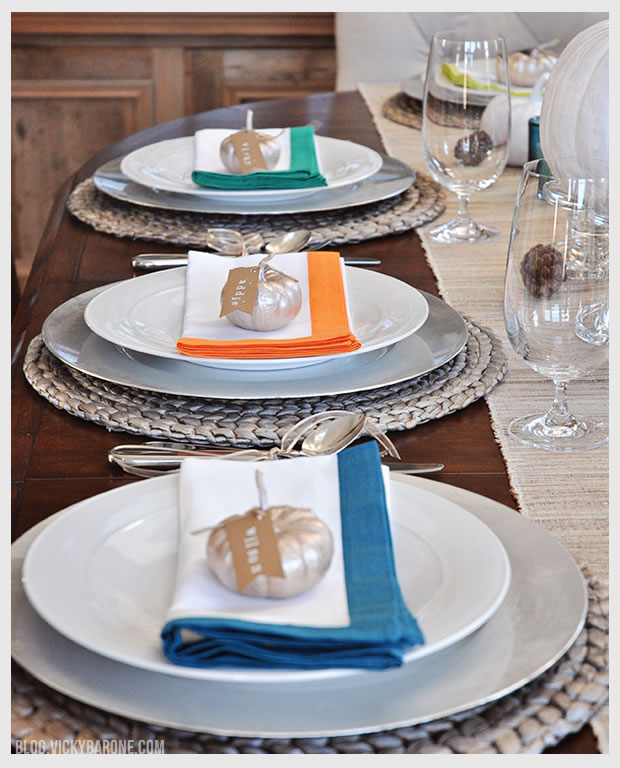
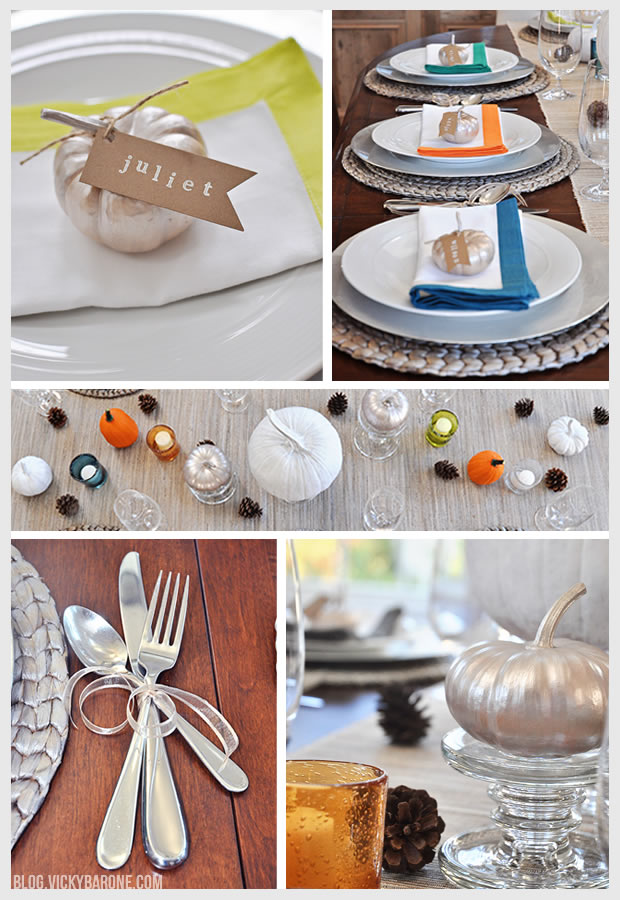
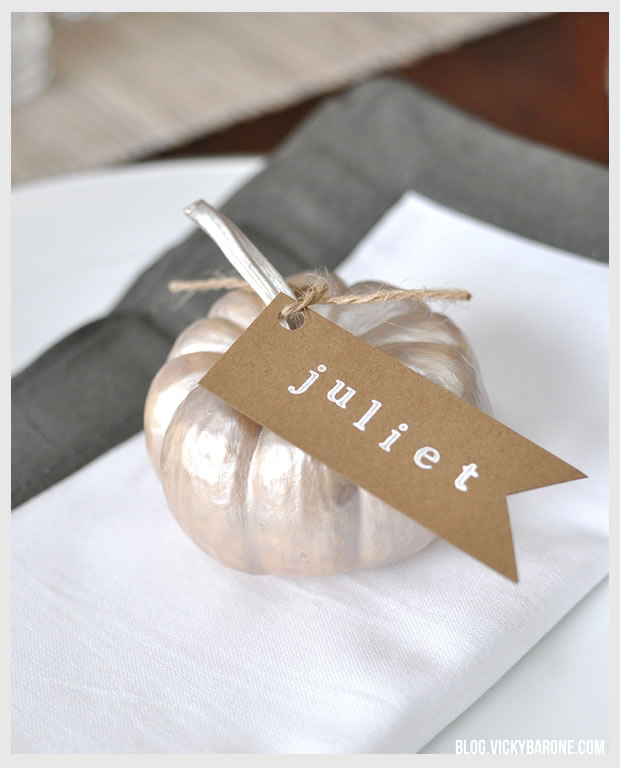
Here’s our favorite detail from our Thanksgiving Table this year! We painted the tiniest pumpkins we could find at the farmer’s market, added our own kraft paper tags et voila! Everyone gets their own baby pumpkin on their plate!
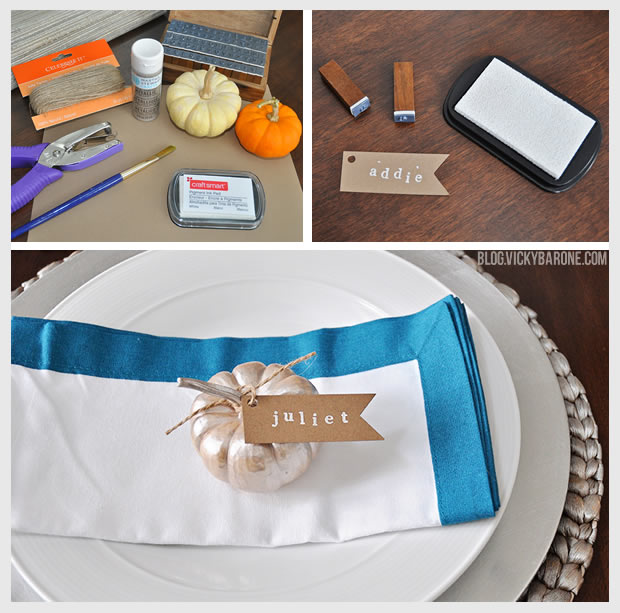
DIY Thanksgiving Pumpkin Place CardsMaterials: Mini pumpkins, metallic acrylic paint, a paint brush, kraft paper, scissors, hole punch, white stamp pad, alphabet stamps, and twine.

Directions:
1. Clean pumpkins with a wet paper towel and dry off completely.
2. Paint pumpkins with acrylic paint and let dry completely (We used white pumpkins so we only needed one coat of paint to cover them! You might need two or three coats with an orange pumpkin).
3. Cut kraft paper into tags and hole punch a little hole in the top left corner for the twine.
4. Using the stamps and stamp pad, add names to each tag. Let dry.
5. Thread twine through the hole in the tag and tie around pumpkin stem loosely.

DIY Thanksgiving Pumpkin Place Cards

DIY Thanksgiving Pumpkin Place Cards

Don’t they look pretty on our multicolored napkins?
We hope everyone is having fun with their Thanksgiving plans! Check out our table set up for more ideas!

Categories
DIY Holidays Lifestyle Parties and Events

Thanksgiving Table Setting

Tada! Our very own Thanksgiving table setting! You might have seen some of our favorite inspirations here, but now we’ve styled our very own! We mixed very simple natural elements with bright pops of color to create a modern and rustic Thanksgiving table. We’re so excited to add food and family and make the holiday complete!

Thanksgiving Table SettingHere are some of the elements we pulled together for our table:
Painted Pumpkin place cards
Metallic Placemats from Pier 1 Imports
Table Runner from Pier 1 Imports
Multicolor Border Napkins from Crate and Barrel
Glass Votives from Target
Ribbon tied silverware
Decorative pine cones from Joann
Pumpkins from North Carolina State Farmers Market

We hope you are all having fun planning your own Thanksgiving celebrations! Check back to see more ideas as the holidays approach!

Categories
DIY Holidays Lifestyle Parties and Events Projects

DIY Fall Flower Arrangement

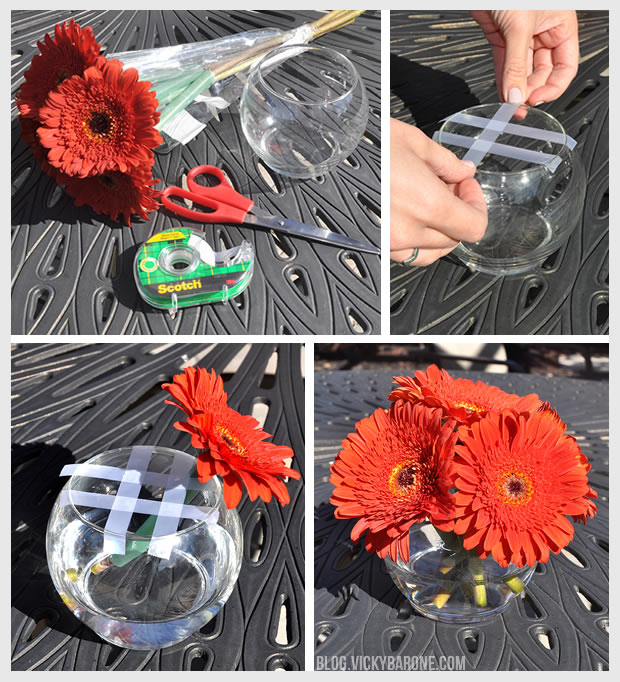
Fresh flowers are beautiful, but buying them from a flower shop in already-made arrangements can be pricey. Here’s a quick and simple way to make your own arrangement using a cheap bouquet from the grocery store. We used a 4 dollar bouquet and a simple glass vase from the dollar store and created this low arrangement that’s perfect for our Thanksgiving table!

DIY Fall Flower Arrangement

Materials: A small bouquet of fresh flowers, a vase, tape, and scissors.

Directions:
1. Put water and flower food into your vase, making sure the outside of the vase is dry so the tape will stick.
2. Use tape to create a crisscross pattern on the top of the vase.
3. Cut each flower stem at a diagonal and place each into their own hole in the tape lattice.

Now you have a beautiful low flower arrangement to add to your Thanksgiving centerpiece.
Check out the flower arrangements we made for our Pizza and Champagne Party!

P.S. With the support of the tape and a few more bouquets, you can make an even bigger arrangement! Martha Stewart shows you how with this large bowl and some beautiful dahlias.

Categories
DIY My Projects Parties and Events Projects

DIY Diamond Paper Garland

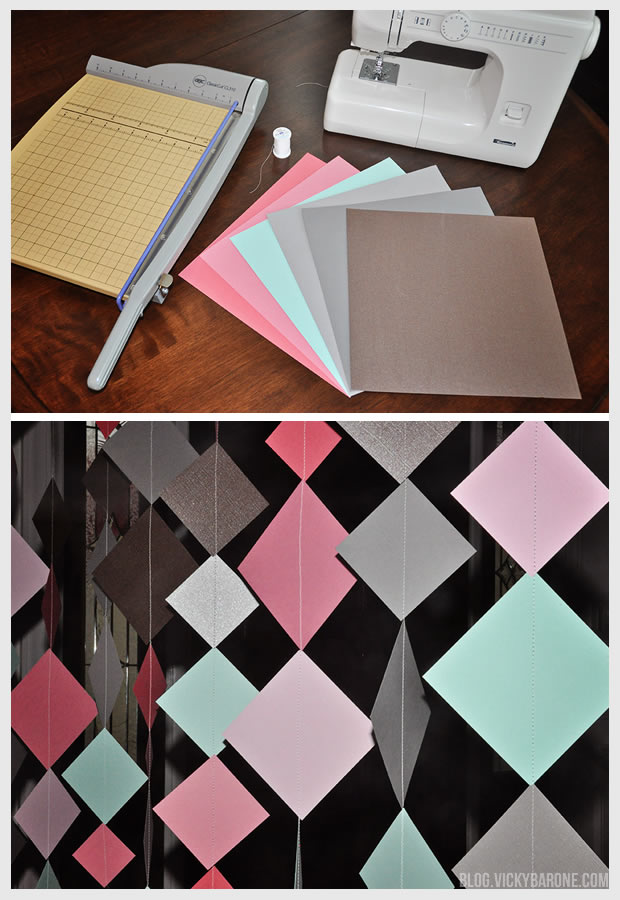
Sewn paper garlands have become our go-to decoration lately. They are a great way to create a bright color palette for any party and they are easy to make! Here is the diamond paper garland we made for our Pizza and Champagne Party!

DIY Diamond Paper GarlandMaterials:
1. Colorful card stock or scrapbook paper
2. A paper cutter
3. A sewing machine
4. All purpose thread

Directions:
1. Using the paper cutter, cut each piece of colored paper into squares of different sizes
2. Put all of your squares into the order that you want (we did the same pattern of colors in order, but mixed up the sizes as we went)
3. Leave a tail of thread to hang the garland before starting to sew into the paper
4. One by one, feed each square into the sewing machine corner to corner to create the geometric diamond look
5. Hang your garland and enjoy! We made each of our strips long enough to hang vertically in a doorway, but you can also leave a tail of thread on each side of the garland and hang them horizontally as well!

Diamond Paper Garland
Don’t forget to check out our Pizza and Champagne Party for other fun party ideas!

P.S. Our circle garland, and our paper strip garland.


Categories
DIY Lifestyle Parties and Events Recipes

Pizza and Champagne Party

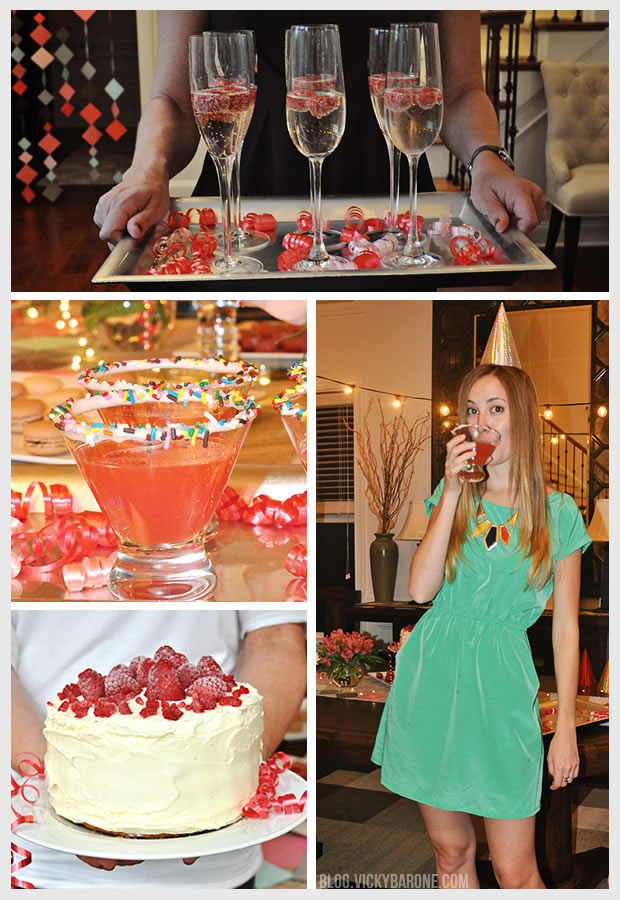
We hosted a girls’ night party with a few of our close friends, some cocktails, and pizza! What better way to spend an ordinary Wednesday evening than by dressing up and sipping on girly drinks with friends?

Here are some highlights from our night!

Pizza and Champagne Party
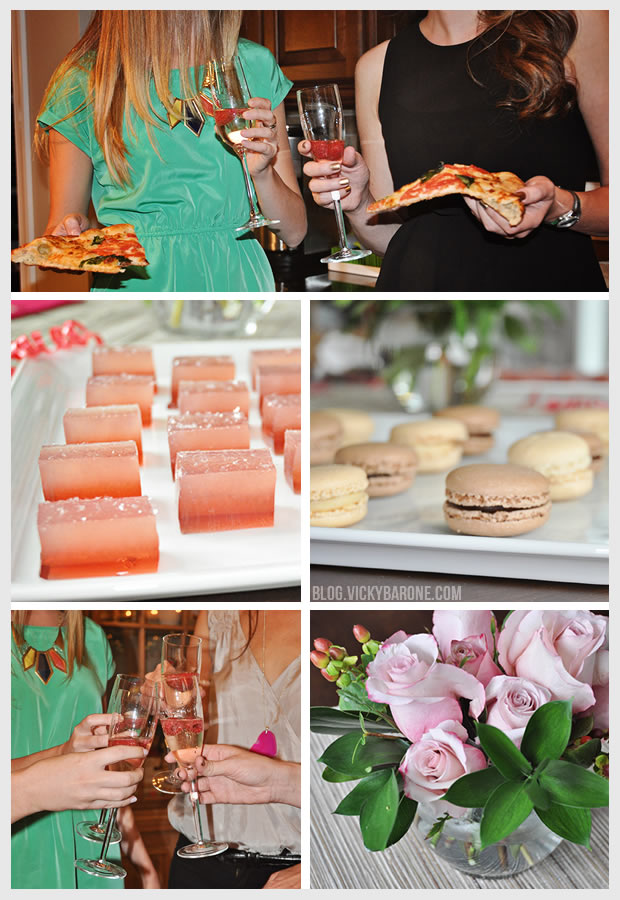
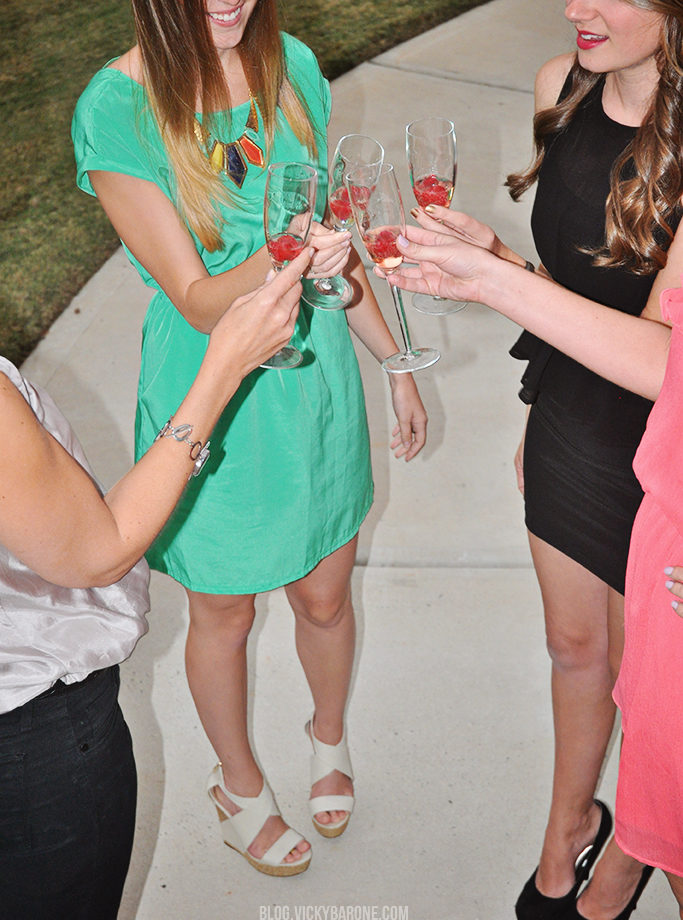
We dropped a few frozen raspberries in our champagne to keep it chilled and make it fancy! Then we ordered pizza delivery to bring us back down to earth. We also made some jello shots from scratch, and picked up some fresh flowers and frozen macarons from the grocery store. Mixing homemade with store-bought is a great way to make an easy and pretty party come together.

Pizza and Champagne Party

Here are some of the elements we used for our party (check back soon for links to tutorials!):
White Chocolate rimmed cocktail glasses with Rainbow Sprinkles
Ombre Gelatin Shots
Parisian Macarons from Trader Joe’s
Flower Arrangements DIY
String lights from Amazon
Diamond Paper Garland DIY

Thank you so much to everyone who came to our party! We were so happy to have you all. Cheers to a great evening!
Pizza and Champagne Party

Categories
DIY Parties and Events Projects

Dip-Dyed Frosted Tumblers

This post contains affiliate links. If purchased, I will receive a commission.

Last but not least, my very favorite detail from our End of Summer Party!

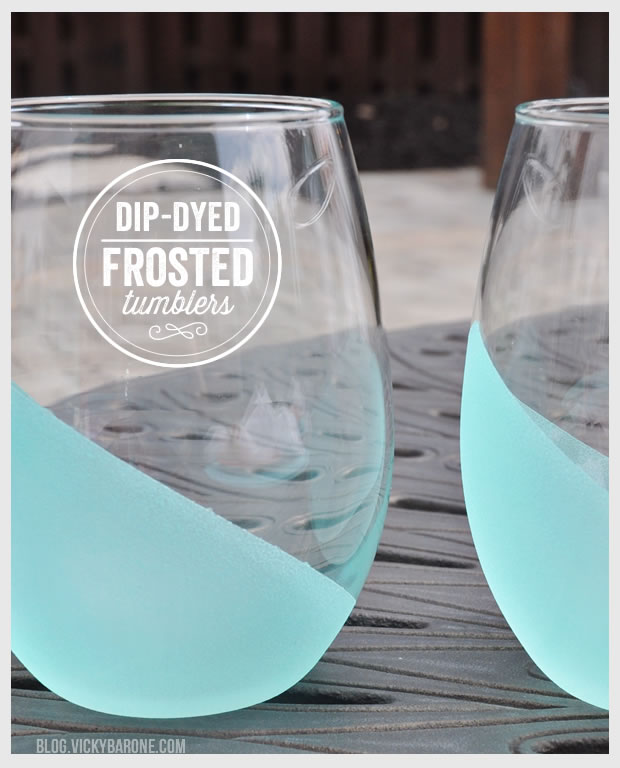
Dip Dyed Frosted Tumblers
We loved the Metallic Confetti Tumblers from our Summer party so much that we just had to make some more. Again we went with Martha Stewart’s glass paint collection, but this time we tried the “Frost” paint. It is an awesome product and we’re so happy with how these turned out!

Materials: Glass tumblers, rubbing alcohol, painter’s tape, a foam pouncer, and Martha Stewart Craft’s Translucent Frost Glass Paint (we used Beach Glass!)
One or more of the supplies listed contain affiliate links. If purchased, I will receive a commission.

What to do:
1. Using rubbing alcohol and a paper towel or cotton ball, clean the tumblers and let dry.
2. Take the painter’s tape in manageable sections and tape off where you want your paint to go.
3. Use your finger nail or a credit card to press out all air bubbles and seal the tape onto the tumblers.
4. Dip the foam pouncer in the frost paint and begin painting the tumblers using an up and down motion (don’t worry if it doesn’t look perfect – a second coat will fix any mistakes!).
5. Let dry two hours before applying a second coat.
6. Let second coat dry overnight and then peel off the painter’s tape!
7. Follow the directions on Martha Stewart’s craft website for how to set the paint (We air cure for 21 days, but you can also oven bake them!).
8. Have a party!

We hope you’ve enjoyed our DIY projects from our End of Summer Party. Bring on the Fall!

**UPDATE**
Thank you all so much for your interest in this fun little DIY! Check out the comment section for paint alternatives and extra advice on making the tumblers.
Sadly, this paint has been discontinued, but we found a few colors still for sale on Amazon! HERE and HERE.
(The above include affiliate links. If purchased, I will receive a commission.)


For more fun DIY projects and inspiration, greeting cards, and more check out Vicky Barone on Instagram!

Categories
DIY Parties and Events Projects

DIY Paper Strip Garland

Here’s a fun detail from our End of Summer Party! We loved the Paper Mobile by Oh Happy Day and thought it would add the perfect touch to our bright outdoor set up.
For step-by-step instructions, check out the paper mobile link above, or take a look at our Circle Paper Garland blog post! I will say, however, that the strips of paper are a bit harder to sew together than the circle garland was. I found that adjusting the needle thread tension on my sewing machine to a lower setting while using a straight stitch helped a lot! If you find your thread snapping or getting caught, try loosening your stitch and tension before calling it quits. Or call it quits and make the circle garland instead (can you tell we’re partial to the circle garland? It might just be the quickest sewing project ever.)!

9_10_13_VerticalPaperGarland

Categories
DIY My Projects Projects

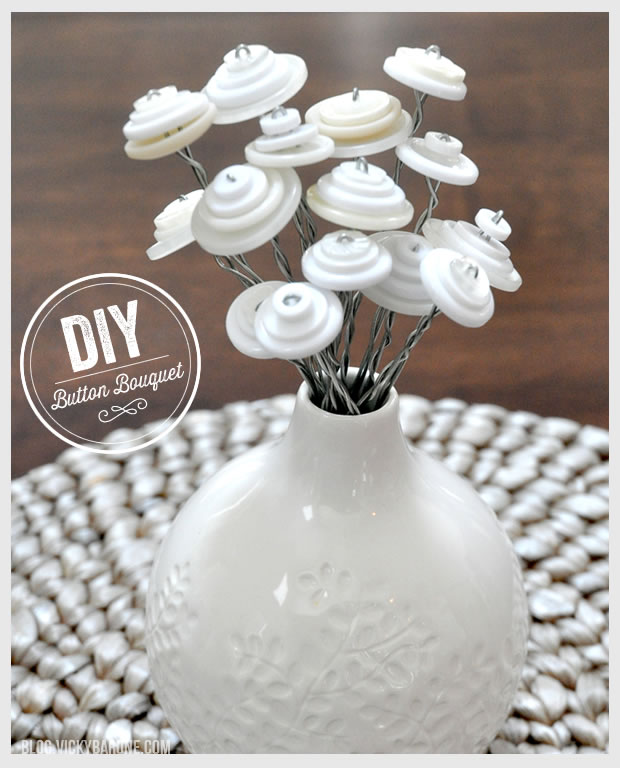
DIY Button Bouquet

Here’s a cute and easy detail from our all-white Summer party!

7_8_13_ButtonFlowers

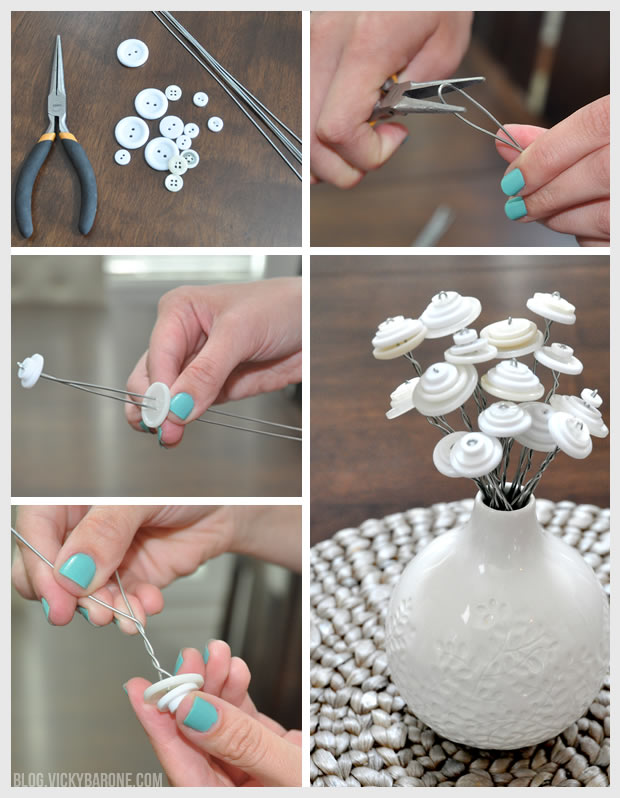
Materials: Buttons in different sizes, floral stem wire (we used 18 gauge), and a pair of pliers.

What to do:
1. Fold one of your wire stems in half and pinch it tight with the pliers.
2. Put each end of your folded wire into the two holes of a small button and push the button to the fold.
3. Repeat with two to three more buttons from smallest to largest.
4. Twist the floral wire to keep the buttons in place and to create a twisted stem.
5. Fold the bottom of each stem at different places to vary the height of each button flower and arrange in a vase.

Now you have a pretty little bouquet that will never wilt!

These could also make great wedding centerpiece as well, or even be turned into a larger bouquet for your bridesmaids!

You can also use colored buttons like the ones I made here (follow me on Instagram!).
If you like this decoration, be sure to check out the rest of the DIY projects we did for our Summer party!

[This post was shared at The Makers Link Party!]