Categories
DIY Holidays

DIY Clay Gift Tags

Are you a late-night Christmas Eve present wrapper? With everything that goes on during this busy season, it’s hard to not be guilty of that!

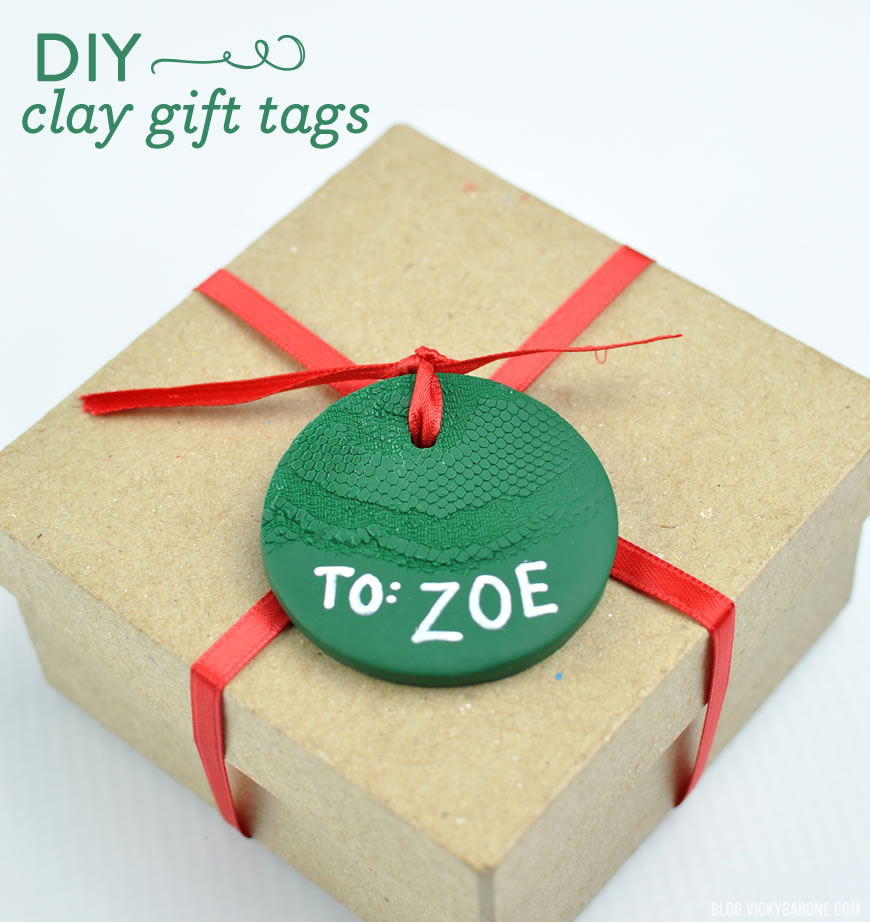
We are here to help you get ahead of the game with some DIY gift tags! Add a personalized touch to your gifts with these clay tags and get your wrapping done right now! Here’s how to make your own:

DIY Clay Gift Tags | Vicky Barone

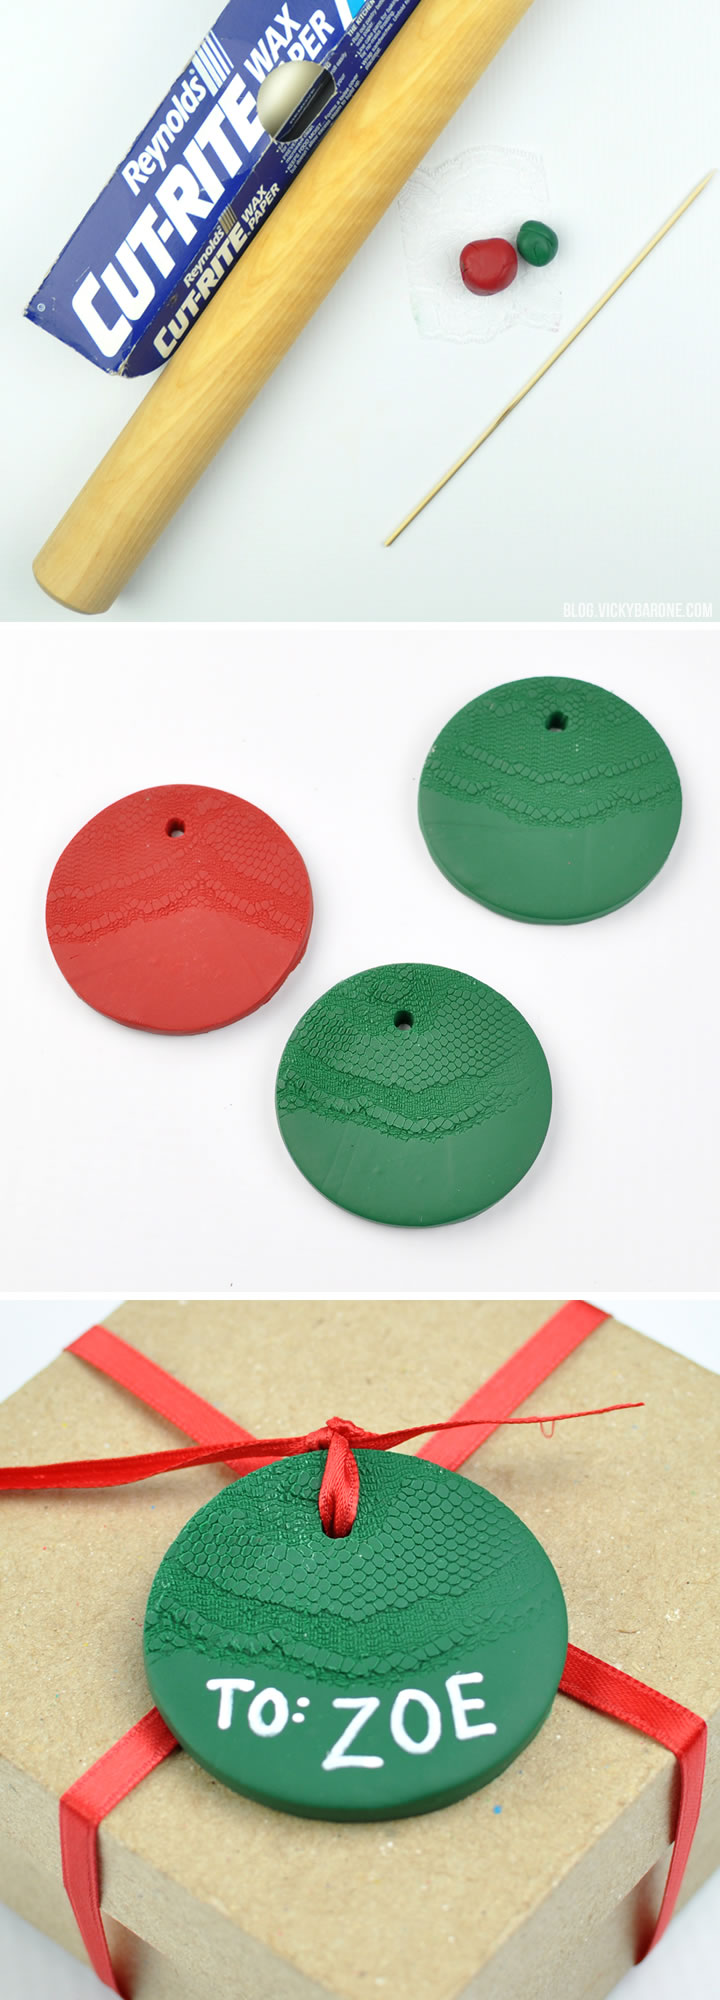
Supplies: polymer clay, wax paper, a rolling pin, a circle cookie cutter, a wooden skewer, a white paint pen, and a piece of lace (optional).

Directions:
1. Roll out clay to desired thickness. Be sure to place a layer of wax paper between the clay and your work surface and a layer between the clay and the rolling pin.
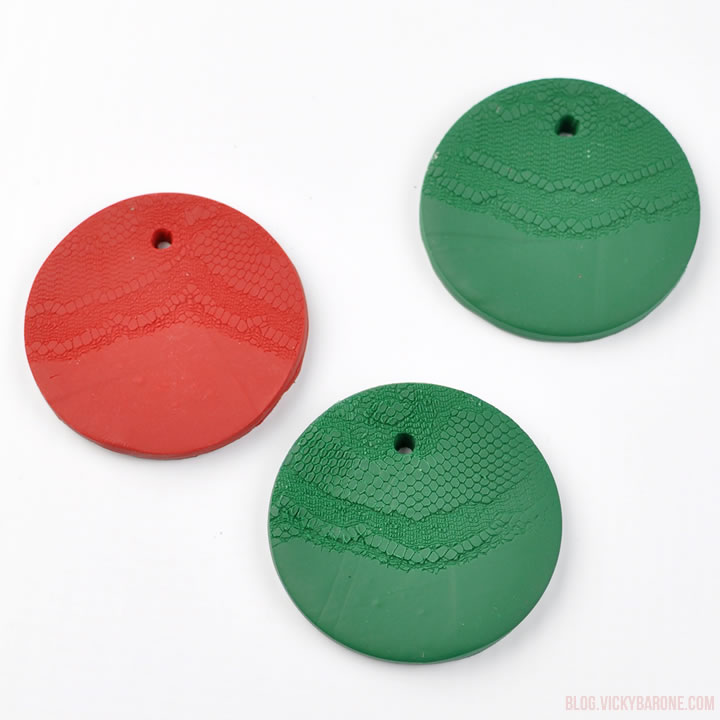
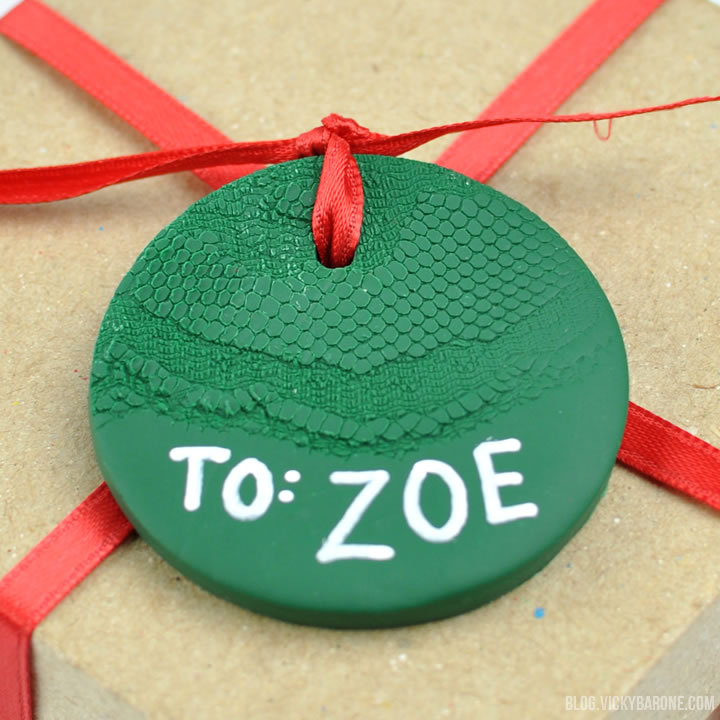
2. Press the lace into the clay to create a pattern. You can use other objects instead of lace like leaves or an object with an engraved pattern in it.
3. Use a cookie cutter (or some other round object) to create circles. (For more tips on working with clay, check out this post!)
4. Use the wooden skewer to make holes in the top of each circle.
5. Place circles on a cookie sheet lined with parchment paper or aluminum foil. Bake according to directions on package.
6. Once completely cool, use a paint pen to write on the tags and tie them to a gift using ribbon.

DIY Clay Gift Tags | Vicky Barone DIY Clay Gift Tags | Vicky BaroneDIY Clay Gift Tags | Vicky Barone

If you don’t have time to make your own tags, check out these FREE printable tags!

Categories
DIY Holidays Parties and Events

Christmas Table Setting 2014

Happy Monday, everyone! We are so excited to share our Christmas table this morning. This year we used red and teal details to create a modern and bright table that really pops! Keep reading for more details:

Christmas Table Setting 2014 | Vicky BaroneIn lieu of napkin rings, we chose a silky red ribbon to hold the silverware tight, similar to what we did for last year’s Thanksgiving table.

Christmas Table Setting 2014 | Vicky BaroneEach setting comes with a candy cane place card holder and a white cranberry mimosa as well!

You can find the metallic place mats at Pier 1, the teal chargers at the dollar store, and the border napkins from Crate and Barrel.

What details are you including in your Christmas table this year? We’d love to see!


Categories
DIY Holidays

DIY “Merry & Bright” Christmas Garland

We can’t stop making these fabric garlands! This new Christmas bunting makes us so happy and looks great hanging on the mantle AND the Christmas tree! The instructions are just about the same as the “Thankful” garland, but we’ve added them here as well. Keep reading to see how you can make your own…

DIY Fabric Christmas Garland | Merry & Bright | Vicky Barone

Supplies: linen or muslin fabric, red and green fabric, fabric scissors, a sewing machine(optional!), Mod Podge, a paint brush, twine, and mini clothes pins.

Directions:
1. Print out a word or phrase you’d like the banner to read. This will be your stencil and guide for how big to make each pennant.
2. Cut the linen into rectangles (ours were about 3.5″ by 5″).
3. Create a 1/4″ hem on the longer sides of the rectangle and either sew or glue them down. Create the same hem on the top of the rectangle and sew or glue as well.
4. With the rectangle face down, make a 1.5″ cut with scissors in the middle of the base. Fold the two corners created by the cut up and to the sides to create the two points. Glue into place or sew along the edges to match the rest of the hems.
5. Paint both sides of the green and red fabrics with Mod Podge and let dry. This will stiffen the fabric and prevent it from fraying when cut.
6. When the green and red fabric is dry, cut out the letters with scissors using the printed stencil you created.
7. Use more Mod Podge to attach the letters to each linen pennant. (Optional: give each pennant an extra coat of Mod Podge to seal the letters).
8. When the pennants are dry, use mini clothes pins to attach them to a piece of twine. Hang your garland and enjoy!

DIY Fabric Christmas Garland | Merry & Bright | Vicky Barone

DIY Fabric Christmas Garland | Merry & Bright | Vicky Barone

DIY Fabric Christmas Garland | Merry & Bright | Vicky Barone

Follow Vicky Barone on Instagram, Facebook, andPinterest to see all of our Christmas decor and recipes this season!

Categories
DIY Kids Parties and Events

DIY Car Photo Booth

This post contains affiliate links. If purchased, I will receive a commission.

We saw this AMAZING idea for a photo booth here and knew we had to try and re-create it for the Race Car Birthday Party!

DIY Car Photo Booth | Vicky BaroneThe kids loved it and it made for great pictures! Using the pictures from this blog post as inspiration, we did our best to create our own free standing car photo booth. Here’s how we did it:

Materials: cardboard, an X-acto knife or scissors, red duct tape, black duct tape, two wooden dowels, a brad pin, and paper cut outs for the headlights and license plate.

Some of the supplies above contain affiliate links. If purchased, I will receive commission.

Directions:
1. On a large piece of cardboard, trace the shape of a front-facing car with a large windshield. Cut this out with an Exacto knife or scissors.
2. On a smaller piece of cardboard or with your cardboard scraps, trace and cut out two slightly squared off ovals (these will be the wheels!) and a steering wheel.
3. Wrap the car in red duct tape and the wheels and steering wheel with black duct tape. Attach the wheels to the bottom of the car with more tape.
4. I made my own head lights and license plate, printed them out, and glued them to the car. You can recreate this on the computer or by cutting out two black circles and two slightly smaller white circles for the headlights and a rectangle with any combination of letters and numbers you’d like for the license plate!
5. Flip the car over and tape the wooden dowels to the back. We attached ours midway up the sides of the car to support the flimsy outline if the windshield.
6. We attached the steering wheel by punching a hole in the car and in the center of the steering wheel and inserting a plastic brad from a DIY Pinwheel kit (you can use any kind of brad pin or paper fastener). This helped the wheel spin, which made it extra fun! Then we added a piece of red duct tape to the front of the car to cover where the brad stuck out.
7. Using a stake or sharp object, make holes in the ground outside and insert the wooden dowels.

DIY Car Photo Booth | Vicky Barone

We had so much fun with the photo booth we might make another one some day!

Check out the rest of the Race Car Birthday Party here!

Categories
DIY Holidays Recipes

M&M Pretzel Kisses for Valentine’s Day

M&M Pretzel Kisses make the best Valentines! We love to throw these sweet treats together for just about every holiday. They are so easy to make and are always a crowd favorite. Package them in a cellophane bag and add my “I’m Sweet on You, Valentine” free printable to make the perfect Valentines!

M&M Pretzel Kisses for Valentine's Day | Vicky Barone

Ingredients: Pretzel Snaps (make sure you don’t get the butter flavored ones!), Hershey Kisses, and Valentine’s Day M&Ms.

Directions:
1. Preheat oven to 200.
2. Arrange pretzels on a cookie sheet and place Kisses on top.
3. Bake at 200 for 5 minutes.
4. Remove from oven and carefully push one M&M into each Kiss.
5. Place tray in refrigerator or freezer to set about 5-10 minutes.
6. Store in an airtight container or wrap in individual bags as Valentines!

Enjoy!


Categories
Kids Recipes

Healthy Patriotic Popsicles

Despite the gloomy weather we’re having here, we are still gearing up for the 4th of July!

We’re hoping for sunshine tomorrow and we’re already planning to cool off with some patriotic popsicles!  While store-bought popsicles are convenient, they are just water, sugar, and food coloring. By making your own popsicles, you can make them healthy and delicious. That’s just what we did with these red, white, and blue popsicles! We also made them in 2oz cups with longer sticks to make them easier for the kids to eat!

7_3_13_FourthPops

Ingredients (to make approximately 12-15 popsicles):
8oz pureed strawberries
8oz pureed blueberries
6oz vanilla yogurt
2oz milk

We used organic fruit, non-fat greek yogurt, and 2% milk, but you can use whatever you and your family enjoy! We made ours as simple as we could since we’ll be sharing them with the little ones, but you can add sweeteners like honey or agave to your yogurt and milk layer to make it even sweeter.

For the popsicle forms, we used 2oz plastic party cups (aka plastic shot glasses) and lollipop sticks. You can also use Dixie cups and popsicle sticks or any other popsicle form you might have from the Dollar store, etc.

What to do:
1. Using a blender (we used a baby food maker!), puree your fresh fruit.
2. Mix together yogurt and milk.
3. In whatever order you’d like, pour a layer of strawberry puree, yogurt, and blueberry puree into each cup (each layer is thick enough that you won’t even need to freeze each one individually so that they don’t run together like fruit juice would!)
4. Place a sheet of plastic wrap over each cup and wrap tightly
5. Using a sharp knife, make a small slit in the center of the plastic wrap and insert the lollipop stick (the plastic wrap will help the lollipop stick stand straight up until the popsicle freezes).
6. Freeze!
7. To remove from the plastic cup, place each popsicle in a bowl of warm water for 15 seconds (if you used a paper cup, you can just rip it and peel it away!)

And that’s it! Now you and your little ones can enjoy your healthy popsicles!

Check out our Popsicle Pinterest board for more ideas!

Happy Independence Day!