Categories
Holidays Kids Recipes

Halloween Sprinkle Rimmed Glasses

For those of you who liked our sprinkle rimmed cocktail glasses, here are some Halloween sprinkle rimmed glasses* for kids! We used white chocolate and orange and black nonpareils for the rims, and filled the glasses with milk! You could even add a little food coloring to the milk to make it orange if you’d like! We also added some orange straws with glittery bat stickers to make them extra festive.

Click here to see a full how-to on the sprinkle rims!

Click here for even more last minute Halloween ideas!

*We suggest using plastic cups for your littlest ones, not glass!

Categories
My Projects Parties and Events Recipes

Sprinkle Rimmed Glasses DIY

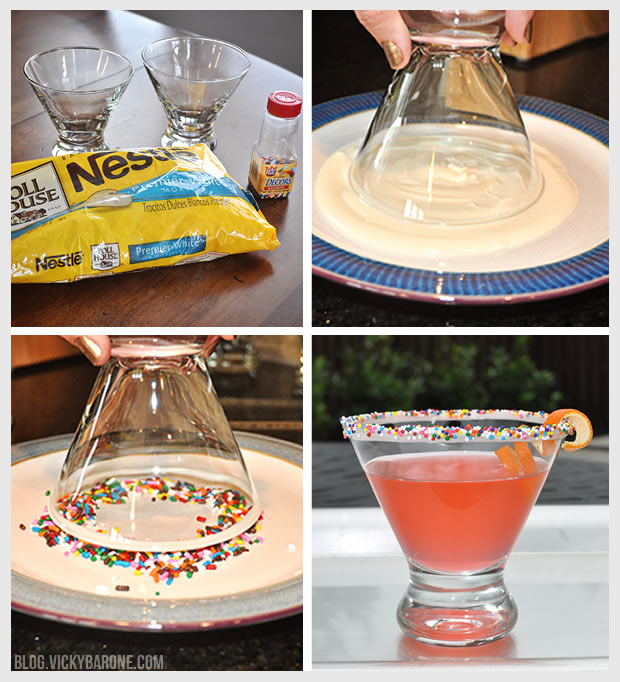
This is the easiest DIY for a party that will make you feel like the fanciest host ever! These sprinkle rimmed cocktail glasses were so perfect for our Pizza and Champagne Party and they only required two ingredients!

Sprinkle Rimmed Glasses DIYWhat you need:
1. Cocktail glasses. You can use any kind of drink wear including shot glasses!
2. Chocolate bits or melting chocolate. We used Nestle Premier White Morsels.
3. Sprinkles! We used rainbow sprinkles for our first round of glasses and nonpareils for the main picture you see at the top! They both worked great.

Directions:
1. Melt about 1/4 cup of chocolate bits in a small bowl in the microwave, stirring every 30 seconds until completely melted.
2. Spread the melted chocolate onto one small plate and pour sprinkles onto another small plate.
3. Dip a glass into the melted chocolate and carefully lift it back up. Slowly turn the glass clockwise and counterclockwise to catch any drips onto the rim and not down the side of the glass!
4. Immediately dip the glass into the sprinkles on the other plate. You can lift the glass up and down to pick up more sprinkles until the melted chocolate rim is covered.
5. Let the glasses set before serving. We put ours into the freezer to set faster.
6. Add your favorite cocktail (or mocktail!) and serve!

We hope this fancy touch will add some flair to your next party! Don’t forget to check out the rest of the DIY details from our Pizza and Champagne Party!


Categories
DIY My Projects Parties and Events Projects

DIY Diamond Paper Garland

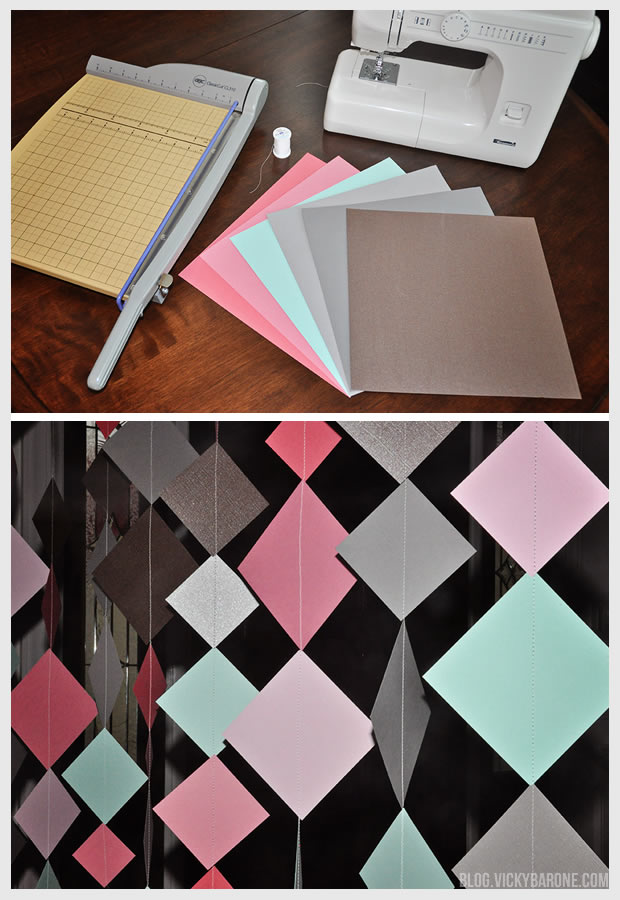
Sewn paper garlands have become our go-to decoration lately. They are a great way to create a bright color palette for any party and they are easy to make! Here is the diamond paper garland we made for our Pizza and Champagne Party!

DIY Diamond Paper GarlandMaterials:
1. Colorful card stock or scrapbook paper
2. A paper cutter
3. A sewing machine
4. All purpose thread

Directions:
1. Using the paper cutter, cut each piece of colored paper into squares of different sizes
2. Put all of your squares into the order that you want (we did the same pattern of colors in order, but mixed up the sizes as we went)
3. Leave a tail of thread to hang the garland before starting to sew into the paper
4. One by one, feed each square into the sewing machine corner to corner to create the geometric diamond look
5. Hang your garland and enjoy! We made each of our strips long enough to hang vertically in a doorway, but you can also leave a tail of thread on each side of the garland and hang them horizontally as well!

Diamond Paper Garland
Don’t forget to check out our Pizza and Champagne Party for other fun party ideas!

P.S. Our circle garland, and our paper strip garland.


Categories
Parties and Events Recipes

Ombre Gelatin Shots

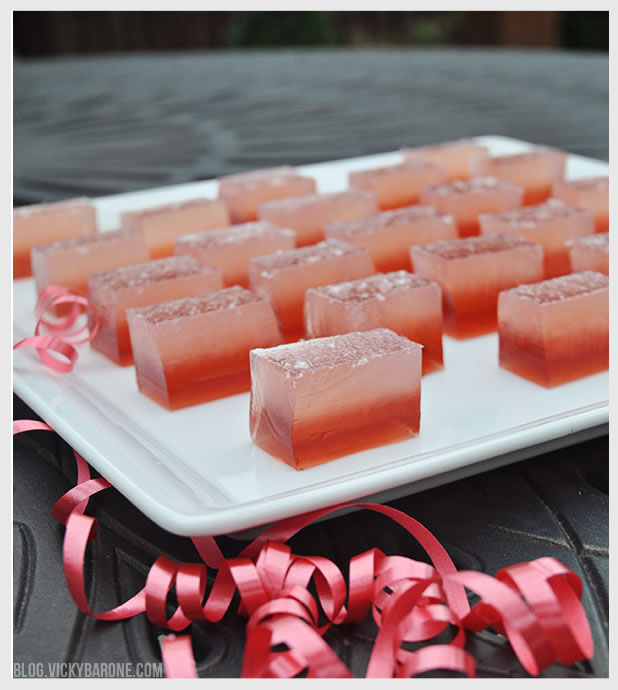
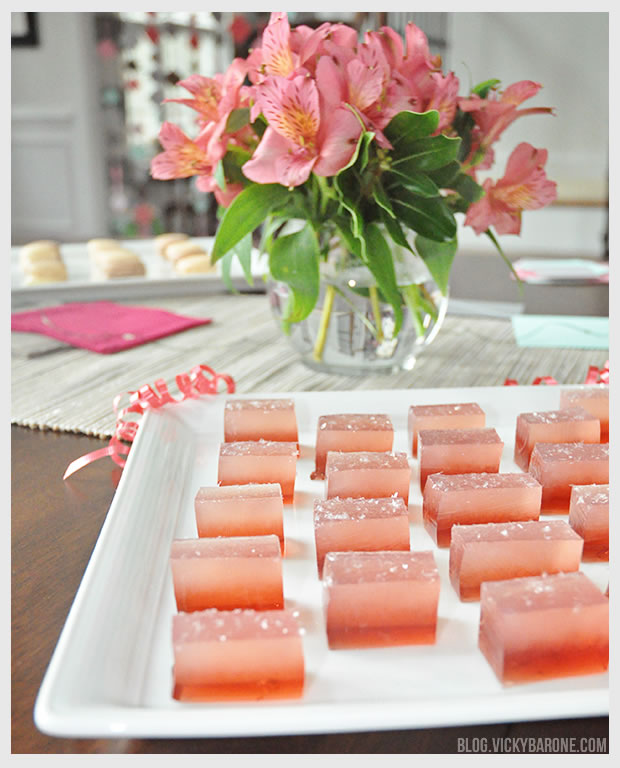
Here’s a delicious detail from our Pizza and Champagne Party! Ombre Gelatin Shots (aka Jello shots, but we didn’t use any Jello mix!). You can add Jello to the recipe, but it’s the gelatin that helps the shots hold their shape!

Ombre Gelatin ShotsAren’t they pretty? Unfortunately, the ones we made were not quite as tasty as they could have been (I forgot to add sugar!) but this recipe is delicious, I promise!

Ombre Gelatin Shots
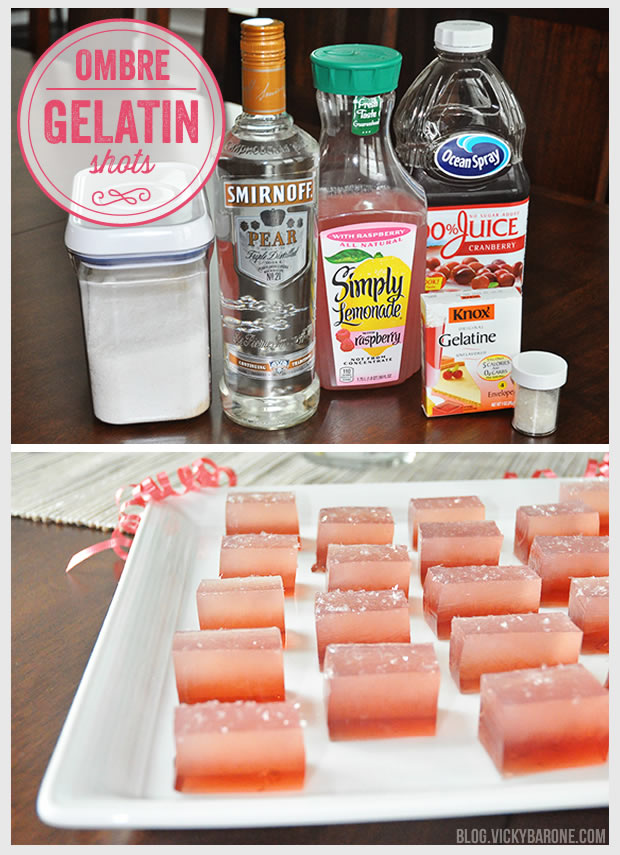
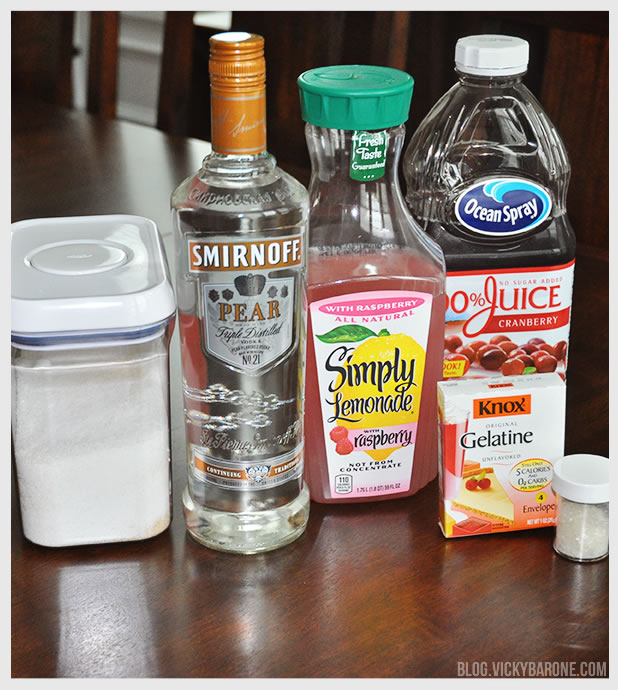
Ingredients:
4 envelopes unflavored gelatin
1 cup cold flavored vodka (We used pear! It’s delicious.)
1.5 cups cranberry juice
1.5 cups pink lemonade
2 tablespoons sugar (you can also use a flavored Jello here!)
Sprinkles (we used Wilton Cake Sparkles)

Directions:
1. In a medium bowl, sprinkle 2 envelopes gelatin over 1/2 cup cold vodka. Let stand one minute.
2. Boil cranberry juice and stir into the vodka gelatin mix until gelatin is completely dissolved.
3. Stir in 1 tablespoon of sugar.
4. Pour cranberry juice layer into a 9×7 pan or casserole dish (you can also use a 13×9, but we wanted ours a little taller to show off the ombre so we used a smaller pan).
5. Let cranberry juice layer chill for an hour and a half in the refrigerator.
6. Repeat steps 1-3 with remaining ingredients and pink lemonade.
7. Carefully, pour pink lemonade mixture over cranberry juice layer.
8. Return to refrigerator and let chill for 3 hours.
9. Cut gelatin into whatever shapes you like.
10. Pour sprinkles into a bowl and dip the top of each gelatin shot into sprinkles. The cake sparkles we used stuck the best to the gelatin, but they dissolve after a while so make sure you serve them right away!

Ombre Gelatin Shots

You can use any juice, any vodka, and any colors! Mix and match and be creative! This fancy spin on a down and dirty party snack is sure to be a hit at your next get-together. Don’t forget to tell your guests that they’re spiked! If you’d like them to be kid-friendly, just replace the cold cup of vodka for a cold cup of juice!

Check back soon to see more details from our party!

*recipe adapted from Knox Gelatine

Categories
DIY Lifestyle Parties and Events Recipes

Pizza and Champagne Party

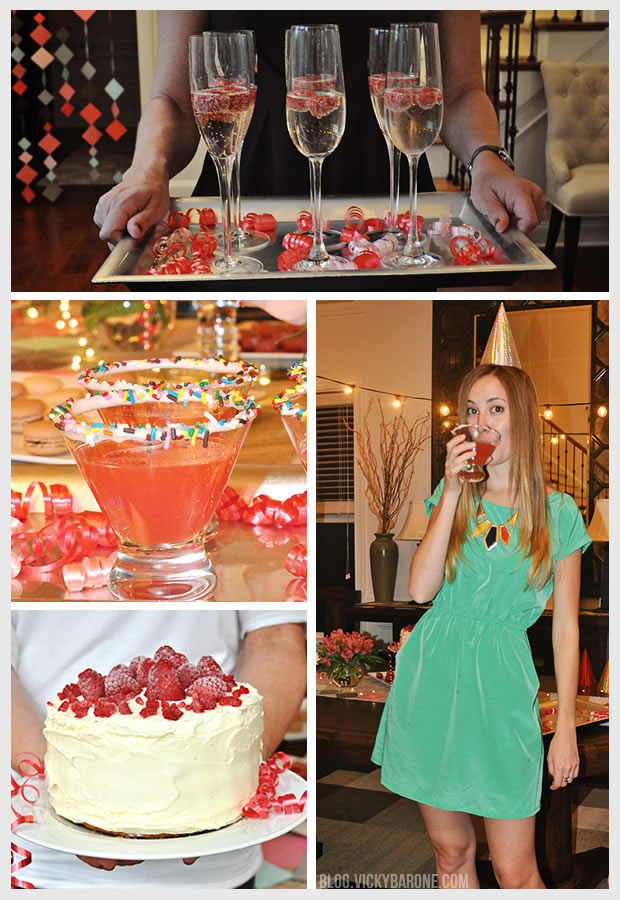
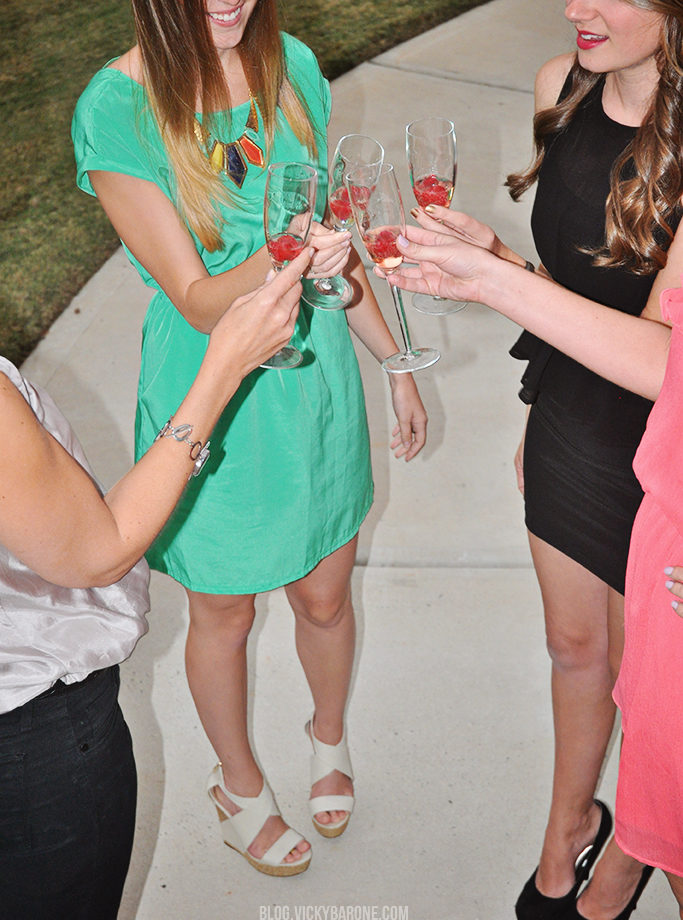
We hosted a girls’ night party with a few of our close friends, some cocktails, and pizza! What better way to spend an ordinary Wednesday evening than by dressing up and sipping on girly drinks with friends?

Here are some highlights from our night!

Pizza and Champagne Party
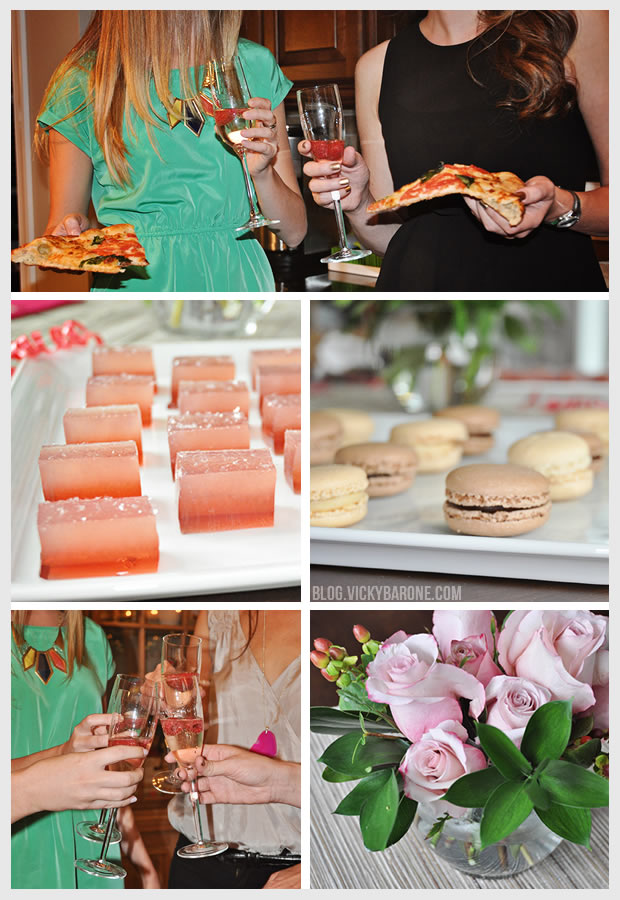
We dropped a few frozen raspberries in our champagne to keep it chilled and make it fancy! Then we ordered pizza delivery to bring us back down to earth. We also made some jello shots from scratch, and picked up some fresh flowers and frozen macarons from the grocery store. Mixing homemade with store-bought is a great way to make an easy and pretty party come together.

Pizza and Champagne Party

Here are some of the elements we used for our party (check back soon for links to tutorials!):
White Chocolate rimmed cocktail glasses with Rainbow Sprinkles
Ombre Gelatin Shots
Parisian Macarons from Trader Joe’s
Flower Arrangements DIY
String lights from Amazon
Diamond Paper Garland DIY

Thank you so much to everyone who came to our party! We were so happy to have you all. Cheers to a great evening!
Pizza and Champagne Party

Categories
DIY Parties and Events Projects

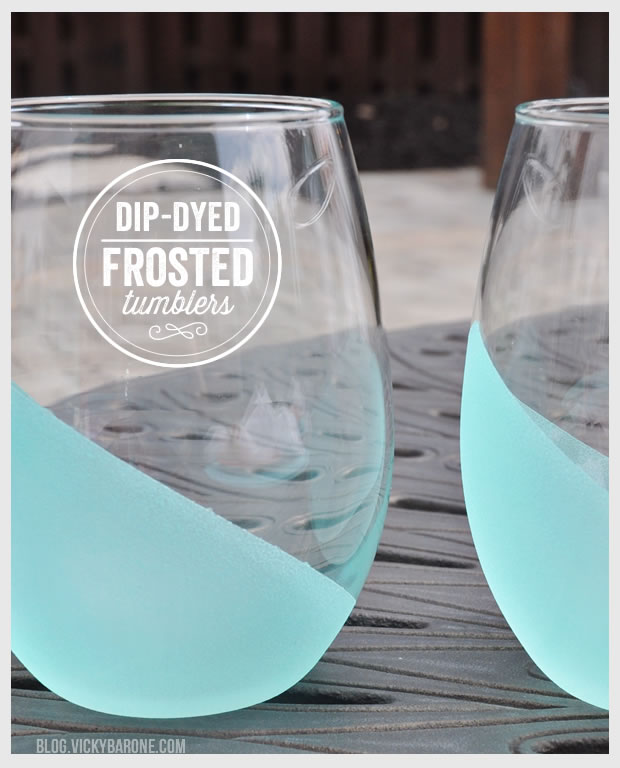
Dip-Dyed Frosted Tumblers

This post contains affiliate links. If purchased, I will receive a commission.

Last but not least, my very favorite detail from our End of Summer Party!

Dip Dyed Frosted Tumblers
We loved the Metallic Confetti Tumblers from our Summer party so much that we just had to make some more. Again we went with Martha Stewart’s glass paint collection, but this time we tried the “Frost” paint. It is an awesome product and we’re so happy with how these turned out!

Materials: Glass tumblers, rubbing alcohol, painter’s tape, a foam pouncer, and Martha Stewart Craft’s Translucent Frost Glass Paint (we used Beach Glass!)
One or more of the supplies listed contain affiliate links. If purchased, I will receive a commission.

What to do:
1. Using rubbing alcohol and a paper towel or cotton ball, clean the tumblers and let dry.
2. Take the painter’s tape in manageable sections and tape off where you want your paint to go.
3. Use your finger nail or a credit card to press out all air bubbles and seal the tape onto the tumblers.
4. Dip the foam pouncer in the frost paint and begin painting the tumblers using an up and down motion (don’t worry if it doesn’t look perfect – a second coat will fix any mistakes!).
5. Let dry two hours before applying a second coat.
6. Let second coat dry overnight and then peel off the painter’s tape!
7. Follow the directions on Martha Stewart’s craft website for how to set the paint (We air cure for 21 days, but you can also oven bake them!).
8. Have a party!

We hope you’ve enjoyed our DIY projects from our End of Summer Party. Bring on the Fall!

**UPDATE**
Thank you all so much for your interest in this fun little DIY! Check out the comment section for paint alternatives and extra advice on making the tumblers.
Sadly, this paint has been discontinued, but we found a few colors still for sale on Amazon! HERE and HERE.
(The above include affiliate links. If purchased, I will receive a commission.)


For more fun DIY projects and inspiration, greeting cards, and more check out Vicky Barone on Instagram!

Categories
DIY Projects

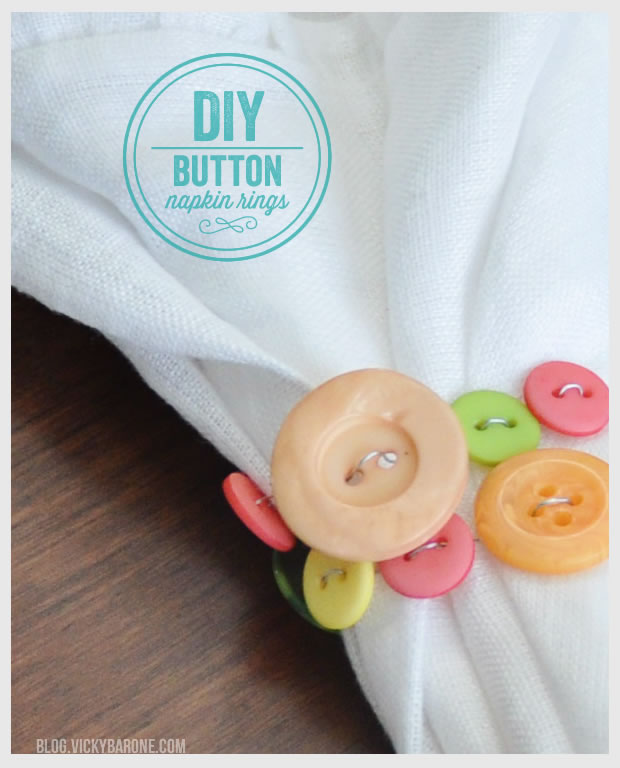
DIY Button Napkin Rings

Check out what else we made for our End of Summer Party! The easiest of all easy napkin rings!

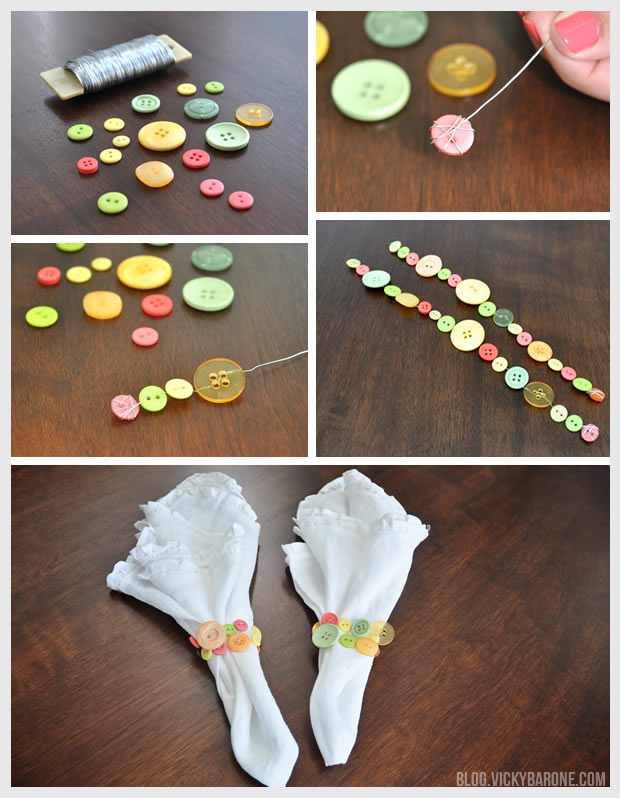
DIY Button Napkin RingsMaterials: Floral wire, buttons, and scissors.

What to do:
1. Cut a piece of wire to wrap around whatever napkins you are using, giving yourself an extra four inches or so.
2. Thread your first button and wrap the wire around it a few times to secure it, tucking in the end of the wire.
3. Thread the rest of your buttons, alternating color and size.
4. Wrap the remaining wire around the last button to secure it and cut off any excess wire.
5. Wrap your napkin rings around your napkins and enjoy!

We did a few other DIY projects for our End of Summer Party so be sure to check those out too!


Categories
DIY Parties and Events Projects

DIY Paper Strip Garland

Here’s a fun detail from our End of Summer Party! We loved the Paper Mobile by Oh Happy Day and thought it would add the perfect touch to our bright outdoor set up.
For step-by-step instructions, check out the paper mobile link above, or take a look at our Circle Paper Garland blog post! I will say, however, that the strips of paper are a bit harder to sew together than the circle garland was. I found that adjusting the needle thread tension on my sewing machine to a lower setting while using a straight stitch helped a lot! If you find your thread snapping or getting caught, try loosening your stitch and tension before calling it quits. Or call it quits and make the circle garland instead (can you tell we’re partial to the circle garland? It might just be the quickest sewing project ever.)!

9_10_13_VerticalPaperGarland