Categories
Recipes

Frozen Pineapple Cocktail

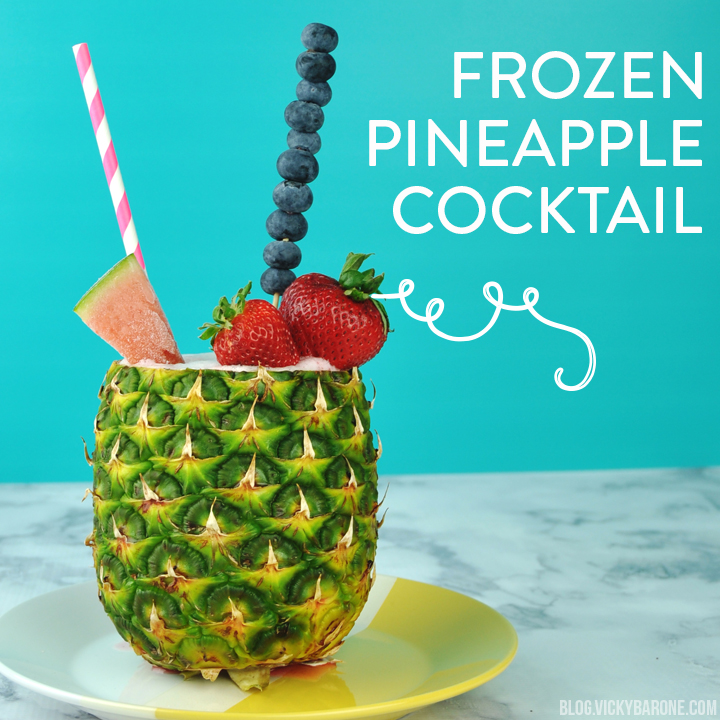
Happy Fri-YAY! We are so happy it’s the weekend that we are celebrating with this delicious frozen cocktail! This recipe is so simple, you’ll be cooling down with a pineapple in your hand in no time!

Frozen Pineapple Cocktail | Vicky Barone

Ingredients:
2 cups fresh pineapple chunks
1 cup ice
4 oz white rum
juice of 1 lime

Directions: blend all ingredients in a blender and serve in a pineapple cup!

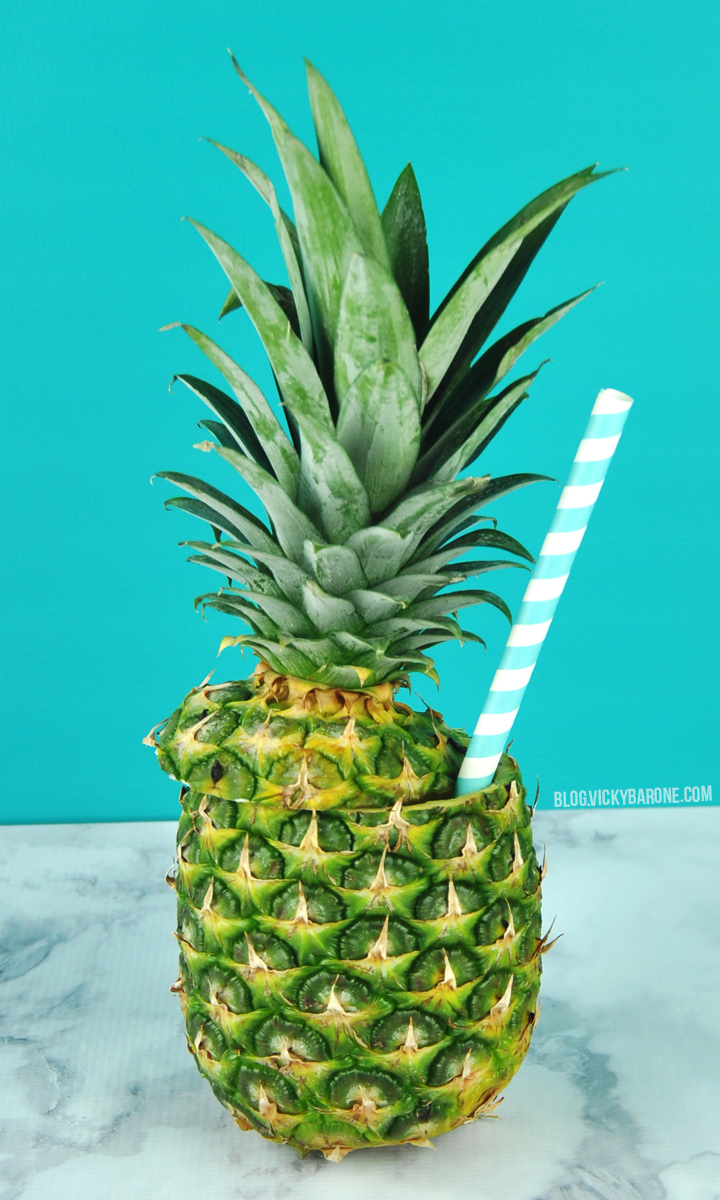
To create the pineapple cup:
1. Cut off the top of the pineapple and set aside.
2. Run a knife around the inside of the pineapple, about 1/2″ from the edge.
3. Cut the inside diagonally twice (to create an X).
4. Use a spoon to scoop out the insides.
5. Cut away the hard inner core of the pineapple and discard. Use the rest of the pineapple for the recipe.

Frozen Pineapple Cocktail | Vicky Barone Frozen Pineapple Cocktail | Vicky Barone

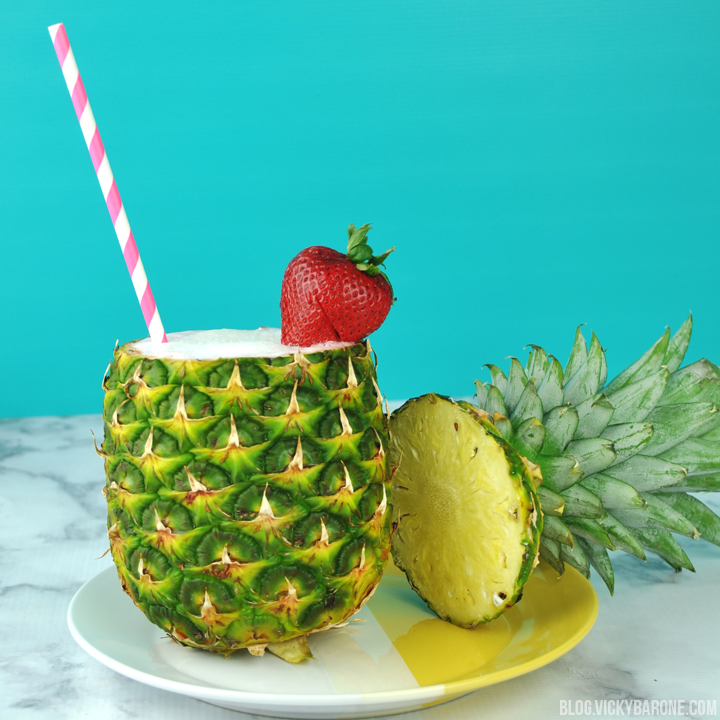
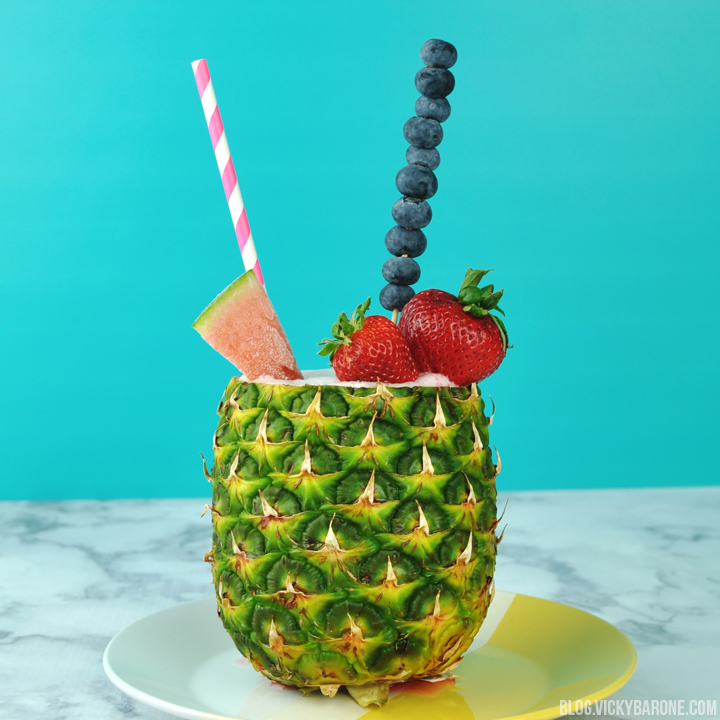
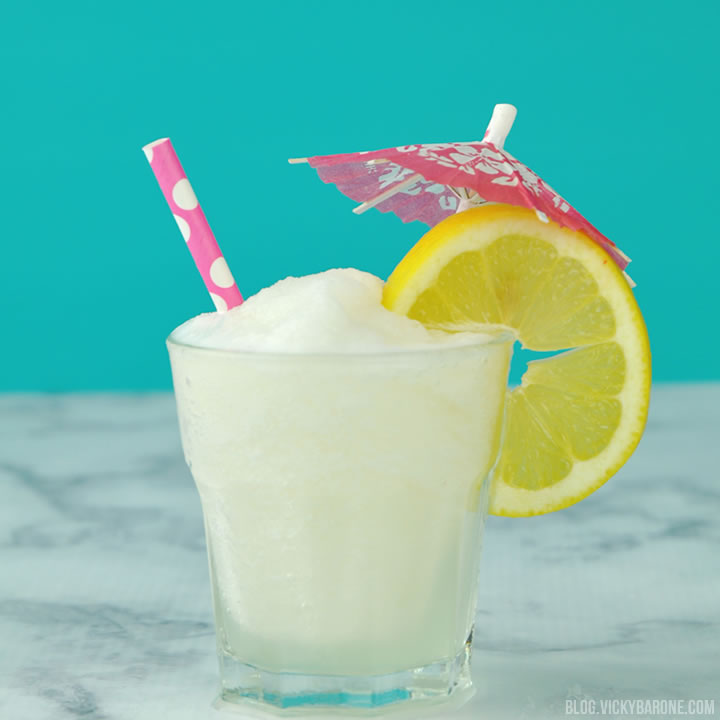
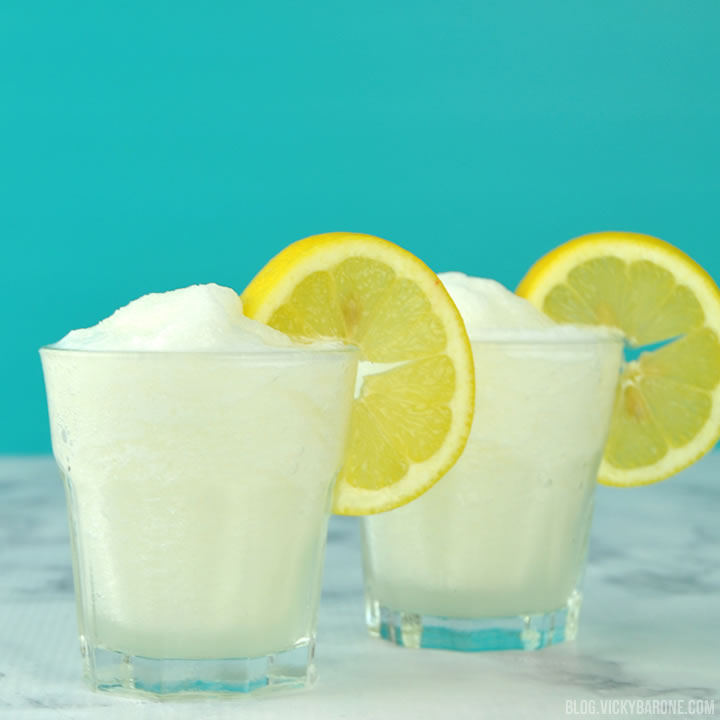
Garnish your tropical drink with pineapple wedges, lime slices, or lots of yummy fresh fruit!

Frozen Pineapple Cocktail | Vicky Barone

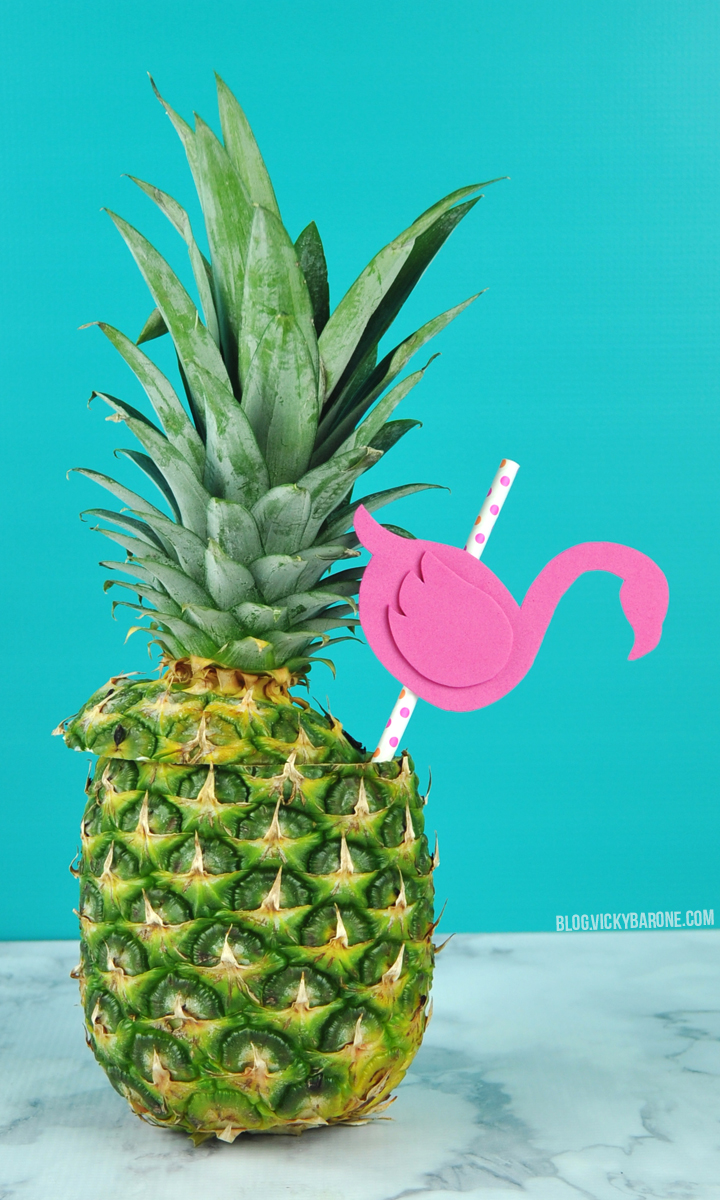
Isn’t our little flamingo straw cute? Find out how to make it here!

Enjoy responsibly and have a fabulous weekend!

Categories
DIY

DIY Cactus Piñata Garland

We don’t know about you, but the East Coast has been HOT lately. We are doing our best to celebrate the heat with these DIY piñata cacti! These super cute little succulents can be used as table decor, accents for other crafts, or strung together to make a garland! Here’s how to make your own:

DIY Cactus Piñata Garland | Vicky Barone

Supplies: cardstock, green tissue paper, scissors, glue, and string.

Directions:
1. Trace cactus shapes onto cardstock and cut out.
2. Cut tissue paper into 1/2 inch strips.
3. Cut fringe into strips of tissue paper. If the strips are super long, fold them accordion style, cut fringe, and unfold.
4. Start from the bottom of a cactus cut-out and add a thin line of glue.
5. Press a strip of fringed tissue paper to the glue. Repeat all the way up the cactus!
6. When the glue is dry, trim away the excess tissue paper from the edges of the cactus with scissors.
7. If you are turning these into a garland, attach them to string using glue. Let dry, hang, and enjoy!

DIY Cactus Piñata Garland | Vicky Barone

We even found a cute little cactus dish at the thrift store to match!

DIY Cactus Piñata Garland | Vicky Barone

Thanks for visiting! For more DIY ideas and inspiration, follow Vicky Barone on Instagram!

Categories
Kids Recipes

Gummy Bear Popsicles

This post contains affiliate links. If purchased, I will receive a commission, but the price remains the same for you!

Happy Friday! To celebrate the weekend, we are sharing an easy Popsicle recipe your kids will love. These 2-ingredient Popsicles are sweet and delicious and have the cutest little gummy bears peeking out! Here’s how to make your own:

Gummy Bear Popsicles | Vicky Barone

Supplies: a Popsicle mold, Popsicle sticks, gummy bears, and a clear beverage of your choice (try Sprite, flavored sparkling water, or coconut water!).
The above supplies contain affiliate links. If purchased, I will receive a commission, but the price remains the same for you!

Directions:
1. Add three or four gummy bears to the bottom of a Popsicle mold.
2. Insert the Popsicle stick and hold in place as you add more gummy bears on the sides (the gummy bears will help steady the Popsicle stick).
3. When all the molds are full of gummy bears, carefully pour the beverage you chose into each mold until it reaches the top.
4. Let set in freezer at least four hours.

Gummy Bear Popsicles | Vicky Barone Gummy Bear Popsicles | Vicky Barone Gummy Bear Popsicles | Vicky Barone

YUM! Such a tasty treat for a hot Summer day. Hope you enjoy and have a wonderful weekend!

Categories
DIY Parties and Events

Aloha Summer Banner

Happy First Day of Summer! We are so excited that Summer is officially here, so we’re celebrating with a DIY paper banner!

Aloha Summer | DIY Paper Banner | Vicky Barone

Supplies: colorful scrapbook paper, white cardstock, a printer, scissors, glue, a single hole punch, and twine.

Directions:
1. Cut scrapbook paper into rectangles using scissors or a paper cutter. Ours were about 4×5″
2. Cut triangles out of the bottom of each rectangle. You can freehand this or create a template to trace to make each triangle the same.
3. To create the white letters, you can use a program like Illustrator or Photoshop to type the words you’d like to say and then increase the size so that each letter fits into your rectangles. Our letters were about 3×4″
4. Change the font color of the letters to a super light gray so you don’t use a lot of ink, but can still see the outlines when you cut.
5. Before printing, reverse the letters so they are all backwards! You will want them to print that way so that when you cut them out, the glue will go on the light gray side and the opposite side will be a crisp white!
6. Print and cut the letters.
7. Glue the letters to each rectangle.
8. Use the single hole punch to create two holes in each rectangle.
9. Cut two lengths of twine and thread them through the holes in the rectangles to create the banner.

Hang and enjoy!

Aloha Summer | DIY Paper Banner | Vicky Barone

How will you celebrate the first day of Summer?

Categories
DIY Kids

DIY Paper Plate Crab

School’s out for Summer!!! And now that I’ve got a little one back at home with me before camp starts, we are in need of some crafts! This paper plate crab is super fun to put together. Your kids will love celebrating Summer with a sweet little beach creature!

DIY Paper Plate Crab | Summer Craft for Kids | Vicky Barone

Supplies: a paper plate, red acrylic paint, a paint brush, red construction paper, scissors, glue, and googly eyes.

Directions:
1. Flatten the paper plate and paint one side with the red acrylic paint. Let dry.
2. While the paint is drying, cut a piece of construction paper into six thin strips and two thicker strips with claws on the ends!
3. Fold the thin strips accordion style. Fold the thick strips accordion style until you get to the claws.
4. When the plate is dry, flip it over so the white is facing up and glue the legs onto the edge of one half.
5. Add glue to the other half of the plate and fold in half.
6. Glue on googly eyes. Let dry.

DIY Paper Plate Crab | Summer Craft for Kids | Vicky Barone

There you have it! A fun and simple craft to keep your little ones busy (at least for a few minutes 😉 ).

What are your favorite Summer crafts? We’d love to hear!

Categories
Recipes

Boozy Lemonade Slushies

The weather is finally heating up and we are finding the most delicious ways to cool down. Today we’re sharing a frozen lemonade drink that requires just TWO ingredients…

Boozy Lemonade Slushies | Vicky Barone

If you’d like these drinks to be kid-friendly, then they’ll only require ONE ingredient!

Boozy Lemonade Slushies | Vicky Barone

Here is what you’ll need:
– Bottled lemonade. You can make it fresh if you’d like, but we bought a bottle of Simply Lemonade to make it easier (plus it’s delicious!).
– Vodka. We used plain vodka, but try flavors like blueberry, cherry, or raspberry!
– An ice cube tray (or two!).
– A blender.
– Lemon slices, paper umbrellas, and paper straws to garnish.

Directions:
1. Pour lemonade into ice cube trays and freeze for 4 hours or overnight.
2. Remove lemonade cubes from tray and place in blender.
3. Add vodka to your liking! (This step is optional!)
4. Blend.
5. Garnish.
6. Serve!

Boozy Lemonade Slushies | Vicky Barone

Boozy Lemonade Slushies | Vicky Barone

Boozy Lemonade Slushies | Vicky Barone

So deliciously refreshing. What are your plans for the Summer? We’d love to hear!

Categories
DIY

DIY Paper Umbrella Wreath

This post contains affiliate links. If purchased, I will receive a commission. 

Happy Monday, party people! Today we’re sharing a Summer DIY to get you in the tropical mood. This paper umbrella wreath is super easy to assemble, and is sure to make your front door Summer-ready! Here is how to make your own:

DIY Paper Umbrella Wreath | Vicky Barone

Supplies: paper umbrellas, foam wreath, twine or ribbon.
(One or more of the supplies listed contain affiliate links. If purchased, I will receive a commission.)

Directions:
1. Tie a piece of twine or string around the foam wreath for hanging.
2. Add paper umbrellas around the wreath by simply opening them up (carefully!) and inserting them into the foam.
3. Adjust and move around the umbrellas until you have a pattern and arrangement you like!
4. If you can see too much of the wooden ends inside the wreath, you can clip them with scissors.

DIY Paper Umbrella Wreath | Vicky Barone
Aren’t these paper umbrellas pretty? We love the color combo and pattern!
DIY Paper Umbrella Wreath | Vicky Barone DIY Paper Umbrella Wreath | Vicky Barone

DIY Paper Umbrella Wreath | Vicky Barone

Now your front door is ready for Summer! Enjoy!

This post contains affiliate links. If purchased, I will receive a commission. 

Categories
DIY

DIY Felt Lemons

Here on the East Coast it is suddenly feeling like Summer! To celebrate, we created some felt lemons for a Summery garland! Here’s how…

DIY Felt Lemons | Vicky Barone

Supplies: green felt, yellow felt, scrapbook paper, scissors, and glue.

Directions:
1. Create a template from a piece of scrapbook paper.
2. Trace the template onto the yellow felt.
3. Cut out the lemon shapes from the felt and set aside.
4. Cut leaves from green felt.
5. Glue some leaves to the lemons, leaving some leaves as extra.
6. Attach lemons and leaves to a string to make a garland or spread them out across a table as a runner! (Or use them to decorate a lemonade stand!)

DIY Felt Lemons | Vicky Barone

DIY Felt Lemons | Vicky Barone DIY Felt Lemons | Vicky Barone

DIY Felt Lemons | Vicky Barone

Who else is excited for Summer?! Happy crafting!