Categories
DIY Holidays Projects Things I Love

Things I Love: Popsicle Stick Ornaments

1. Sled | 2. Snowflake | 3. Christmas Characters | 4. Reindeer | 5. Snowman | 6. Christmas Tree

How cute are these ornaments? All you need for these fun holiday crafts for kids are some Popsicle sticks, paint, glue, and a little imagination! Click on the sources above for full tutorials on each ornament.

Happy crafting!

Categories
DIY Holidays Lifestyle Projects Uncategorized

DIY Felt Gift Card Holders

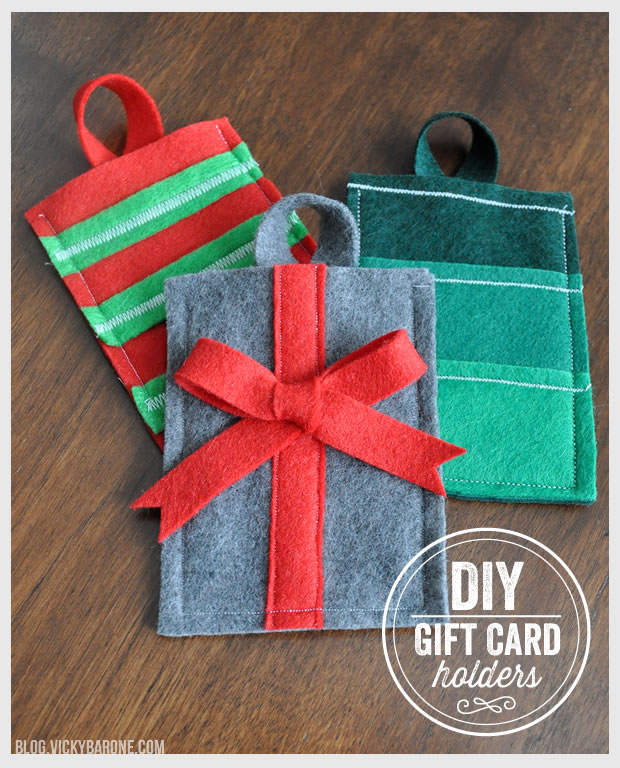
Add a personal touch to those less-than-personal gift cards with these adorable felt gift card holders! They are perfect to hang on the Christmas tree or tuck into a card this holiday season!

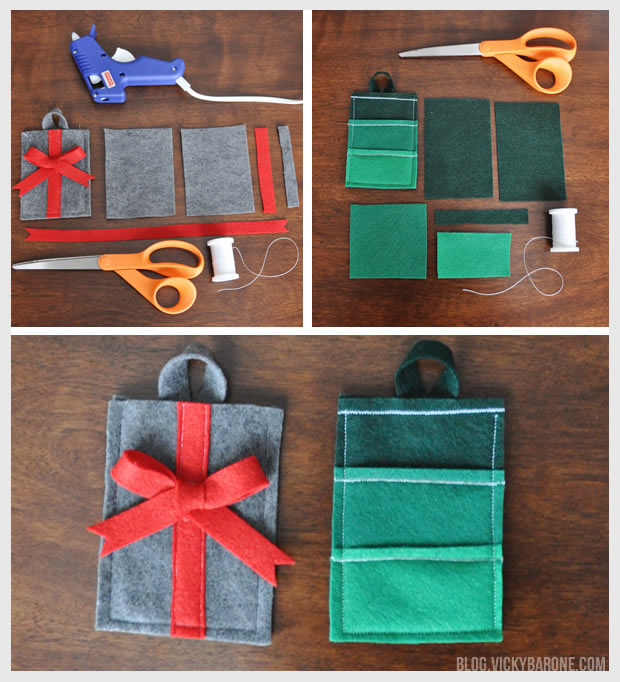
DIY Felt Gift Card HoldersMaterials: Felt, scissors, all-purpose thread, a hot glue gun, and a sewing machine.

DIY Felt Gift Card Holders

Directions:
1. For the main pocket and loop, cut felt into two 3.25″ x 2.25″ rectangles and one 4″ x 0.5″ strip.
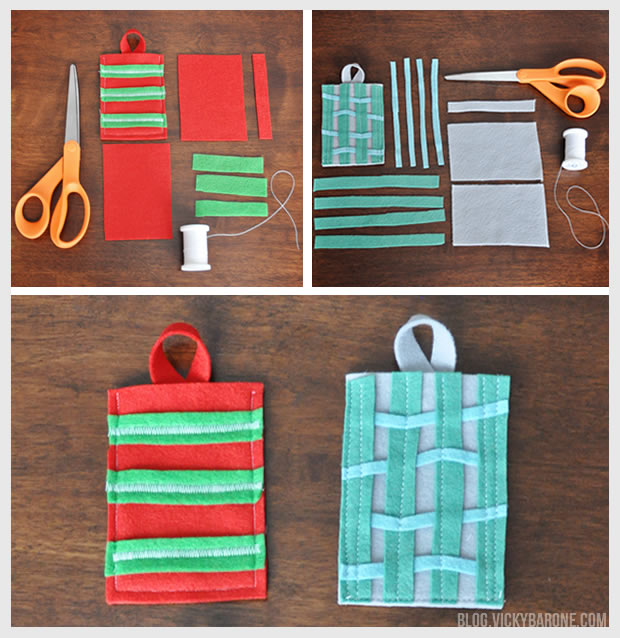
2. To decorate the front of the gift card holder, cut different colored felt into different sizes and shapes to create the designs you like! See the pictures above and below for ideas.
3. Make a loop with the 4″ x 0.5″ strip and sew onto back rectangle.
4. Sew design onto front rectangle using different types of stitching (you can also hot glue any pieces to the front – like our red bow)
5. Sew front and back rectangles together, leaving the top open to insert a gift card.
6. Trim edges of felt to create clean lines and any excess thread.

DIY Felt Gift Card Holders

Make sure you loosen the stitching on your sewing machine before starting this project, otherwise the felt will stretch and your rectangles will look a little lopsided. If you don’t have a sewing machine, no worries! These can also be hand stitched or simply hot glued. Felt is very versatile so be creative!

P.S. These gift card holders look great with ourĀ Wine Bottle Holiday Sweaters šŸ˜‰

Categories
DIY Holidays Lifestyle Projects

DIY Merry Christmas Garland

This post contains affiliate links. If purchased, I will receive a commission, but the price stays the same for you!

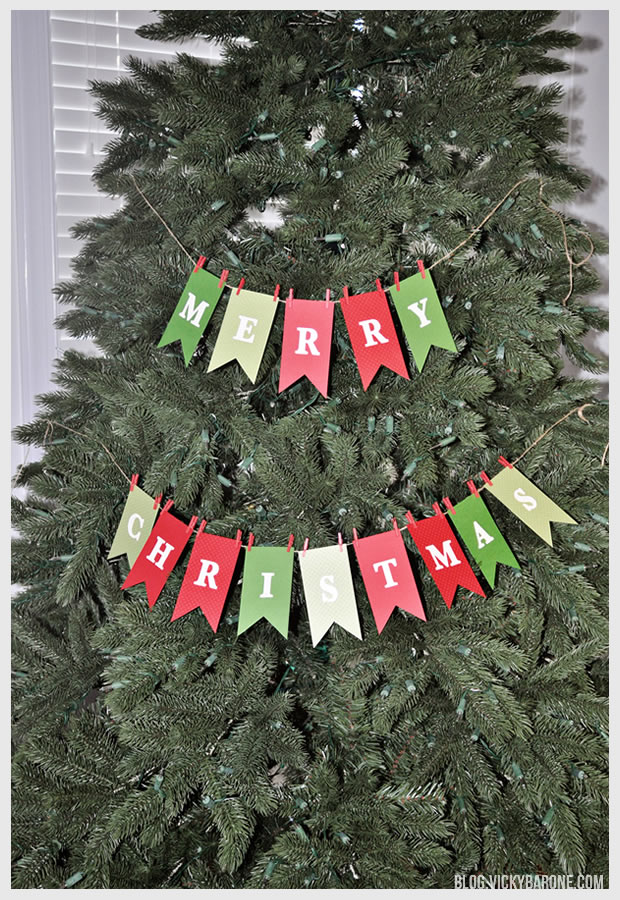
We made another garland for Christmas! Our Thanksgiving garland was so popular, we decided to make another for Christmas. This time we used red and green textured scrapbook paper and ivory scrap-booking letters. It was very easy to make and we are so happy with the end result!
DIY Merry Christmas Garland

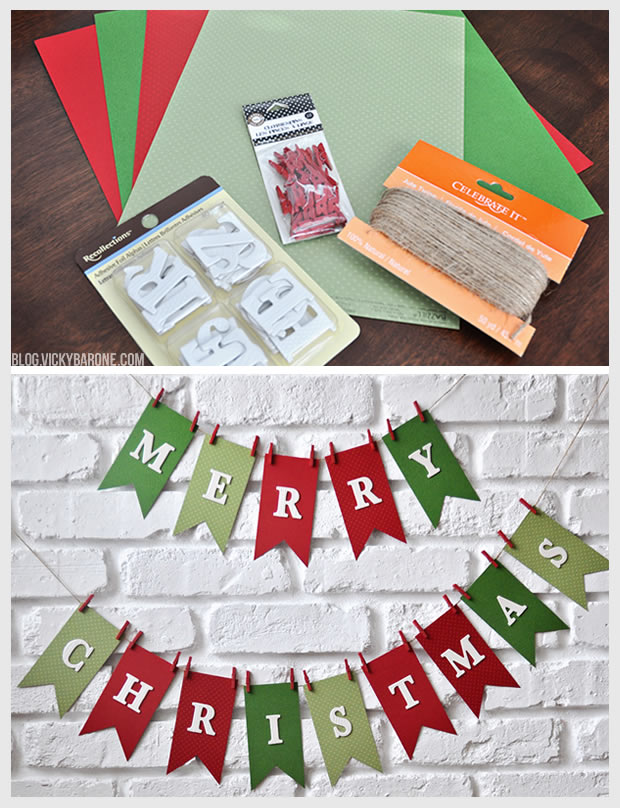
Materials: Green and red scrapbook paper, adhesive chipboard alphabet letters (similar), a paper cutter and/or scissors, mini clothespins, and twine. You can find all of these materials in your local craft store!

The above suppliesĀ containĀ affiliate links. If purchased, I will receive a commission, but the price stays the same for you!

Directions:
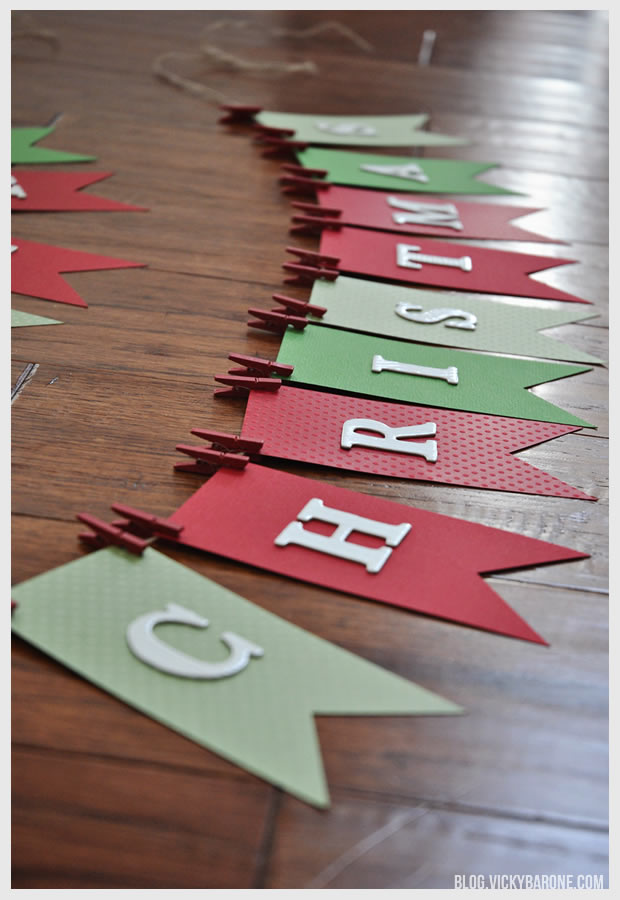
1. Using a paper cutter, cut scrapbook paper into 2.5 x 5 inch rectangles.
2. Cut a triangle out of the bottom of each paper rectangle using scissors. We made a stencil out of scrap paper to make sure each triangle cut was the same.
3. Remove the backing from the letters and attach to each paper flag.
4. Cut one long piece of twine (or two medium length pieces) and attach each flag with two mini clothespins, leaving equal space between the flags and extra twine on each end for hanging.
DIY Merry Christmas Garland

DIY Merry Christmas Garland

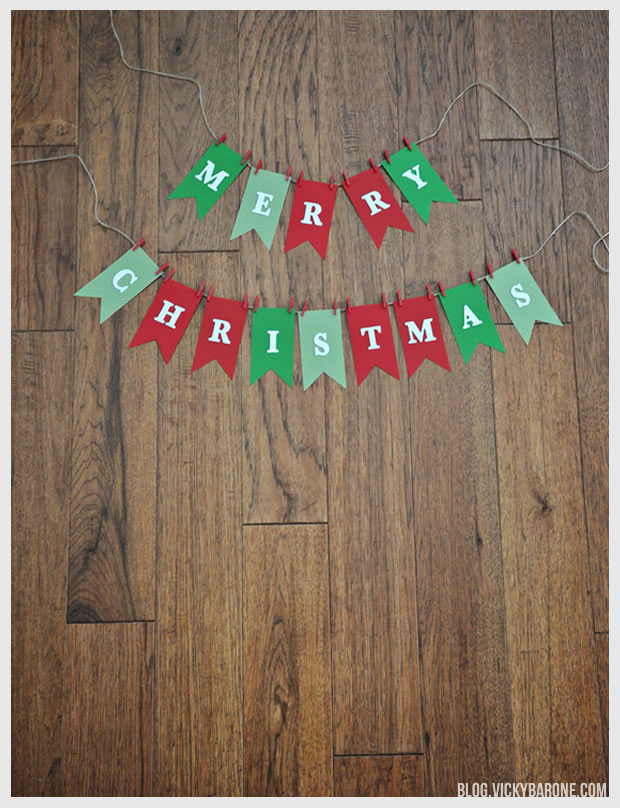
DIY Merry Christmas GarlandAs you can see by our extensive photo shoot, this garland goes great all over the house! Hang it from your mantle, on your Christmas tree, or on any wall for a festive touch to your home.

Happy Holidays!

Categories
DIY Holidays Lifestyle Parties and Events

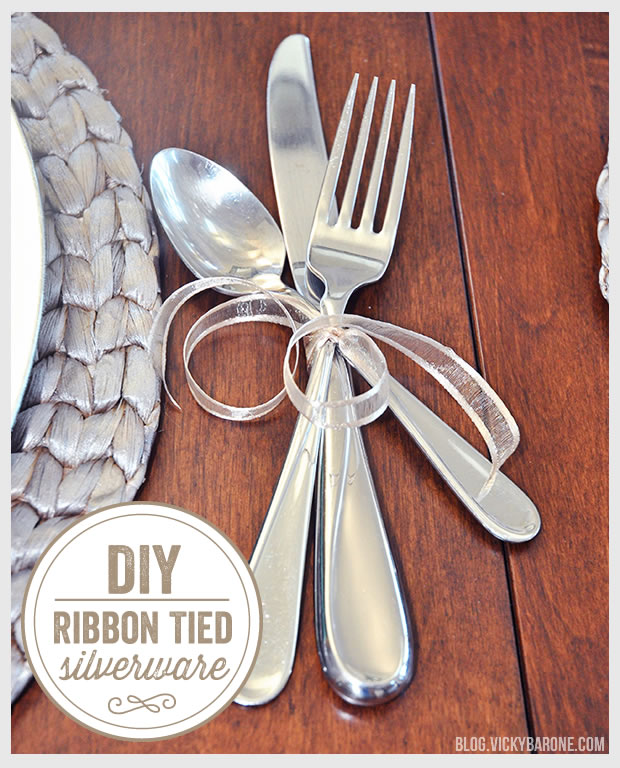
Ribbon Tied Silverware

We’ve been seeing a lot of pretty place settings on Pinterest that have silverware tied with ribbon or twine. We think it is just the sweetest thing (and the easiest!), so we adopted it for our own Thanksgiving table!

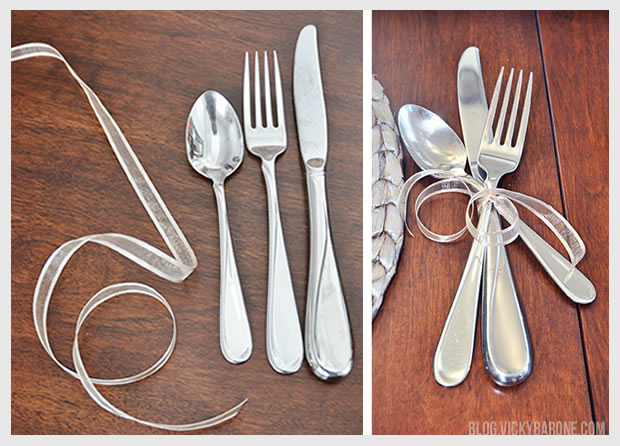
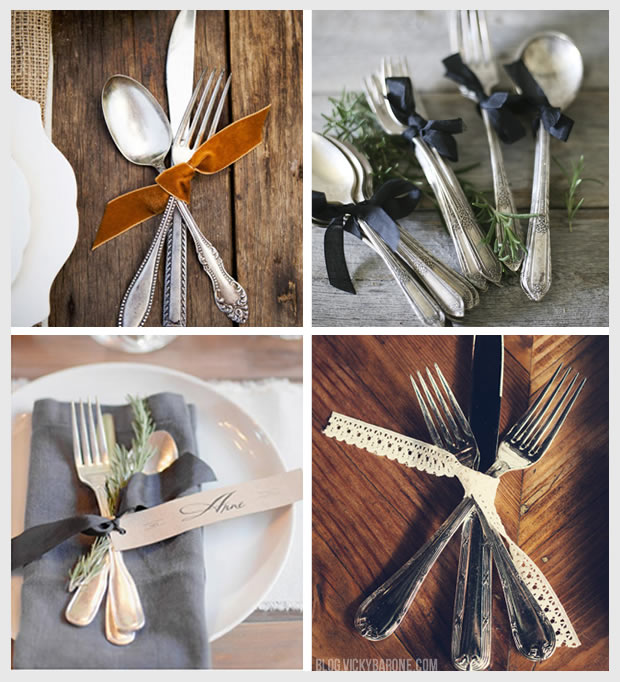
DIY Ribbon Tied SilverwareAll you need is your flatware, and a piece of ribbon! We tied ours in a knot and curled the ribbon a little. You can also tie a bow or even tie a name tag into the ribbon for a place setting.

Here are some of our other favorites from around the web:
DIY Ribbon Tied Silverware

one | two | three | four

Don’t forget to check out the rest of our Thanksgiving details! Happy decorating!

Categories
DIY Holidays Lifestyle My Projects Parties and Events Projects

Thanksgiving Pumpkin Place Cards

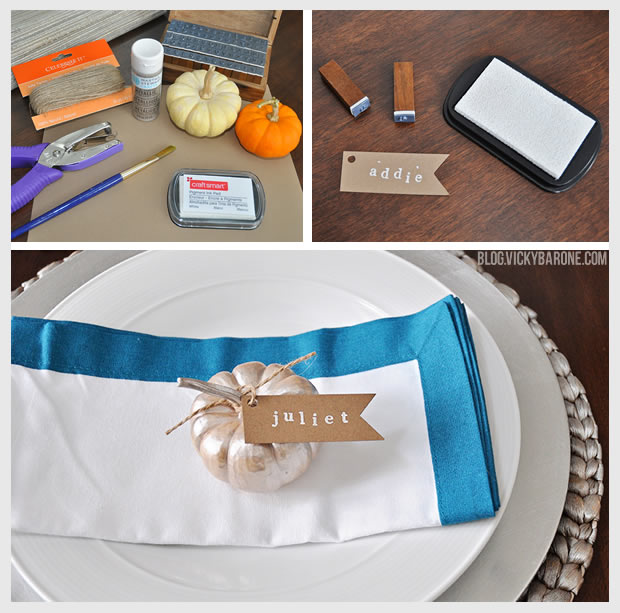
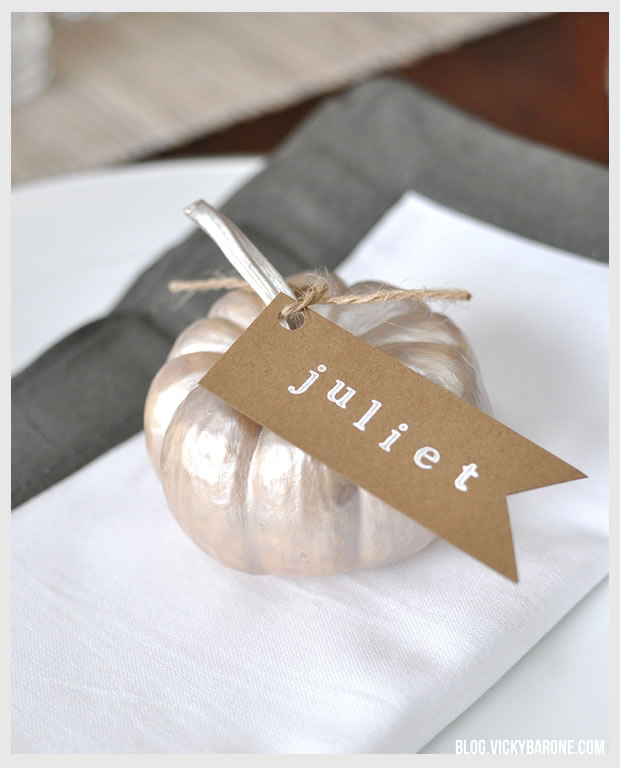
Here’s our favorite detail from our Thanksgiving Table this year! We painted the tiniest pumpkins we could find at the farmer’s market, added our own kraft paper tags et voila! Everyone gets their own baby pumpkin on their plate!

DIY Thanksgiving Pumpkin Place CardsMaterials: Mini pumpkins, metallic acrylic paint, a paint brush, kraft paper, scissors, hole punch, white stamp pad, alphabet stamps, and twine.

Directions:
1. Clean pumpkins with a wet paper towel and dry off completely.
2. Paint pumpkins with acrylic paint and let dry completely (We used white pumpkins so we only needed one coat of paint to cover them! You might need two or three coats with an orange pumpkin).
3. Cut kraft paper into tags and hole punch a little hole in the top left corner for the twine.
4. Using the stamps and stamp pad, add names to each tag. Let dry.
5. Thread twine through the hole in the tag and tie around pumpkin stem loosely.

DIY Thanksgiving Pumpkin Place Cards

DIY Thanksgiving Pumpkin Place Cards

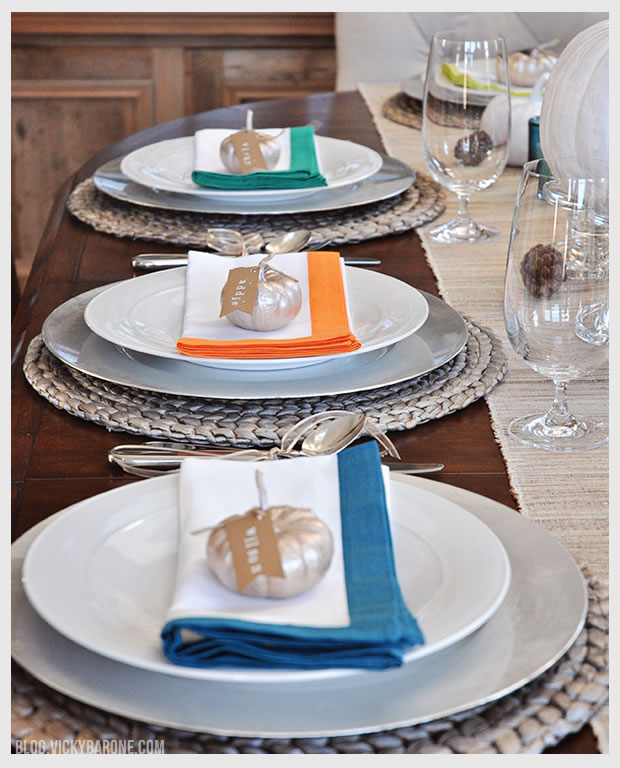
Don’t they look pretty on our multicolored napkins?
We hope everyone is having fun with their Thanksgiving plans! Check out our table set up for more ideas!

Categories
DIY Holidays Lifestyle Parties and Events

Thanksgiving Table Setting

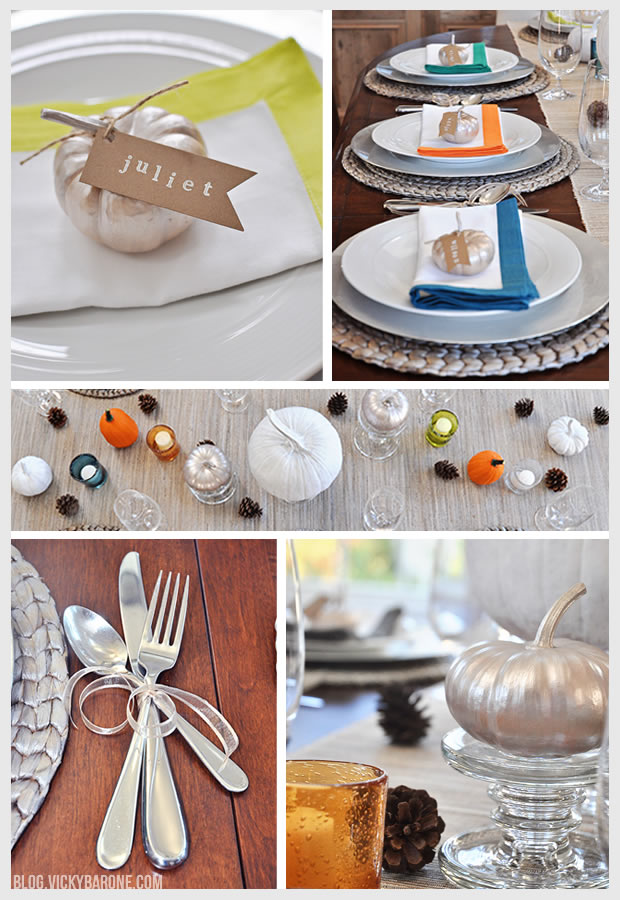
Tada! Our very own Thanksgiving table setting! You might have seen some of our favorite inspirations here, but now we’ve styled our very own! We mixed very simple natural elements with bright pops of color to create a modern and rustic Thanksgiving table. We’re so excited to add food and family and make the holiday complete!

Thanksgiving Table SettingHere are some of the elements we pulled together for our table:
Painted Pumpkin place cards
Metallic Placemats from Pier 1 Imports
Table Runner from Pier 1 Imports
Multicolor Border Napkins from Crate and Barrel
Glass Votives from Target
Ribbon tied silverware
Decorative pine cones from Joann
Pumpkins from North Carolina State Farmers Market

We hope you are all having fun planning your own Thanksgiving celebrations! Check back to see more ideas as the holidays approach!

Categories
DIY Holidays Lifestyle Parties and Events Projects

DIY Fall Flower Arrangement

Fresh flowers are beautiful, but buying them from a flower shop in already-made arrangements can be pricey. Here’s a quick and simple way to make your own arrangement using a cheap bouquet from the grocery store. We used a 4 dollar bouquet and a simple glass vase from the dollar store and created this low arrangement that’s perfect for our Thanksgiving table!

DIY Fall Flower Arrangement

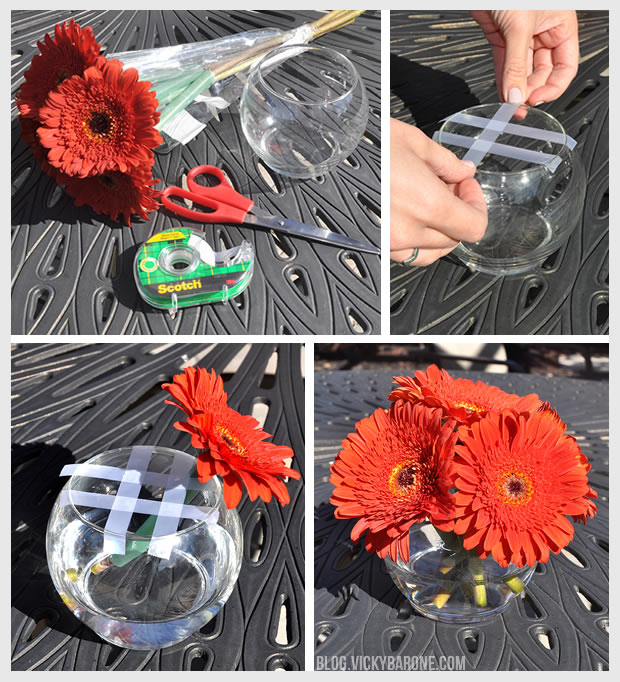
Materials: A small bouquet of fresh flowers, a vase, tape, and scissors.

Directions:
1. Put water and flower food into your vase, making sure the outside of the vase is dry so the tape will stick.
2. Use tape to create a crisscross pattern on the top of the vase.
3. Cut each flower stem at a diagonal and place each into their own hole in the tape lattice.

Now you have a beautiful low flower arrangement to add to your Thanksgiving centerpiece.
Check out the flower arrangements we made for our Pizza and Champagne Party!

P.S. With the support of the tape and a few more bouquets, you can make an even bigger arrangement! Martha Stewart shows you how with thisĀ large bowlĀ and some beautiful dahlias.

Categories
DIY Holidays Kids

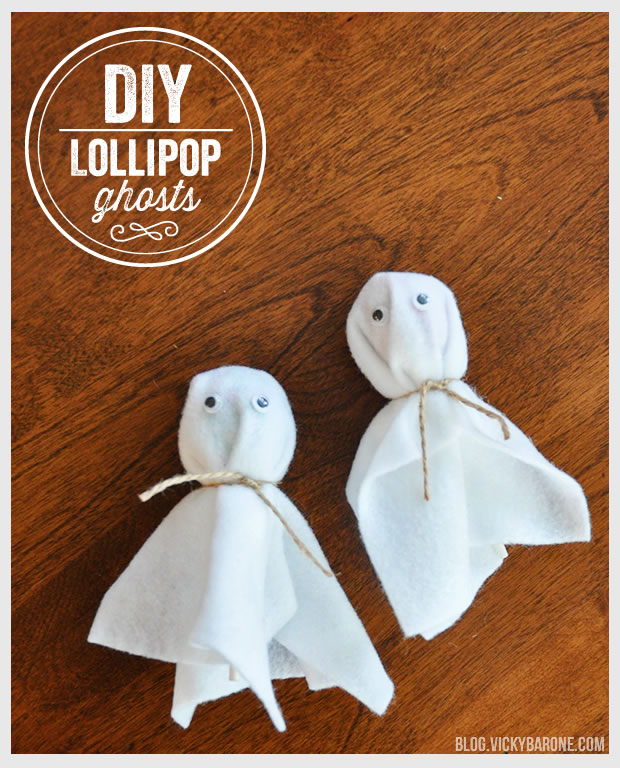
DIY Lollipop Ghosts

We’ve been boo-ed! Have you?
When you’re stretched for time, it’s tempting to re-gift your “Boo” Bag, isn’t it? We fought that urge this morning when we were boo-ed and made a quick craft for our neighbors to enjoy (or maybe re-gift??).

If you’ve been boo-ed, try this cute five-minute craft with lollipops, felt, twine or ribbon, googly eyes, and glue!

DIY Lollipop GhostsCheck out the You’ve Been Booed Website for more ideas! Happy Halloween!