Categories
DIY

DIY Metallic Pumpkin Planters

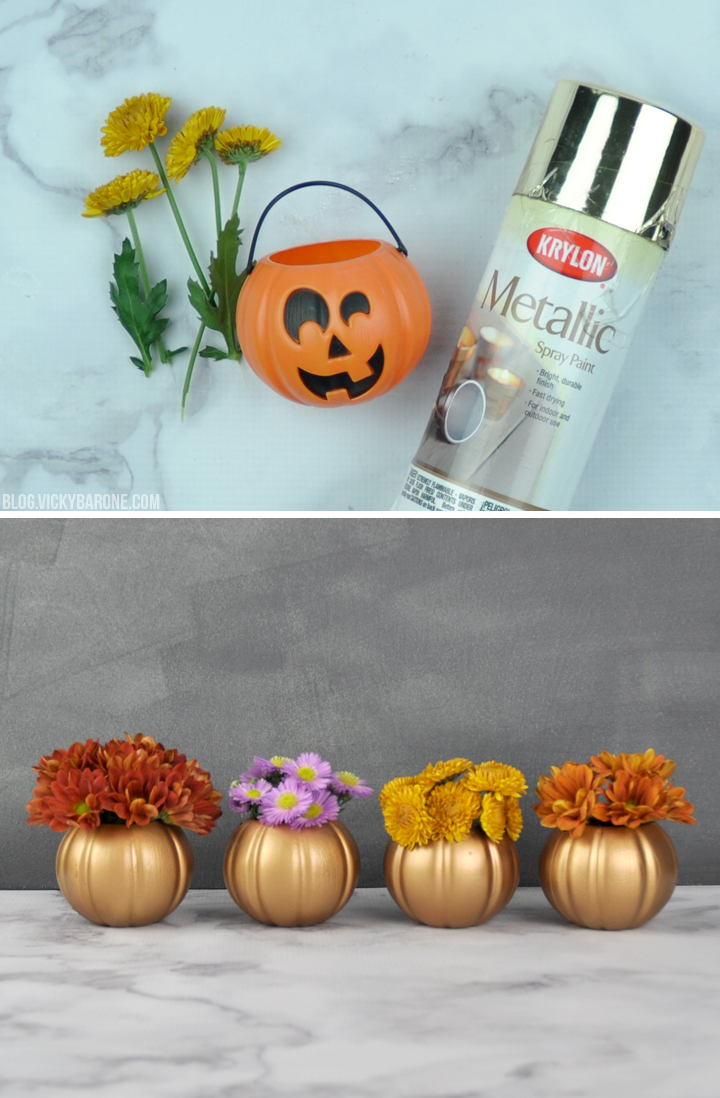
Before you pack away or toss out your Halloween decorations, how about a little spray paint to transition them into Thanksgiving mode? We took these mini plastic jack-o-lanterns and made them November-ready with a little metallic sheen. Here’s how…
DIY Metallic Pumpkin Planters | Vicky Barone

Supplies: mini plastic jack-o-lantern buckets (we got ours at Target, but they can be found in the Dollar Store too!), metallic spray paint, and fresh flowers.

Directions:
1. Remove the plastic handles and discard.
2. In a well-ventilated area (preferably outside!) spray paint the pumpkins.
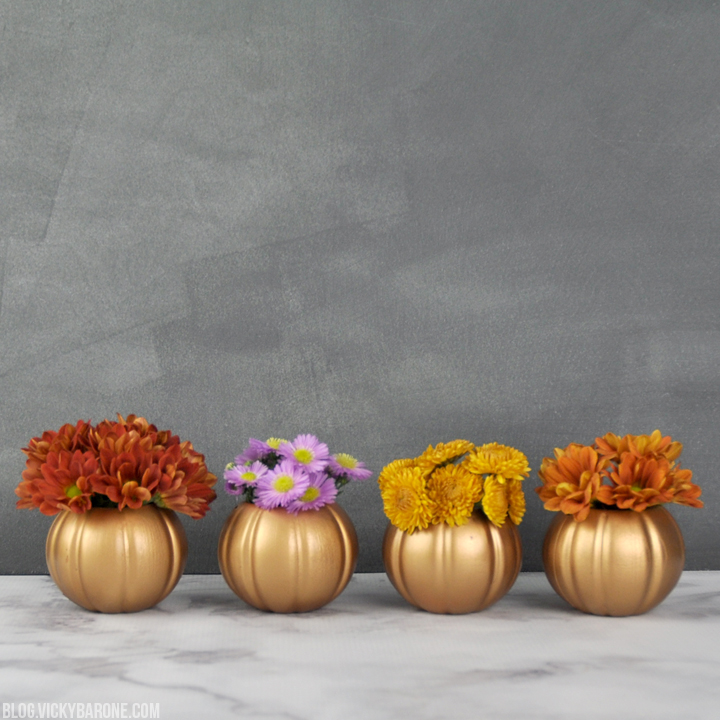
3. When they pumpkins are fully coated and dry, add some water and fresh flowers.

DIY Metallic Pumpkin Planters | Vicky Barone DIY Metallic Pumpkin Planters | Vicky Barone DIY Metallic Pumpkin Planters | Vicky Barone

Aren’t they sweet? How will you decorate with your metallic planters?

Categories
DIY Family Holidays

Candy Flowers for Mother’s Day

Today we’re combining everyone’s go-to gifts, candy AND flowers, into one sweet and thoughtful Mother’s Day present.

Candy Flowers for Mother's Day | Vicky Barone

Supplies: colorful cardstock, floral wire, scissors, felt, glue, and wrapped chocolate candies.

Directions:
1. Cut flower shapes out of the card stock. Poke a small hole into the center of each flower.
2. Cut a length of wire and fold the end a few times to make a loop or knot.
3. Stick a piece of wire through the center of a flower. The loop you made on the end will stop the wire from going all the way through. Fold the wire coming out the back of the flower down.
4. Fold a piece of felt in half and cut a leave shape out of it, leaving the fold intact.
5. Fold the felt leaf around a wire stem and glue to hold in place.
6. Glue the chocolate candies to the centers of the flowers.
7. Carefully fold the flower petals upwards to give them a little depth.

Tada! A chocolately treat for moms to put on display (and eat of course!).

If you’re looking for more Mother’s Day ideas, check out these past posts:
Mother’s Day Gift Guide
DIY Mother’s Day Gifts
Mother’s Day Gifts on Etsy

Categories
DIY

DIY Tissue Paper Flowers

Happy First Day of Spring! If you’re having a dreary start to your Spring Equinox like we are, maybe some flowers will brighten up your day!

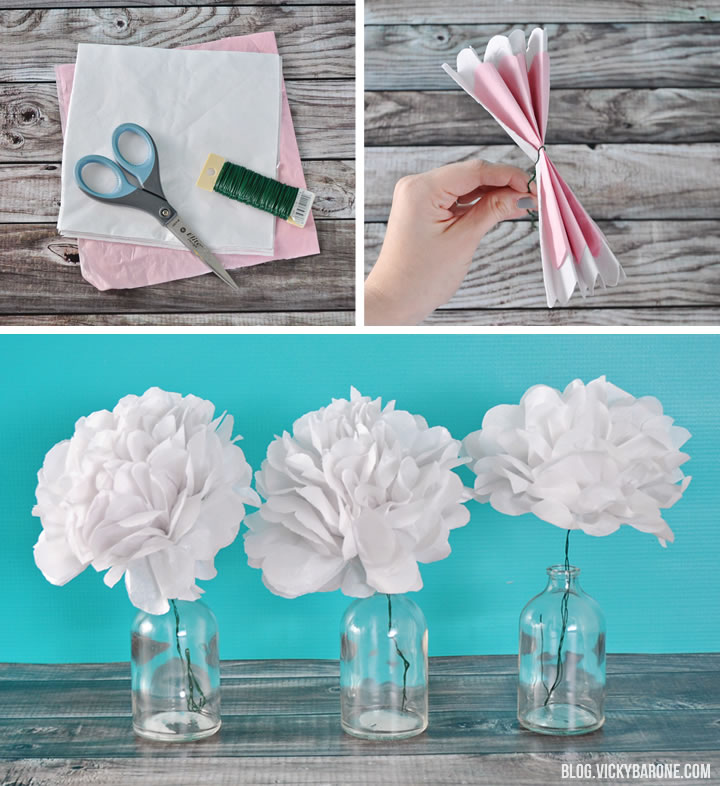
We made these tissue paper flowers using the same method used to make these tissue paper pom poms. Instead of fluffing up the paper on both sides to make a globe shape, we pulled the paper upwards only to create a flower.

Diy Tissue Paper Flowers | Vicky Barone

Supplies: tissue paper, scissors, floral wire.

Directions:
1. Stack 5-7 pieces of tissue paper (ours were 6″x6″ squares) and fold it up accordion style.
2. Twist the floral wire around the middle of the folded tissue paper and create a “stem.”
3. Cut each end of the accordion into a semi circle shape. This will create the scalloped edges of the flower.
4. Holding the stem in your hand (similar to picture two above) carefully pull each sheet of tissue paper up and away from the bunch. Repeat this until all of the pieces are separated.
5. Add your tissue paper flower to a vase!

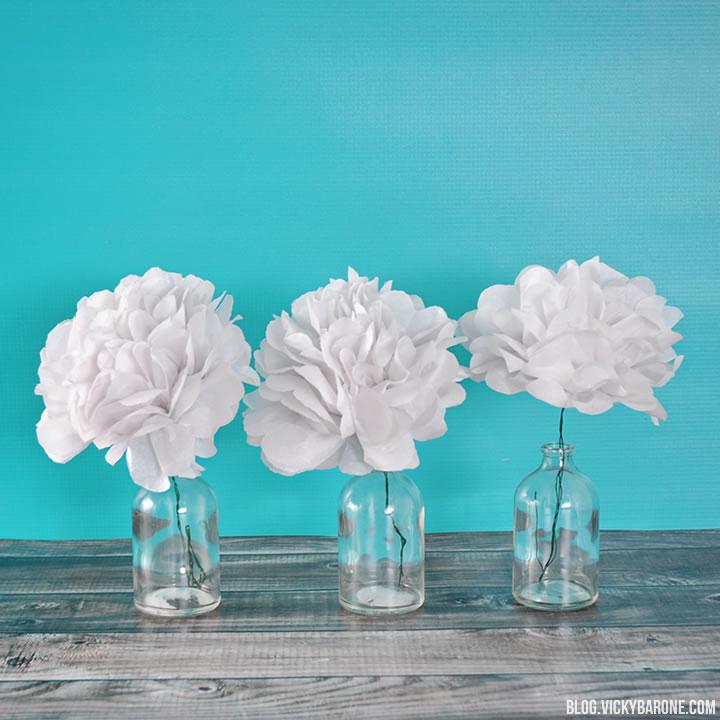
You can use all kinds of colored tissue paper to create a rainbow of flowers and even mix colors within one flower. Cutting different shapes into the ends of the accordion other than a semi circle will also create an array of different types of flowers.

DIY Tissue Paper Flowers | Vicky Barone

We hope you have a happy first day of Spring!

Categories
DIY

DIY Floral Monogram

We’ve seen these floral monogram letters all over Pinterest and thought they would make a great gift! Keep reading to find out how to make your own.

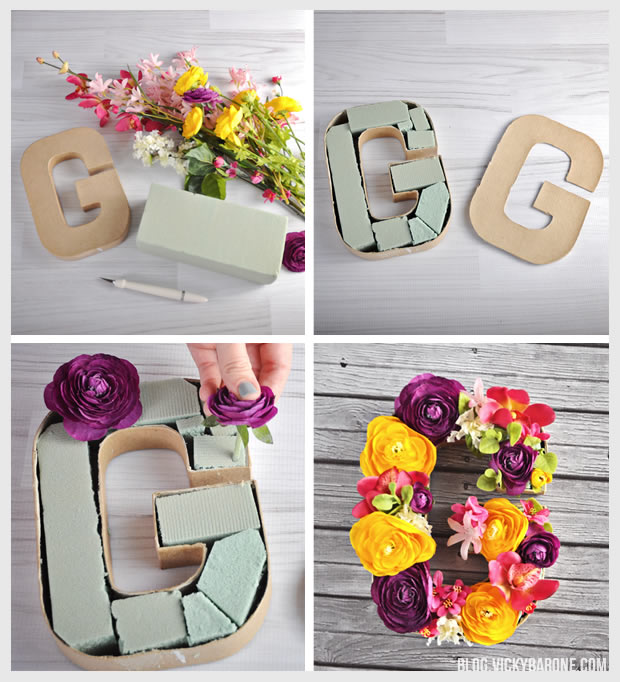
DIY Floral Monogram | Vicky Barone

Supplies: Paper mache letter, X-acto knife, fake flowers, scissors, and a foam block.

Directions:
1. Use the X-acto knife to cut off the face of the paper mache letter. Hollow the letter by discarding the pieces of cardboard you find inside.
2. Cut the dry foam block into smaller pieces to fit inside the letter.
3. Cut the fake flowers, leaving about an inch of stem.
4. Push the stems of the flowers into the dry foam and arrange them however you like.

This can also be done with real flowers as well! Just soak the dry foam in water to help keep the flowers looking fresh.

Categories
DIY Kids Parties and Events

DIY Flower Crown

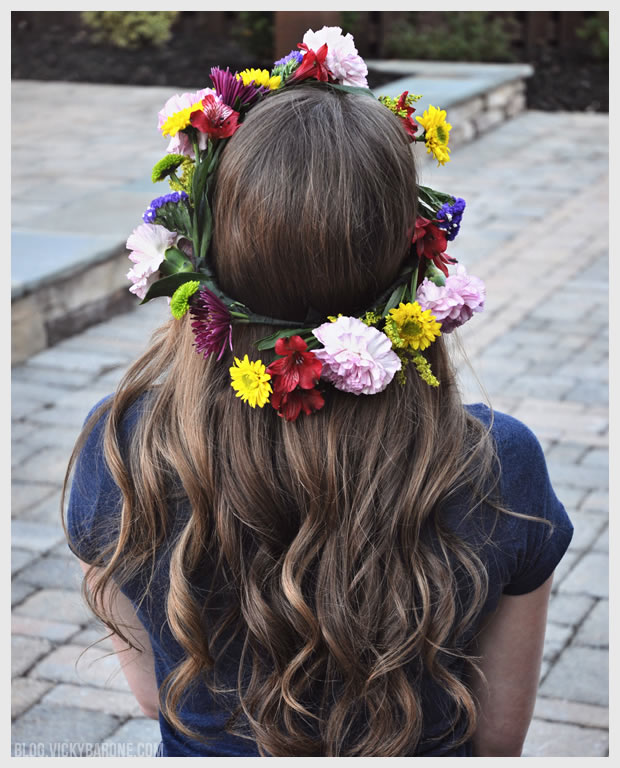
We’re jumping on the flower crown bandwagon with this pretty Spring project and we’re inviting you to come along with us! Flower crowns are surprisingly SO easy to make and can be worn in weddings, on birthdays, or just on a regular Spring day to feel special.

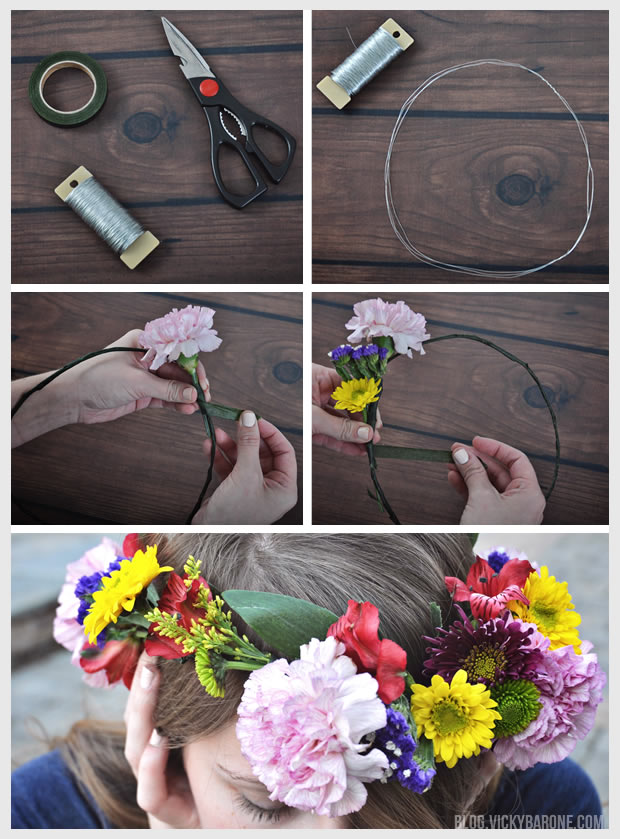
DIY Flower Crown | Vicky Barone

Materials: Wire, floral tape, scissors, and fresh flowers (we used two grocery store bouquets!).

Directions:
1. Cut a piece of sturdy wire about two or three times the circumference of your head and wrap it into a circle, securing the ends.
2. Wrap the entire wire halo in floral tape.
3. Cut fresh blooms about three or four inches from the base (you can trim the stems more once they are attached to the crown).
4. Place a flower against the crown and begin taping the stem until it feels secure.
5. Add more flowers moving backwards around the crown so that each flower covers the last flower’s stem.
6. Continue adding flowers until the entire crown is full OR cover only half of the crown to create more of a headband look.

DIY Flower Crown | Vicky Barone

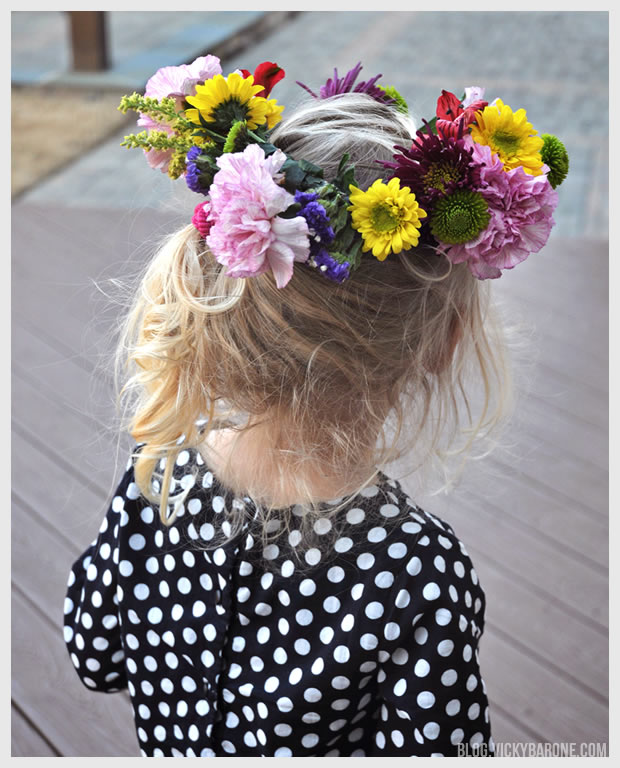
Isn’t that easy? And look how sweet it is on this little angel:

DIY Flower Crown | Vicky BaroneThe boys took turns wearing it as well, but we’ll save those photos as leverage for later on 😉

We hope everyone is enjoying Spring and not getting too bogged down by all this pollen!

Categories
DIY Things I Love

Things I Love: Spring Flower Arrangements

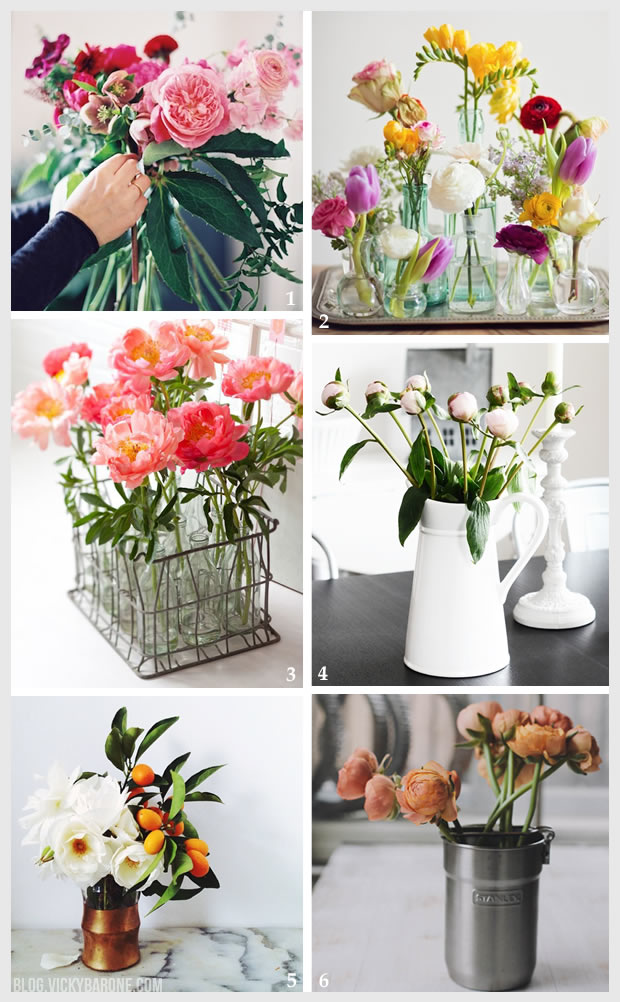
1. Hand Tied | 2. Recycled Bottles | 3. Milk Crate | 4. White Pitcher | 5. Kumquats | 6. Ranunculus 

This rainy day calls for some Spring flowers. Here are some simple and creative ways to decorate your home with fresh blooms. Using things like recycled containers and fruits adds an unexpected twist to a simple arrangement.

We hope you enjoy your rainy Monday and don’t forget: April showers bring May flowers!

Categories
DIY Holidays Things I Love

Things I Love: DIY Spring Wreaths

1. Flowers and Fruit | 2. Living Succulents | 3. Crepe Paper Flowers | 4. Rattan Balls | 5. Hydrangeas | 6. Easter Bunny | 7. Felt Flowers | 8. Baby’s Breath

Spring is officially here! We are so excited for all things Spring, including a new wreath for our front door! Here are 8 wreaths you can make yourself (including ours from last year!). Enjoy!

Categories
DIY Holidays Lifestyle Parties and Events Projects

DIY Fall Flower Arrangement

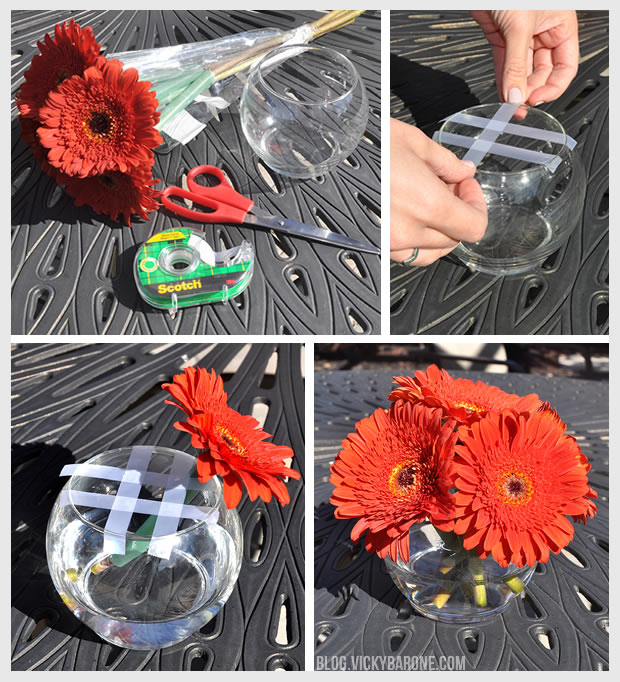
Fresh flowers are beautiful, but buying them from a flower shop in already-made arrangements can be pricey. Here’s a quick and simple way to make your own arrangement using a cheap bouquet from the grocery store. We used a 4 dollar bouquet and a simple glass vase from the dollar store and created this low arrangement that’s perfect for our Thanksgiving table!

DIY Fall Flower Arrangement

Materials: A small bouquet of fresh flowers, a vase, tape, and scissors.

Directions:
1. Put water and flower food into your vase, making sure the outside of the vase is dry so the tape will stick.
2. Use tape to create a crisscross pattern on the top of the vase.
3. Cut each flower stem at a diagonal and place each into their own hole in the tape lattice.

Now you have a beautiful low flower arrangement to add to your Thanksgiving centerpiece.
Check out the flower arrangements we made for our Pizza and Champagne Party!

P.S. With the support of the tape and a few more bouquets, you can make an even bigger arrangement! Martha Stewart shows you how with this large bowl and some beautiful dahlias.