Categories
DIY Holidays Parties and Events

DIY New Year’s Eve Canvas

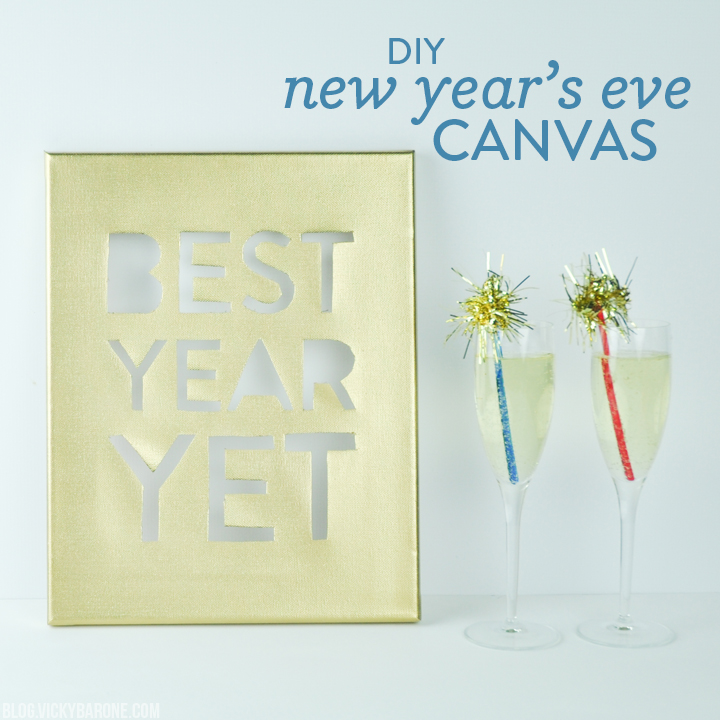
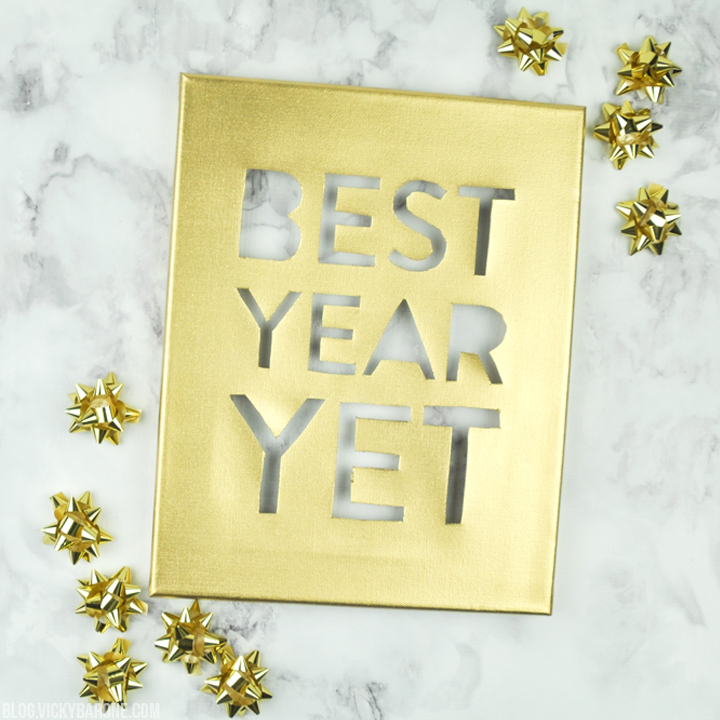
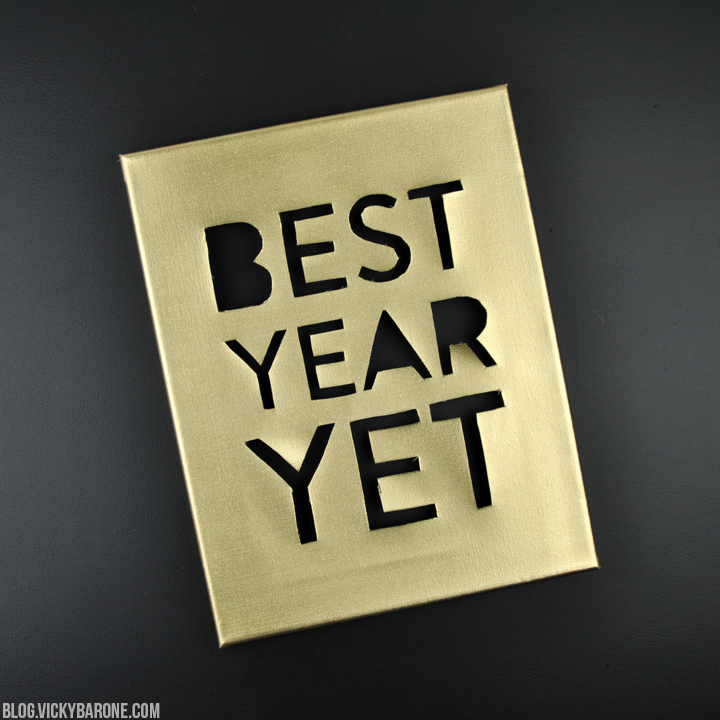
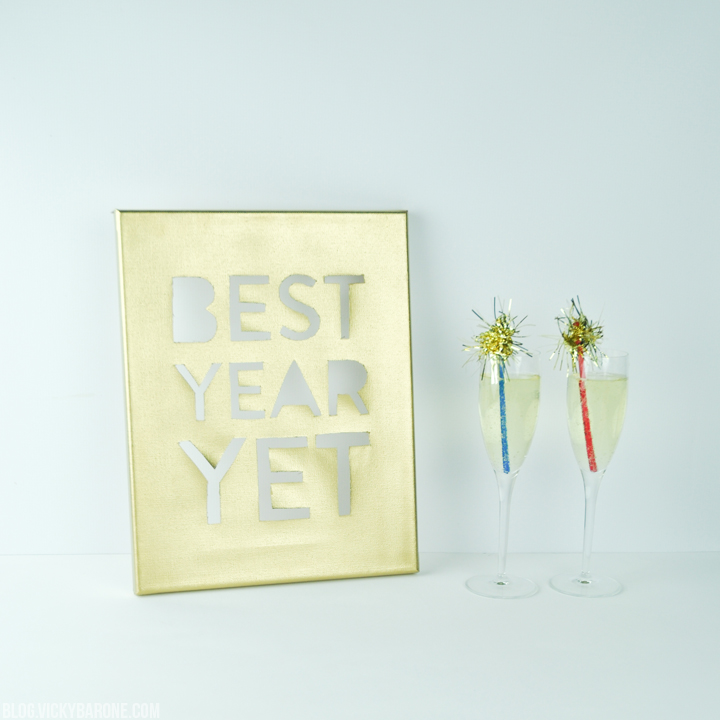
We think 2017 is going to be our best year yet! Here’s how to make a gold cut-out canvas to display at your New Year’s Eve party to celebrate that sentiment…

DIY New Year's Eve Canvas | Best Year Yet | Vicky Barone

Supplies: a canvas, an X-acto knife, a printed quote, self-healing mat, and gold spray paint.

Directions:
1. Create a design or quote you’d like on your canvas and print it backwards (this will create a stencil that you will use on the back of the canvas!).
2. Place the canvas on a self-healing mat, face down.
3. Tape the stencil to the inside of the canvas.
4. Use the X-acto knife to cut away the letters or design (you will be cutting through the paper stencil and the canvas)
5. Neaten up the canvas with an X-acto knife or small scissors.
6. In a well-ventilated area (preferably outside!) cover the canvas with gold spray paint and let dry.
7. Decorate with your new canvas and celebrate the new year!

DIY New Year's Eve Canvas | Best Year Yet | Vicky Barone DIY New Year's Eve Canvas | Best Year Yet | Vicky Barone

For even more NYE ideas, click here!

Categories
DIY Holidays Parties and Events

DIY Starry Headbands

It’s not even Christmas yet, but we are already getting so excited for New Year’s Eve! To celebrate, we created these sparkly headbands to wear while you watch the ball drop. Here’s how to make your own…

DIY Starry Headbands | Vicky Barone

Supplies: plastic headbands, wire, scissors, glittery paper, and hot glue.

Directions:
1. Cut different sized star shapes out of glitter paper.
2. Cut a length of wire and roll the end of it into a flat coil (this will give more surface area for the hot glue to stick to).
3. Attach a star to the coil using hot glue. Repeat until all of the stars are glued to pieces of wire.
4. Wrap the other end of the wire to the headband until the star is at the desired height.
5. Repeat with the rest of the stars until the headband is full.
6. Wear and enjoy!

DIY Starry Headbands | Vicky Barone DIY Starry Headbands | Vicky Barone

What are your plans for ringing in the new year? We’d love to hear!

Categories
DIY

DIY Felt Holly Coffee Sleeve

Christmas is just 11 days away, can you believe it?! Today we’re sharing a holly coffee sleeve to get you and your coffee into the Christmas spirit!

DIY Felt Holly Coffee Sleeve | Vicky Barone

Supplies: red and green felt, scissors, and hot glue.

Directions:
1. Cut holly leaves out of the green felt. We sketched up a holly leaf we liked on card stock and cut it out to make a stencil so each of the leaves were identical.
2. Cut holly berries out of the red felt.
3. Glue holly pieces together in sections. Glue two holly leaves together and add berries on top until you have three holly shapes.
4. Measure around your to-go cup to see how much length you will need.
5. Glue holly shapes together, overlapping them if necessary to make the circle the right size for the cup.
6. Slide the holly sleeve over your cup and enjoy!

DIY Felt Holly Coffee Sleeve | Vicky Barone DIY Felt Holly Coffee Sleeve | Vicky Barone

These would make great last minute DIY gifts for friends and family! We hope you’re having a wonderful week and getting excited for the holidays!

Categories
DIY Holidays Things I Love Uncategorized

Thanksgiving Garland Round-Up

Happy Thanksgiving! We hope your day is filled with lots of food, love, and thankfulness! We thought we’d share a little garland round up if you’re looking for some last-minute decor. Click the links below to see how to make each one!

Happy Thanksgiving 2016 | Garland Round Up | Vicky Barone

felt leaves | give thanks | felt pumpkins | pumpkin pie

Categories
DIY

DIY Bleach Pen Napkins

This post contains affiliate links. If purchased, I will receive a commission, but the price stays the same for you!

We are so excited for Thanksgiving tomorrow! Today we’re sharing a fun DIY to personalize your table settings. Here’s how…

DIY Bleach Pen Napkins | Vicky Barone

We have seen the idea for bleach pen napkins all over Pinterest and we just had to try it out for ourselves.

Supplies: fabric napkins (ours were from Target), a bleach pen, and cardboard.

Directions:
1. Test out your bleach pen writing skills on a piece of scrap cardboard before using it on a napkin. Once you feel comfortable with the flow of the bleach, you can get started!
2. Place another piece of cardboard underneath a napkin to catch any bleach that may seep through.
3. Choose the place on your napkin that you want your word or design and carefully draw it on with the bleach pen.
4. Set a timer for 10 minutes and check on your napkin. We found that with the lighter napkins, the bleach worked very quickly, but the darker napkins needed more time.
5. When the bleach has done it’s job, put the napkin under running water to remove the excess bleach.
6. Let the napkins dry and they are ready to go!

DIY Bleach Pen Napkins | Vicky Barone

P.S. Find these DIY pear place cards right here!

Categories
DIY Holidays Parties and Events

DIY Thanksgiving Place Cards

Happy Thanksgiving week! Today we’re sharing a super easy, last-minute place card tutorial to spice up your Thanksgiving tablescape! Here’s how to make your own…

DIY Thanksgiving Place Cards | Vicky Barone

Materials:
– Faux pears (we got ours at Marshalls, but you can find faux fruit at any craft store!)
– An X-acto knife
– White card stock
– A pen or marker (we used Tombow Dual Brush Pens)

DIY Thanksgiving Place Cards | Vicky Barone

Directions:
1. Cut white card stock into small rectangles. Ours were about 2×3″
2. Use the X-acto knife to make a slit in the top of each of the pears.
3. Use a pen or marker to write names on each card (you can also print out name cards with your favorite font!).
4. Insert cards into pears and set on the table!

DIY Thanksgiving Place Cards | Vicky Barone DIY Thanksgiving Place Cards | Vicky Barone DIY Thanksgiving Place Cards | Vicky Barone

We hope you have the most wonderful Thanksgiving! For even more table setting ideas, click here!

For ideas about how to put together a functional and elegant table setting, check this out!

Categories
DIY

DIY Metallic Pumpkin Planters

Before you pack away or toss out your Halloween decorations, how about a little spray paint to transition them into Thanksgiving mode? We took these mini plastic jack-o-lanterns and made them November-ready with a little metallic sheen. Here’s how…

DIY Metallic Pumpkin Planters | Vicky Barone

Supplies: mini plastic jack-o-lantern buckets (we got ours at Target, but they can be found in the Dollar Store too!), metallic spray paint, and fresh flowers.

Directions:
1. Remove the plastic handles and discard.
2. In a well-ventilated area (preferably outside!) spray paint the pumpkins.
3. When they pumpkins are fully coated and dry, add some water and fresh flowers.

DIY Metallic Pumpkin Planters | Vicky Barone DIY Metallic Pumpkin Planters | Vicky Barone DIY Metallic Pumpkin Planters | Vicky Barone

Aren’t they sweet? How will you decorate with your metallic planters?

Categories
DIY Holidays

DIY Pumpkin Pie Garland

Thanksgiving is coming up and we are making fun decor to get into the spirit! Today we’re sharing a DIY paper garland with everyone’s favorite Thanksgiving dessert…

DIY Pumpkin Pie Garland | Vicky Barone

Supplies: brown and tan paper, mini white pom poms, craft glue, scissors, and twine.

Directions:
1. Cut triangles out of the tan paper to create the base of the pie slices.
2. Cut the brown paper into thin strips.
3. Accordion fold the brown paper and trim to fit the top of the tan pie slices.
4. Glue the brown paper crust to the top of the tan pie slices.
5. Glue the pom poms to the center of each pie slice.
6. When all the glue is dry, flip each of the pie slices over and attach twine to the backs.
7. Hang up your delicious garland and enjoy!

DIY Pumpkin Pie Garland | Vicky Barone

Want to make the felt leaf garland? Click here!

DIY Pumpkin Pie Garland | Vicky Barone

DIY Pumpkin Pie Garland | Vicky Barone DIY Pumpkin Pie Garland | Vicky Barone

DIY Pumpkin Pie Garland | Vicky Barone

Be sure to follow Vicky Barone on Instagram for lots more holiday inspiration!