Categories
DIY Kids

DIY Olympic Gold Medals

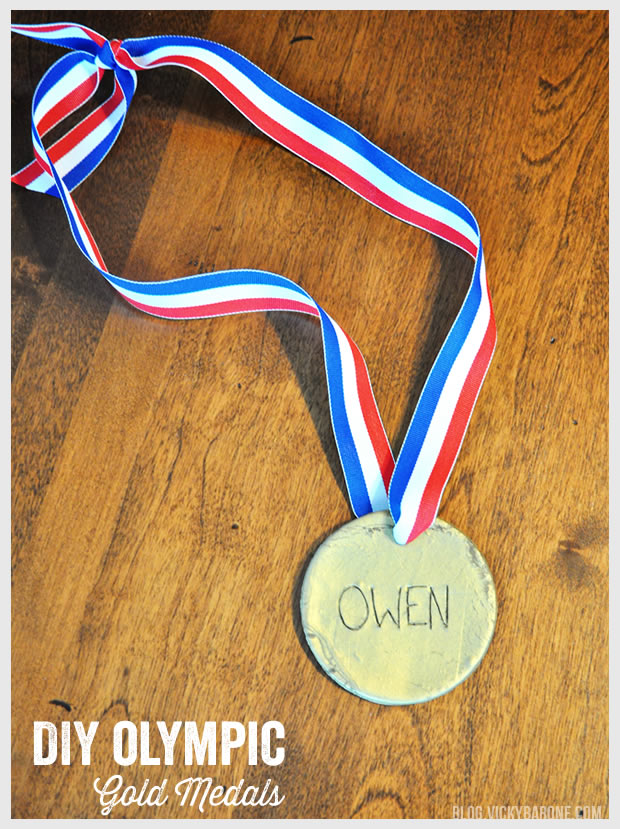
In honor of the 2014 Winter Olympics, we made our very own gold medals! This is a fun and easy project for kids. They can write their names in the medals or even paint them after the medals are baked and cooled.

DIY Olympic Gold Medals | Vicky Barone
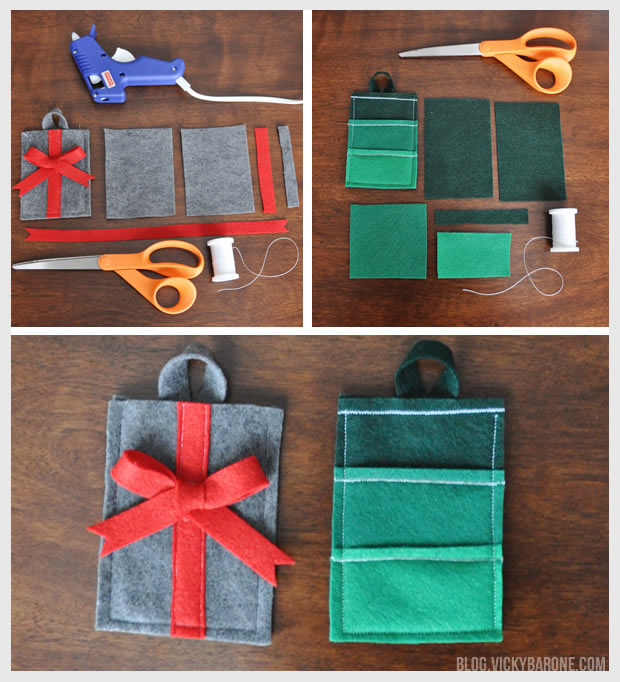
Materials: Polymer clay in Antique Gold, ribbon, scissors, waxed paper, a rolling pin, a straw, a toothpick, and a round object to cut a circle in the clay.

Directions:
1. Roll out the clay on waxed paper with a rolling pin. Put waxed paper between the clay and rolling pin or use a glass jar in place of a rolling pin. Do not mix cooking utensils with clay!
2. Use a circular object to cut a circle into the clay. We used the lid to an old tupperware container that we then threw away.
3. Use a straw to make a hole in the top of the clay circle for your ribbon.
4. Use a toothpick to draw a name or the number 1 into the clay.
5. Bake the clay medals on a cookie sheet lined with aluminum foil according to the baking directions on the clay packaging.
6. Once the medals are cool, cut the ribbon to size and thread it carefully through the holes of the medals and tie a knot.

Tada! Now you and your kids can be Olympic gold medalists!


Categories
DIY Holidays Kids Things I Love

Things I Love: DIY Valentines

1. Lollipop Flower | 2. Seed Paper Heart | 3. Crayon Heart | 4. Paper Heart Breakers | 5. Fruit Roll-Up Fortune Cookies | 6. Candy Heart Bracelet

We love DIY Valentines! Here are six great ideas for do-it-yourself Valentines that are great for kids. Just add a sweet message and share the love!

Follow Vicky Barone on Bloglovin’ for more Valentine’s Day ideas!

Categories
DIY Holidays My Projects Parties and Events

DIY Valentine’s Day Garland

This post contains affiliate links. If purchased, I will receive a commission, but the price stays the same for you!

Here’s our first Valentine’s Day decoration of the season! We love how colorful and happy this garland is and we’re excited for Valentine’s Day already!

DIY Valentine's Day Garland | Vicky BaroneMaterials: scrapbook paper, adhesive chipboard alphabet letters (similar), mini clothespins, a paper cutter and/or scissors, and twine. You can find all of these materials in your local craft store!

The above supplies contain affiliate links. If purchased, I will receive a commission, but the price stays the same for you!

Directions:
1. Using a paper cutter, cut scrapbook paper into 2.5 x 5 inch rectangles.
2. Cut a triangle out of the bottom of each paper rectangle using scissors. We made a stencil out of scrap paper to make sure each triangle cut was the same.
3. Remove the backing from the adhesive letters and attach to each paper flag.
4. Cut three long pieces of twine and attach each flag with a mini clothespin, leaving equal space between the flags and extra twine on each end for hanging.

DIY Valentine's Day Garland | Vicky Barone

If you like this garland, be sure to check out our Thanksgiving, Christmas, and New Year’s Eve garlands as well!

Follow Vicky Barone on Pinterest for even more great Valentine’s Day Ideas!

Categories
DIY Holidays Things I Love

Things I Love: DIY Valentine’s Day Gifts

1. Coordinates Print | 2. Heart Soap | 3. Snow Globe | 4. I Love You Cards | 5. Painted Heart Bag | 6. Special Dates Print

Looking for the perfect gift for a loved one this Valentine’s Day, but don’t want to break the bank? The most thoughtful gifts can be handmade! Here are six ideas for DIY gifts that are sure to put a smile on your Valentine’s face.

Follow Vicky Barone on Bloglovin’ to keep up with all of our Valentine’s Day ideas!

Categories
DIY Holidays Projects

Felt Flower Christmas Wreath

One week until Christmas! Can you believe it?

We have been so happy to share all of our Holiday crafts, gift guides, and recipes with all of you throughout December, and we’re not done yet! Our next project is this candy cane striped Christmas wreath! You might recognize it from the Interchangeable Felt Flower Wreath we made earlier this year. It has served us so well over the past few months during the fall, football season, Halloween, and Thanksgiving. We were not kidding when we said it was interchangeable!

For this Christmas wreath, we filled the entire circle with red and white flowers in a striped pattern to create a candy cane inspired wreath! We love the way it looks on the front door.

For the full felt flower wreath tutorial click here!

Happy Christmas crunch time, everyone!

Categories
DIY Family Holidays Kids

Ice Cream Cone Christmas Trees

We’ve seen this craft floating around Pinterest so we thought we’d give it a try! This is a super simple project for you and your kids to enjoy! Put on some Christmas music and try not to eat all the m&ms.

Ice Cream Cone Christmas Trees

Materials: Ice cream cones, white icing, green food coloring, m&ms, red and green sprinkles, coconut, marshmallows, and any other treats you’d like to add!

Directions:
1. Mix 10-20 drops of green food coloring into the white icing until you get the shade of green you like (we used about 10).
2. Using a knife, spread the green icing on each of the ice cream cones and set down on a plate in the arrangement you like (this part is the messiest, so do this for your youngest kids!).
3. Add candies to decorate!
4. Spread coconut around the base of the trees to look like snow.

Ice Cream Cone Christmas Trees

Tada! Now you have a tasty winter forest that goes great with a neighborhood of gingerbread houses!

P.S. You probably don’t want to eat these after they’ve been sitting out, but maybe Santa’s reindeer might be interested in them…

Categories
DIY Holidays Projects Things I Love

Things I Love: Popsicle Stick Ornaments

1. Sled | 2. Snowflake | 3. Christmas Characters | 4. Reindeer | 5. Snowman | 6. Christmas Tree

How cute are these ornaments? All you need for these fun holiday crafts for kids are some Popsicle sticks, paint, glue, and a little imagination! Click on the sources above for full tutorials on each ornament.

Happy crafting!

Categories
DIY Holidays Lifestyle Projects Uncategorized

DIY Felt Gift Card Holders

Add a personal touch to those less-than-personal gift cards with these adorable felt gift card holders! They are perfect to hang on the Christmas tree or tuck into a card this holiday season!

DIY Felt Gift Card HoldersMaterials: Felt, scissors, all-purpose thread, a hot glue gun, and a sewing machine.

DIY Felt Gift Card Holders

Directions:
1. For the main pocket and loop, cut felt into two 3.25″ x 2.25″ rectangles and one 4″ x 0.5″ strip.
2. To decorate the front of the gift card holder, cut different colored felt into different sizes and shapes to create the designs you like! See the pictures above and below for ideas.
3. Make a loop with the 4″ x 0.5″ strip and sew onto back rectangle.
4. Sew design onto front rectangle using different types of stitching (you can also hot glue any pieces to the front – like our red bow)
5. Sew front and back rectangles together, leaving the top open to insert a gift card.
6. Trim edges of felt to create clean lines and any excess thread.

DIY Felt Gift Card Holders

Make sure you loosen the stitching on your sewing machine before starting this project, otherwise the felt will stretch and your rectangles will look a little lopsided. If you don’t have a sewing machine, no worries! These can also be hand stitched or simply hot glued. Felt is very versatile so be creative!

P.S. These gift card holders look great with our Wine Bottle Holiday Sweaters 😉