Categories
DIY Holidays My Projects Parties and Events

DIY Valentine’s Day Garland

This post contains affiliate links. If purchased, I will receive a commission, but the price stays the same for you!

Here’s our first Valentine’s Day decoration of the season! We love how colorful and happy this garland is and we’re excited for Valentine’s Day already!
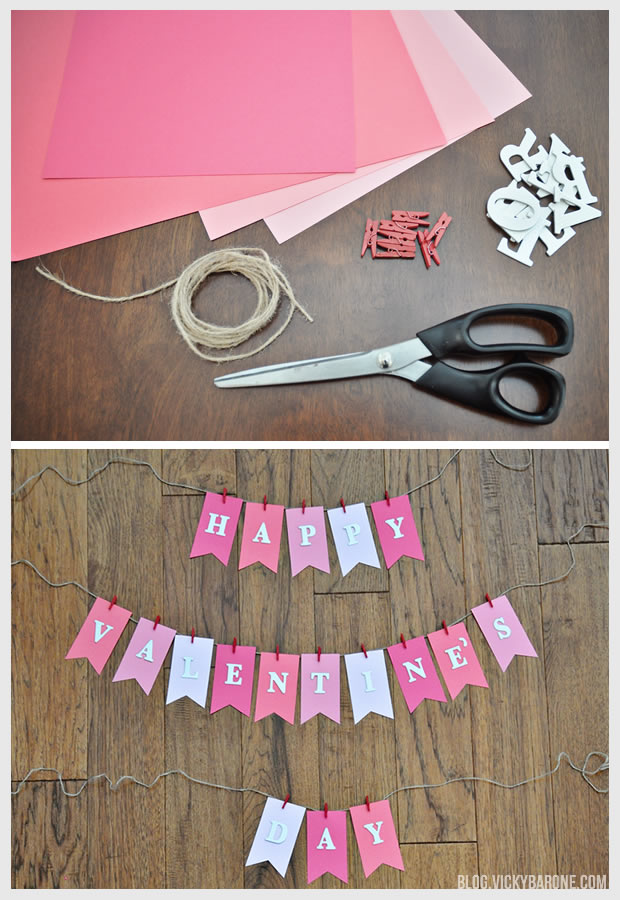
DIY Valentine's Day Garland | Vicky BaroneMaterials: scrapbook paper, adhesive chipboard alphabet letters (similar), mini clothespins, a paper cutter and/or scissors, and twine. You can find all of these materials in your local craft store!

The above supplies contain affiliate links. If purchased, I will receive a commission, but the price stays the same for you!

Directions:
1. Using a paper cutter, cut scrapbook paper into 2.5 x 5 inch rectangles.
2. Cut a triangle out of the bottom of each paper rectangle using scissors. We made a stencil out of scrap paper to make sure each triangle cut was the same.
3. Remove the backing from the adhesive letters and attach to each paper flag.
4. Cut three long pieces of twine and attach each flag with a mini clothespin, leaving equal space between the flags and extra twine on each end for hanging.

DIY Valentine's Day Garland | Vicky Barone

If you like this garland, be sure to check out our Thanksgiving, Christmas, and New Year’s Eve garlands as well!

Follow Vicky Barone on Pinterest for even more great Valentine’s Day Ideas!

Categories
DIY Holidays Things I Love

Things I Love: DIY Valentine’s Day Gifts

1. Coordinates Print | 2. Heart Soap | 3. Snow Globe | 4. I Love You Cards | 5. Painted Heart Bag | 6. Special Dates Print

Looking for the perfect gift for a loved one this Valentine’s Day, but don’t want to break the bank? The most thoughtful gifts can be handmade! Here are six ideas for DIY gifts that are sure to put a smile on your Valentine’s face.

Follow Vicky Barone on Bloglovin’ to keep up with all of our Valentine’s Day ideas!

Categories
DIY Holidays Parties and Events Projects

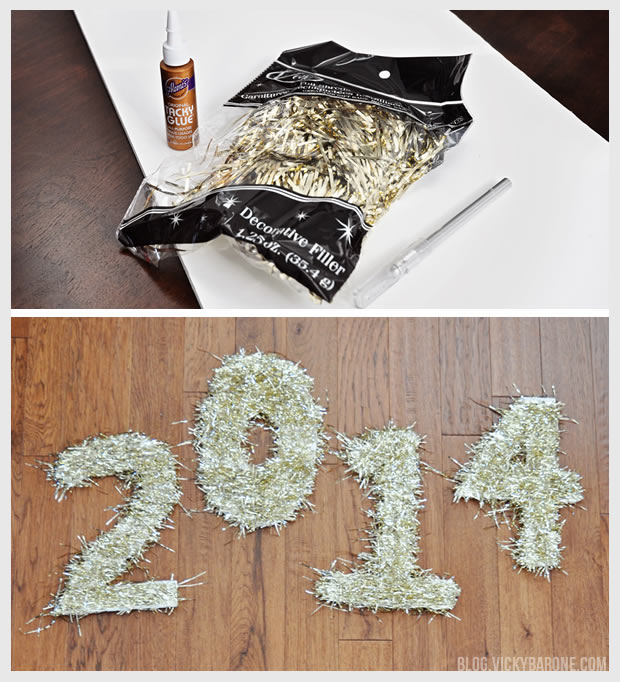
DIY Tinsel New Year Numbers

We made some fun and flashy signs for our New Year’s Eve party! These tinsel number would look great on a buffet table or as props in a photo booth!

DIY Tinsel New Year NumbersMaterials: Two pieces of foam core, an X-Acto knife, tinsel (we used about three bags from the dollar store), glue, and scissors.

Directions:
1. Trace numbers onto foam core and cut out using the X-Acto knife.
2. Cover one side of a number with glue and press on tinsel.
3. After the first side is dry, flip over the number and repeat.
4. When both sides of the number are dry, take scissors and cut away excess tinsel from the outline of the number.

Cover the numbers with as much or as little tinsel as you like and have fun with it! This can be a very messy project so make sure you have your vacuum handy!

We hope everyone had a wonderful Christmas! Enjoy these last days of 2013, because 2014 is right around the corner 🙂


Categories
DIY Holidays Parties and Events

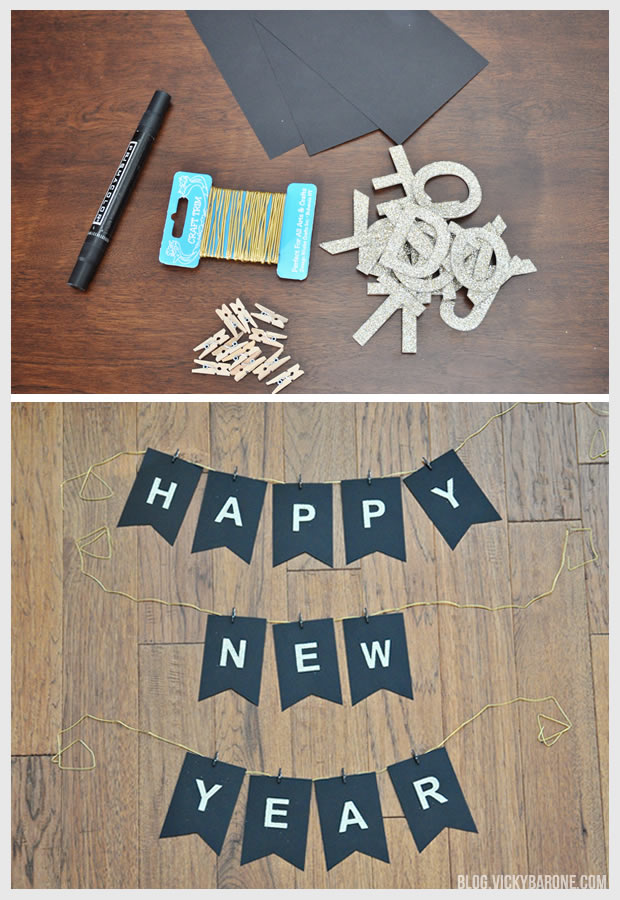
DIY Happy New Year Garland

This post contains affiliate links. If purchased, I will receive a commission, but the price stays the same for you!

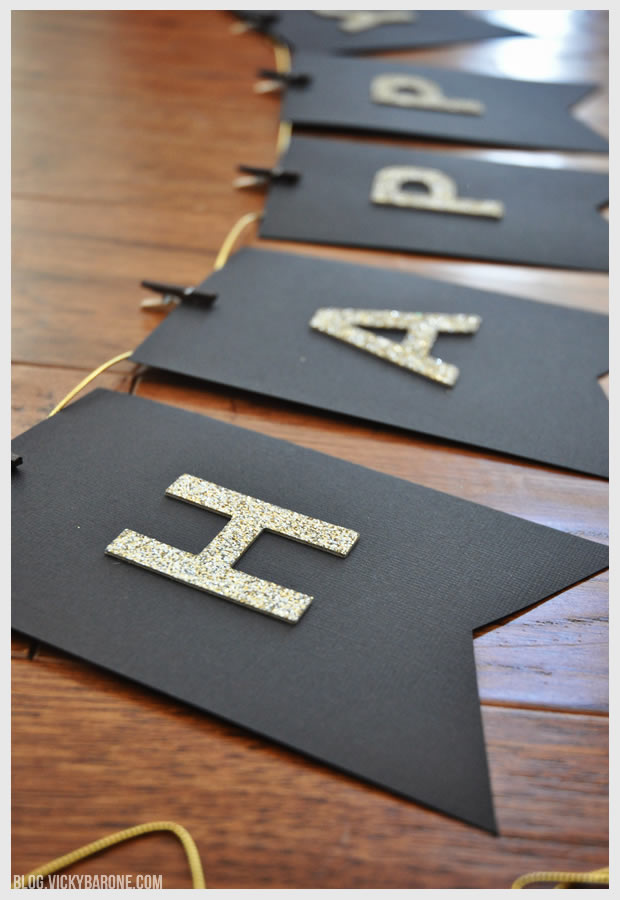
We made a garland for our New Year’s Eve party! It’s our go-to bunting that works for every holiday. Check out our Christmas and Thanksgiving garlands too!

DIY Happy New Year GarlandMaterials: Black scrapbook paper, glittery adhesive chipboard alphabet letters (similar, similar), mini clothespins, a black marker or paint, a paper cutter and/or scissors, and gold trim.

The above supplies contain affiliate links. If purchased, I will receive a commission, but the price stays the same for you!

Directions:
1. Using a paper cutter, cut scrapbook paper into 4×6 inch rectangles.
2. Cut a triangle out of the bottom of each paper rectangle using scissors. We made a stencil out of scrap paper to make sure each triangle cut was the same.
3. Remove the backing from the letters and attach to each paper flag.
4. Paint clothespins black, or color them in with a black marker.
5. Cut one long piece of trim (or three pieces like we did) and attach each flag with a clothespin, leaving equal space between the flags and extra trim on each end for hanging.

DIY Happy New Year Garland

DIY Happy New Year Garland

See more New Year’s Eve inspiration on our NYE Pinterest board!

Categories
DIY Holidays Projects

Felt Flower Christmas Wreath

One week until Christmas! Can you believe it?

We have been so happy to share all of our Holiday crafts, gift guides, and recipes with all of you throughout December, and we’re not done yet! Our next project is this candy cane striped Christmas wreath! You might recognize it from the Interchangeable Felt Flower Wreath we made earlier this year. It has served us so well over the past few months during the fall, football season, Halloween, and Thanksgiving. We were not kidding when we said it was interchangeable!

For this Christmas wreath, we filled the entire circle with red and white flowers in a striped pattern to create a candy cane inspired wreath! We love the way it looks on the front door.

For the full felt flower wreath tutorial click here!

Happy Christmas crunch time, everyone!

Categories
DIY Family Holidays Kids

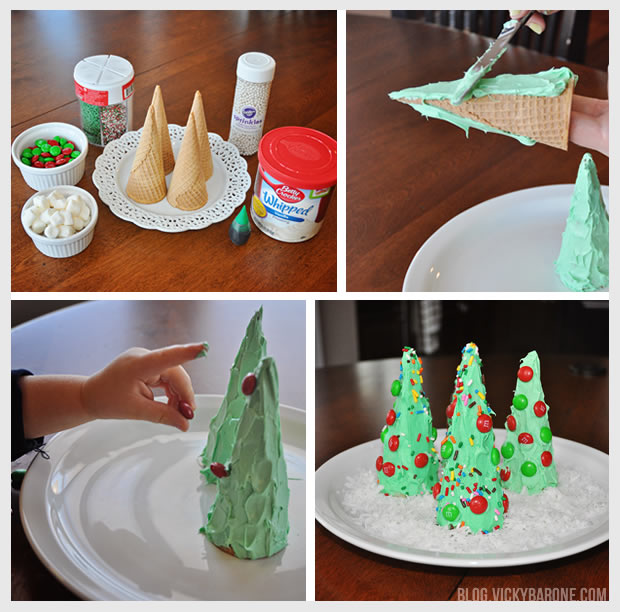
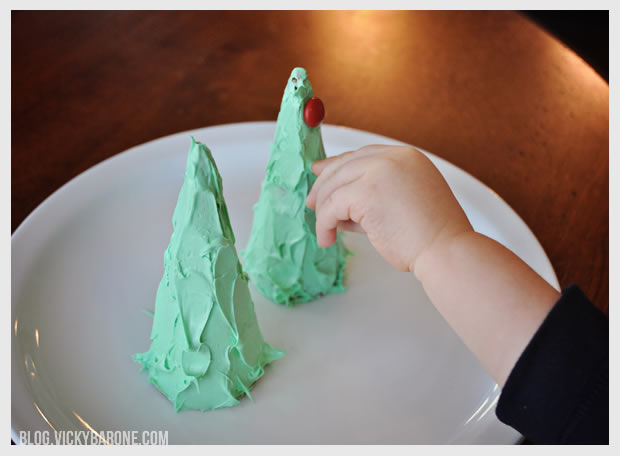
Ice Cream Cone Christmas Trees

We’ve seen this craft floating around Pinterest so we thought we’d give it a try! This is a super simple project for you and your kids to enjoy! Put on some Christmas music and try not to eat all the m&ms.

Ice Cream Cone Christmas Trees

Materials: Ice cream cones, white icing, green food coloring, m&ms, red and green sprinkles, coconut, marshmallows, and any other treats you’d like to add!

Directions:
1. Mix 10-20 drops of green food coloring into the white icing until you get the shade of green you like (we used about 10).
2. Using a knife, spread the green icing on each of the ice cream cones and set down on a plate in the arrangement you like (this part is the messiest, so do this for your youngest kids!).
3. Add candies to decorate!
4. Spread coconut around the base of the trees to look like snow.

Ice Cream Cone Christmas Trees

Tada! Now you have a tasty winter forest that goes great with a neighborhood of gingerbread houses!

P.S. You probably don’t want to eat these after they’ve been sitting out, but maybe Santa’s reindeer might be interested in them…

Categories
DIY Holidays Projects Things I Love

Things I Love: Popsicle Stick Ornaments

1. Sled | 2. Snowflake | 3. Christmas Characters | 4. Reindeer | 5. Snowman | 6. Christmas Tree

How cute are these ornaments? All you need for these fun holiday crafts for kids are some Popsicle sticks, paint, glue, and a little imagination! Click on the sources above for full tutorials on each ornament.

Happy crafting!

Categories
DIY Holidays Lifestyle Projects

DIY Merry Christmas Garland

This post contains affiliate links. If purchased, I will receive a commission, but the price stays the same for you!

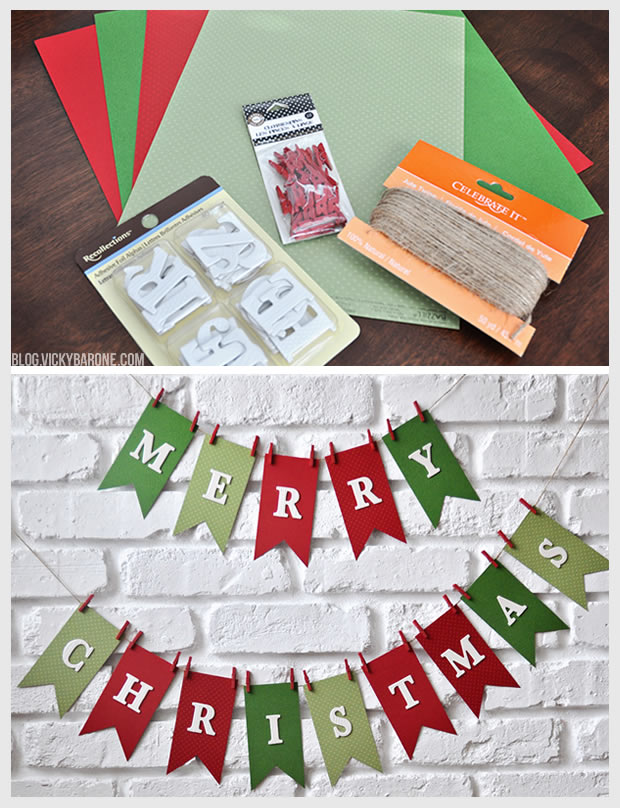
We made another garland for Christmas! Our Thanksgiving garland was so popular, we decided to make another for Christmas. This time we used red and green textured scrapbook paper and ivory scrap-booking letters. It was very easy to make and we are so happy with the end result!

DIY Merry Christmas Garland

Materials: Green and red scrapbook paper, adhesive chipboard alphabet letters (similar), a paper cutter and/or scissors, mini clothespins, and twine. You can find all of these materials in your local craft store!

The above supplies contain affiliate links. If purchased, I will receive a commission, but the price stays the same for you!

Directions:
1. Using a paper cutter, cut scrapbook paper into 2.5 x 5 inch rectangles.
2. Cut a triangle out of the bottom of each paper rectangle using scissors. We made a stencil out of scrap paper to make sure each triangle cut was the same.
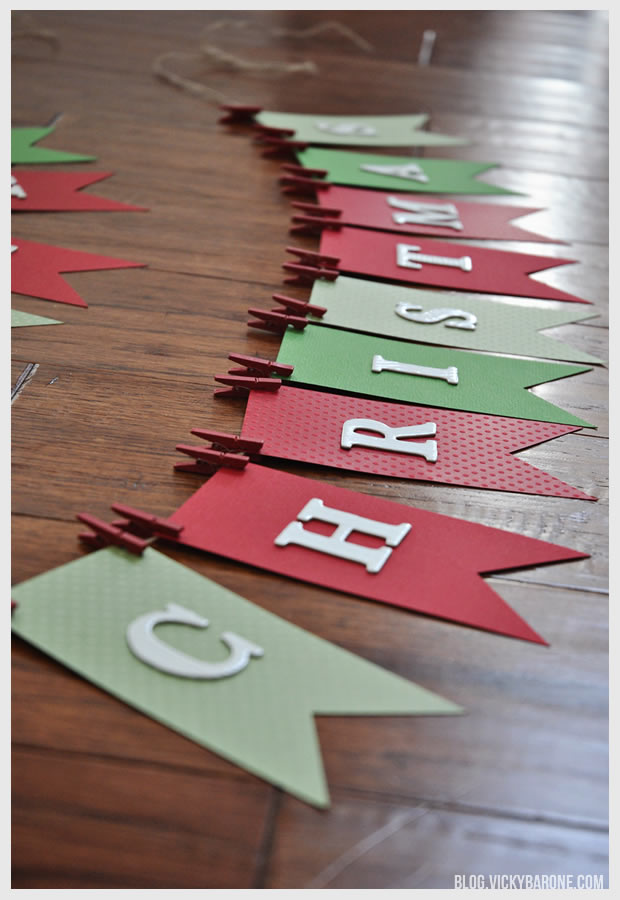
3. Remove the backing from the letters and attach to each paper flag.
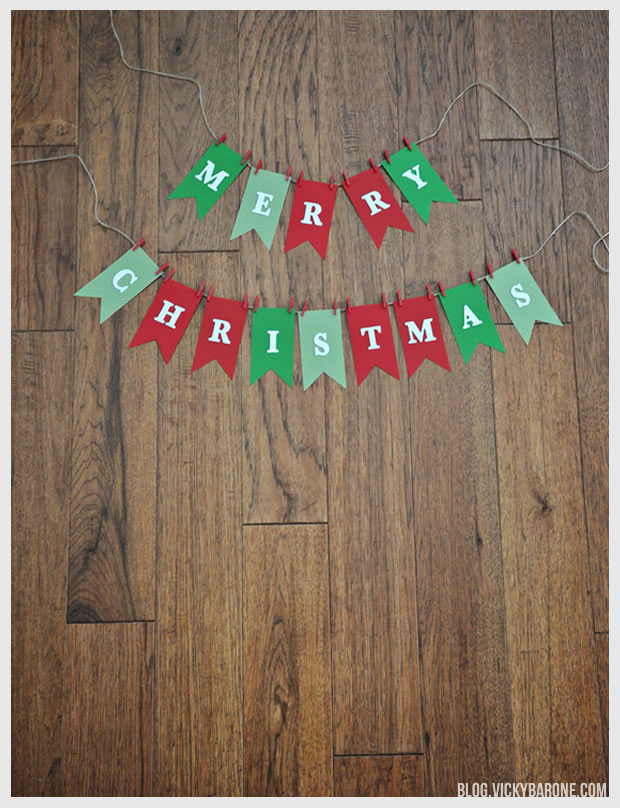
4. Cut one long piece of twine (or two medium length pieces) and attach each flag with two mini clothespins, leaving equal space between the flags and extra twine on each end for hanging.

DIY Merry Christmas Garland

DIY Merry Christmas Garland

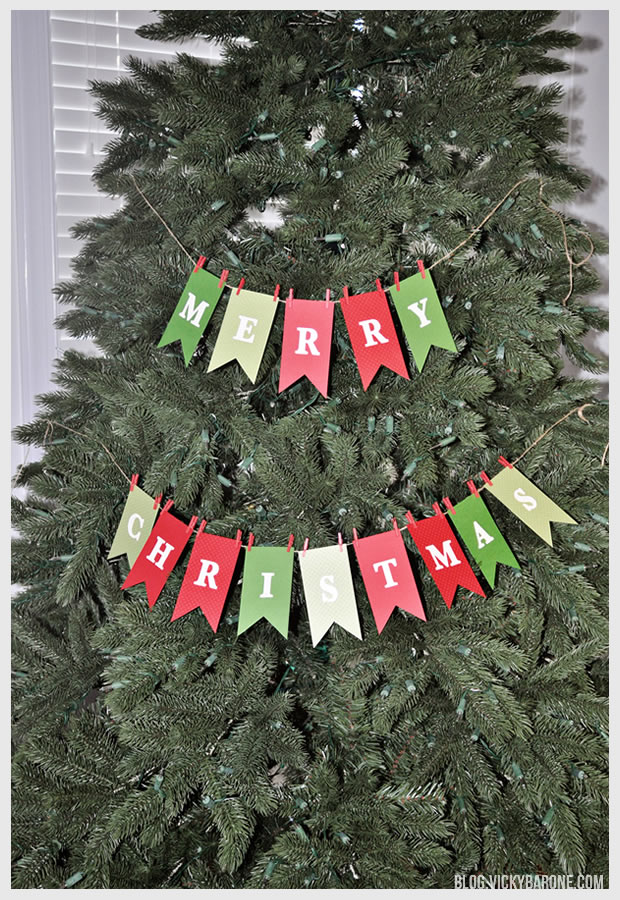
DIY Merry Christmas GarlandAs you can see by our extensive photo shoot, this garland goes great all over the house! Hang it from your mantle, on your Christmas tree, or on any wall for a festive touch to your home.

Happy Holidays!