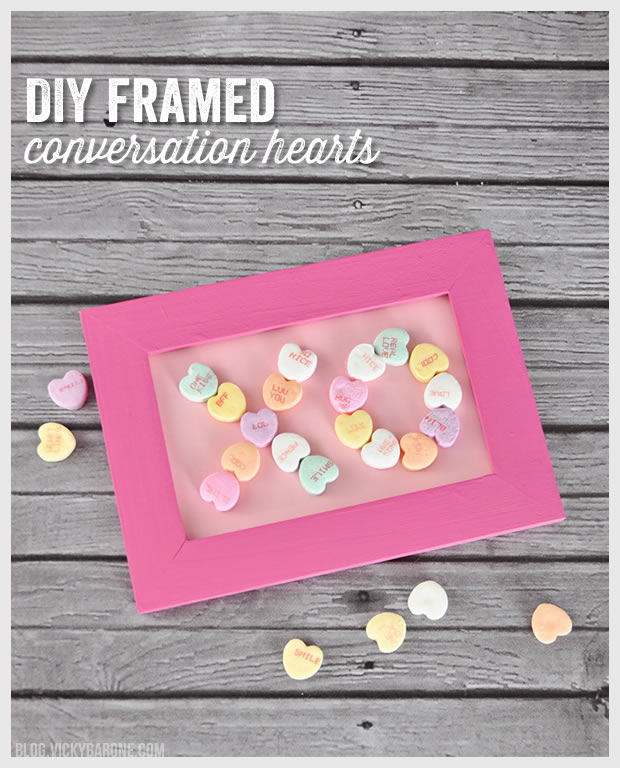
If your kids come home with boxes and boxes of conversation hearts after a Valentine exchange at school, we have just the project for you! Assuming you don’t eat the candies (does anyone actually eat them??), all you need are a few more supplies to create this simple and sweet Valentine’s Day decoration.

Supplies: a frame (ours is from Ikea!), scrapbook paper, acrylic paint, glue, and scissors.
Directions:
1. Paint the frame with an acrylic paint of your choice. Let dry completely.
2. Cut a piece of scrapbook paper to fit the inside of the frame.
3. Insert the paper into the frame the same you would a photo.
4. Arrange the conversation hearts in the pattern you like.
5. Lift up each heart one-by-one and add a dot of glue to the back. Place the heart back down in its spot. Let dry.
*We recommend using a tacky glue rather than a fast-drying glue so that you have some time to arrange and straighten your design before the glue dries.
Send this sweet artwork to a loved one, or hang it in your house! And remember to have fun with it!


3 responses to “DIY Framed Conversation Hearts”
[…] Here’s a project that your kids will enjoy just as much as you. Use your hearts to spell out “Love” or “Be Mine” or “XO” or all of them at once! (via Vicky Barone) […]
[…] Here’s a project that your kids will enjoy just as much as you. Use your hearts to spell out “Love” or “Be Mine” or “XO” or all of them at once! (via Vicky Barone) […]
[…] Here’s a project that your kids will enjoy just as much as you. Use your hearts to spell out “Love” or “Be Mine” or “XO” or all of them at once! (via Vicky Barone) […]