Categories
DIY

DIY Moss Door Hanger

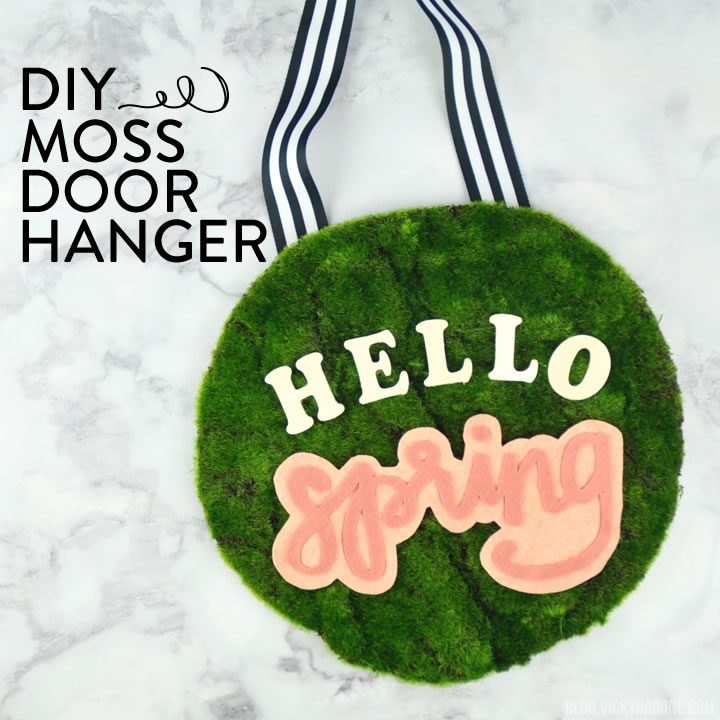
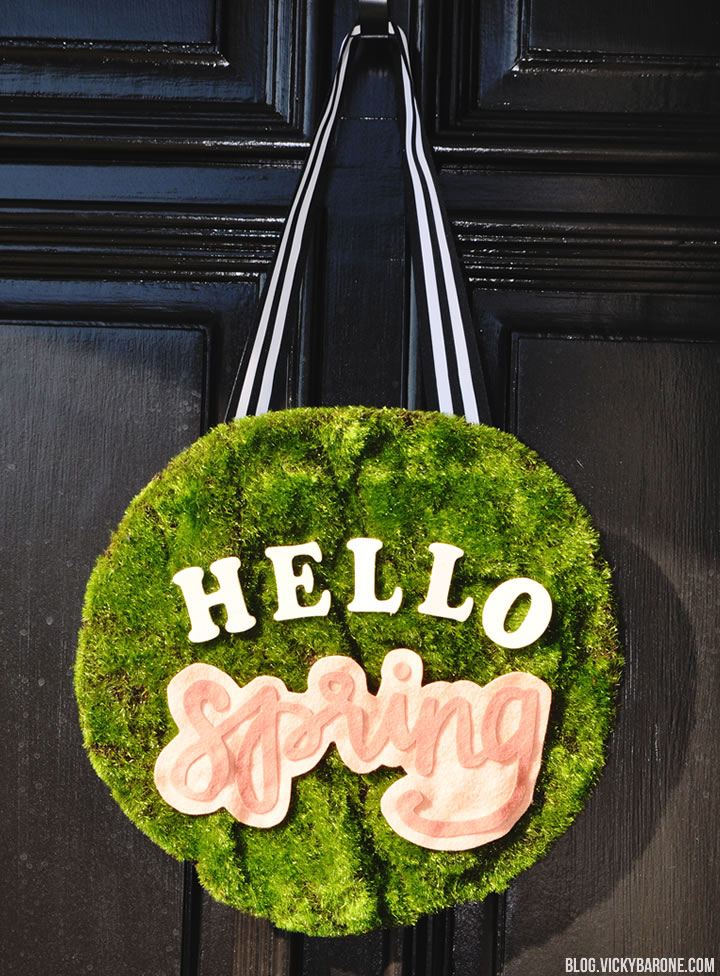
Are you surviving Daylight Savings? We know it’s tough, but it also means that Spring is closer than ever! To celebrate its arrival, we created this moss door hanger. Here’s how to make your own…

DIY Moss Door Hanger | Hello Spring | Vicky Barone

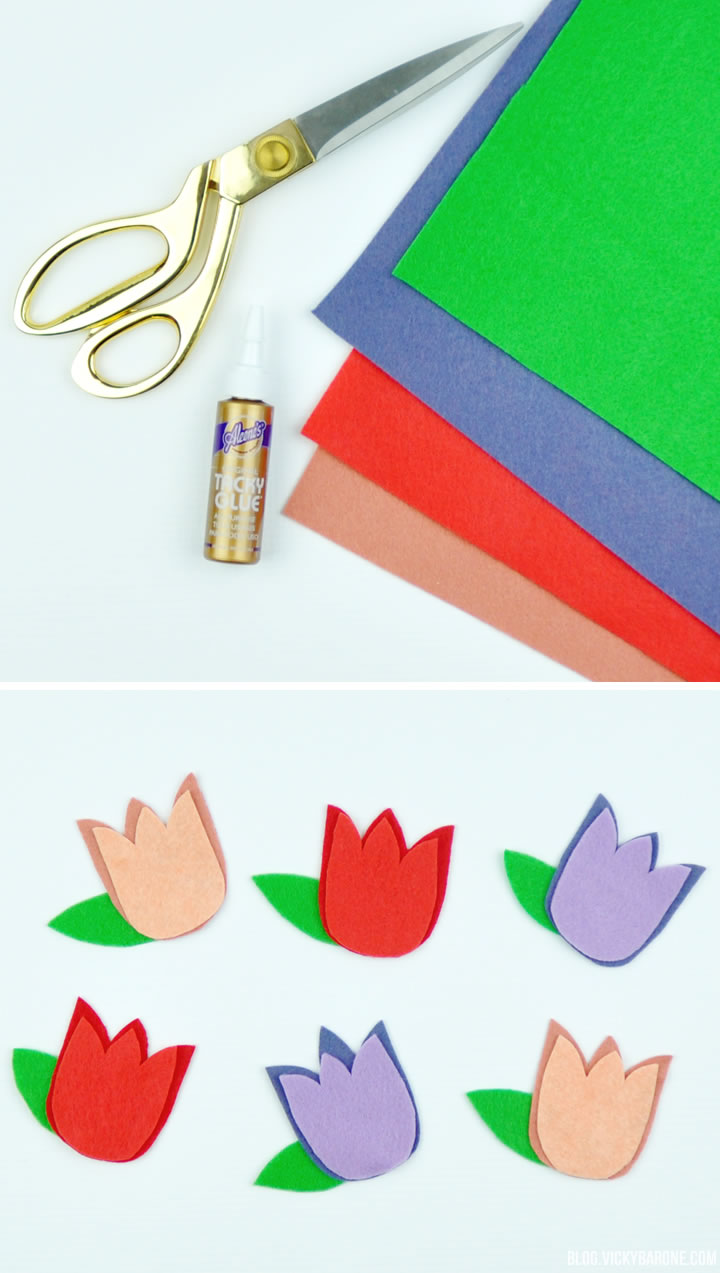
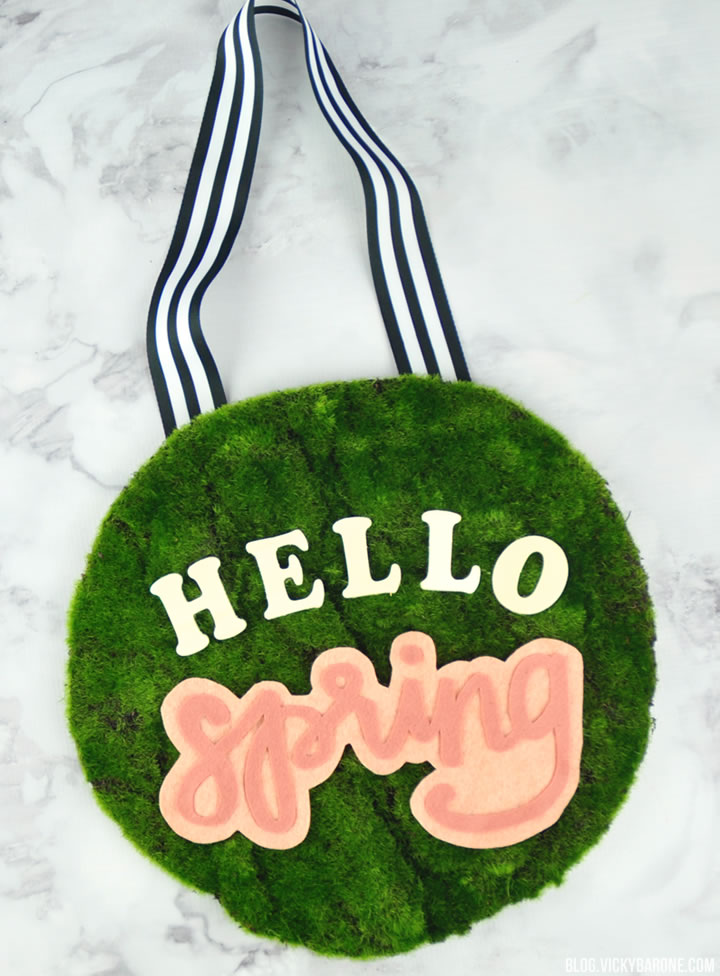
Supplies: moss round, wooden letters, felt, scissors, ribbon, and hot glue.

DIY Moss Door Hanger | Hello Spring | Vicky Barone

Directions:
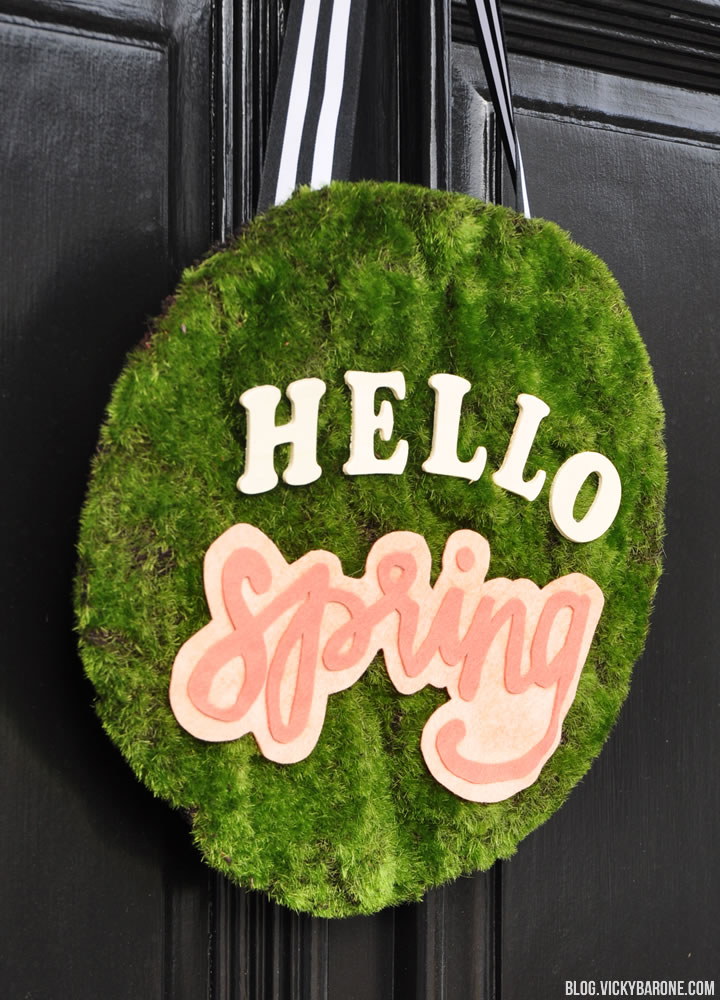
1. Attach wooden letters to the moss round using hot glue. Be sure to press each letter down firmly until the glue cools completely.
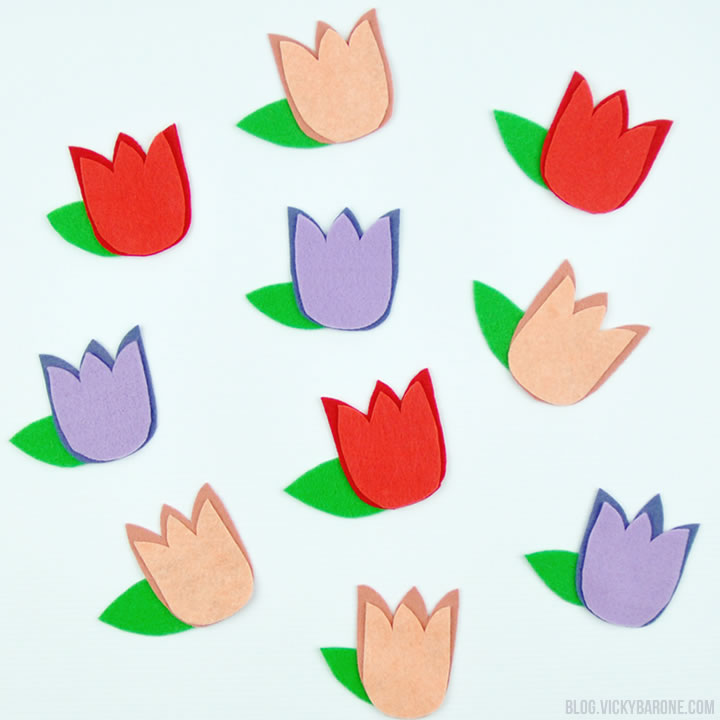
2. Trace the word “Spring” onto a piece of paper or print out the word in a font you like. Cut it out and use it as a template for a medium shade of pink felt.
3. Cut the word out of the medium pink felt and glue it to a piece of light pink felt. When the glue is set, cut around the word, leaving a 1/4″ border.
4. Attach the felt to the moss using more hot glue.
5. Flip over the door hanger and attach ribbon to the back using hot glue. To make it extra sturdy, glue a piece of cardstock to the back of the moss first. Then Glue ribbon to the cardstock.
6. Hang and enjoy!

DIY Moss Door Hanger | Hello Spring | Vicky Barone DIY Moss Door Hanger | Hello Spring | Vicky Barone

DIY Moss Door Hanger | Hello Spring | Vicky Barone DIY Moss Door Hanger | Hello Spring | Vicky Barone

How are you celebrating Spring’s arrival? If you’re looking for more inspiration, check out Vicky Barone on Instagram!

Categories
DIY

DIY Felt Tulips

Spring is suddenly here (well, almost!), and we are so thrilled! To celebrate, we’re sharing some easy felt tulips that you can turn into a garland, a pin, a bookmark, or anything you’d like!

DIY Felt Tulips | Vicky Barone

Supplies: felt, scissors, and glue!

Directions:
1. Cut a tulip shape out of a darker piece of felt.
2. Cut another tulip shape in a lighter shade of the first color. Make this piece slightly smaller than the first.
3. Cut a leaf shape out of a piece of green felt.
4. Use hot glue or tacky glue to glue the pieces together.
5. If you are making a garland, flip the tulips over and attach string to the backs of each using hot glue. Hang and enjoy!

DIY Felt Tulips | Vicky Barone

DIY Felt Tulips | Vicky Barone

DIY Felt Tulips | Vicky Barone

How are you celebrating Spring? We’d love to hear!

Categories
DIY Kids

3 DIY Bird Feeders

Now that it’s finally feeling like Spring, we are noticing our bird friends are back! To encourage them to stick around, we made three different types of DIY bird feeders to treat them to dinner.

3 DIY Bird Feeders | Vicky Barone | Peanut Butter Bird Seed Feeder

Peanut Butter Bird Feeder
Supplies: toilet paper roll, hole punch, twine, a knife, peanut butter, and bird seed.

3 DIY Bird Feeders | Vicky Barone | Peanut Butter Bird Seed Feeder
Directions:
1. Cut two holes into the top of the toilet paper roll with a hole punch.
2. Thread the twine into the holes and tie two knots.
3. Using a knife, cover the roll with peanut butter.
4. Roll the peanut butter covered tube in bird seed until it’s fully covered.
5. Hang in a tree from the twine.


3 DIY Bird Feeders | Vicky Barone | Gelatin Cookie Cutter Bird Feeders

Gelatin Bird Feeders
Supplies: 1 gelatin packet, bird seed, water, cooking spray, cookie cutters, a cookie sheet, wax paper, plastic straws, and twine.

3 DIY Bird Feeders | Vicky Barone | Gelatin Cookie Cutter Bird Feeders
Directions:
1. Line the cookie sheet with wax paper.
2. Arrange cookie cutters on the cookie sheet and spray with cooking spray.
3. Cut up a plastic straw into four or five pieces.
4. In a saucepan, stir 1 packet of gelatin into 1/3 cup of water.
5. Turn burner on to medium heat and stir constantly until the gelatin simmers. Turn off heat.
6. Stir 1 cup of bird seed into the gelatin. Let cool five minutes.
7. Spoon the bird seed into the cookie cutters and press with your fingers to make sure it’s in every corner.
8. Insert a piece of straw into each cookie cutter to make a hole for the twine.
9. Put the cookie sheet into the fridge for 1-2 hours.
10. Once the shapes are hardened, carefully pop them out of the cookie cutters and tie twine through the hole.


3 DIY Bird Feeders | Vicky Barone | Orange Bird Feeders

Orange Bird Feeder
Supplies: 1 orange, a knife, bird seed, wooden skewers, twine.

3 DIY Bird Feeders | Vicky Barone | Orange Bird Feeders
Directions:
1. Cut an orange in half and remove the fruit from the peel.
2. Poke a skewer through each orange peel half.
3. Tie twine to each end of the skewer.
4. Fill orange cup with bird seed (if the cup starts to tip, remove some bird seed until it is steady).
5. Hang in a tree from the twine.

These bird feeders make great projects for kids. They will love looking out the window to see the birds enjoying their yummy snacks. Enjoy!

Categories
DIY

DIY Tissue Paper Flowers

Happy First Day of Spring! If you’re having a dreary start to your Spring Equinox like we are, maybe some flowers will brighten up your day!

We made these tissue paper flowers using the same method used to make these tissue paper pom poms. Instead of fluffing up the paper on both sides to make a globe shape, we pulled the paper upwards only to create a flower.

Diy Tissue Paper Flowers | Vicky Barone

Supplies: tissue paper, scissors, floral wire.

Directions:
1. Stack 5-7 pieces of tissue paper (ours were 6″x6″ squares) and fold it up accordion style.
2. Twist the floral wire around the middle of the folded tissue paper and create a “stem.”
3. Cut each end of the accordion into a semi circle shape. This will create the scalloped edges of the flower.
4. Holding the stem in your hand (similar to picture two above) carefully pull each sheet of tissue paper up and away from the bunch. Repeat this until all of the pieces are separated.
5. Add your tissue paper flower to a vase!

You can use all kinds of colored tissue paper to create a rainbow of flowers and even mix colors within one flower. Cutting different shapes into the ends of the accordion other than a semi circle will also create an array of different types of flowers.

DIY Tissue Paper Flowers | Vicky Barone

We hope you have a happy first day of Spring!

Categories
DIY Products Things I Love

Things I Love: Flower Crowns

1. Paper Flowers | 2. Yellow and White
3. Fresh Flowers | 4. Bridal Headpiece
5. Baby’s Breath | 6&7. Spring Flowers

We have been seeing the most beautiful flower crowns all over the Internet, from buy to DIY and we wanted to share some of our favorites! Floral headpieces make the perfect wedding day accessory or rainy day activity! Which one is your favorite?

Categories
DIY Things I Love

Things I Love: Air Plants

one | two | three | four | five | six | seven

How cool are these air plant and their containers? We are loving this new foliage and how versatile it is. We hope you enjoy these seven creative ways to display your own air plants (link number two can teach you how to grow them!).

And if you’re looking for more information about air plants, you can find some here!

We hope everyone had a wonderful Mother’s Day yesterday! We are so grateful for all of the lovely ladies in our lives. 🙂

Categories
DIY Things I Love

Things I Love: Spring Flower Arrangements

1. Hand Tied | 2. Recycled Bottles | 3. Milk Crate | 4. White Pitcher | 5. Kumquats | 6. Ranunculus 

This rainy day calls for some Spring flowers. Here are some simple and creative ways to decorate your home with fresh blooms. Using things like recycled containers and fruits adds an unexpected twist to a simple arrangement.

We hope you enjoy your rainy Monday and don’t forget: April showers bring May flowers!

Categories
DIY Holidays Things I Love

Things I Love: DIY Spring Wreaths

1. Flowers and Fruit | 2. Living Succulents | 3. Crepe Paper Flowers | 4. Rattan Balls | 5. Hydrangeas | 6. Easter Bunny | 7. Felt Flowers | 8. Baby’s Breath

Spring is officially here! We are so excited for all things Spring, including a new wreath for our front door! Here are 8 wreaths you can make yourself (including ours from last year!). Enjoy!