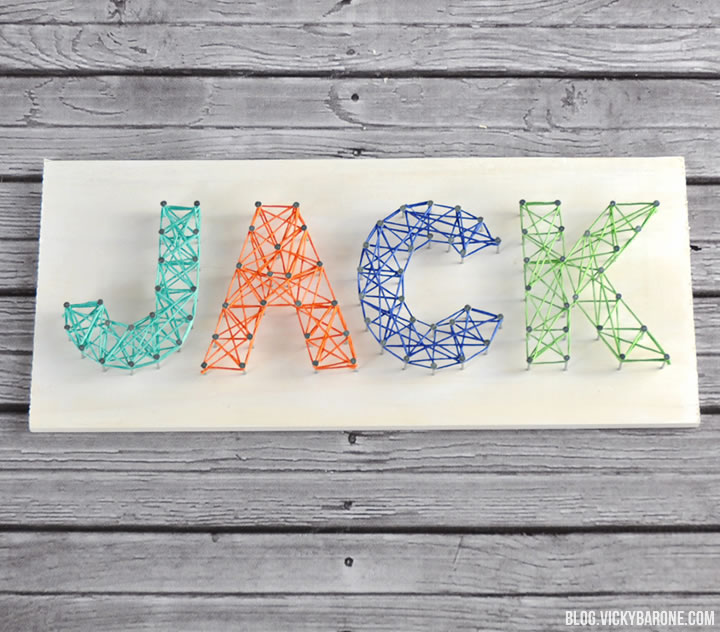
Today we’re sharing a super cute DIY that has been popping up all over Pinterest (how cool is this extra-large installation?!). String art decor is a great project for a rainy day and a name plate like this one would make a great gift!
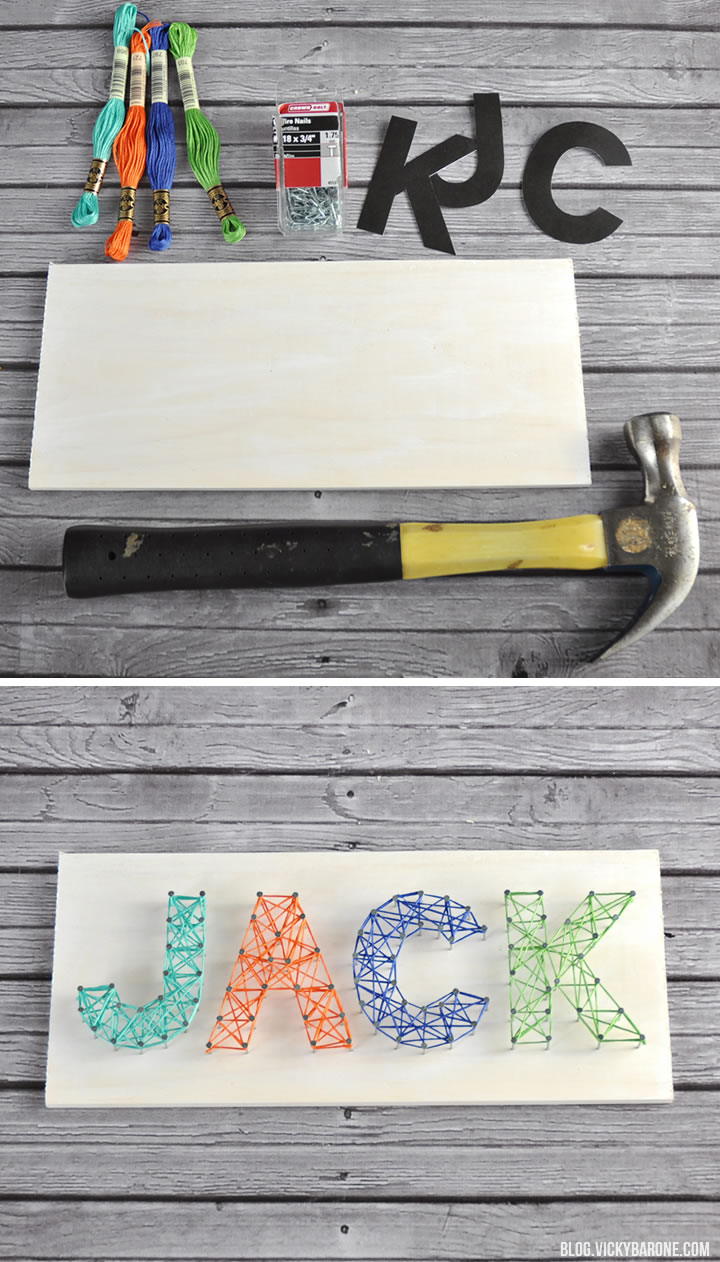
Supplies: a piece of wood (anything from pallet wood to unfinished wood), nails, a hammer, printed letters, and colorful embroidery floss.
Directions:
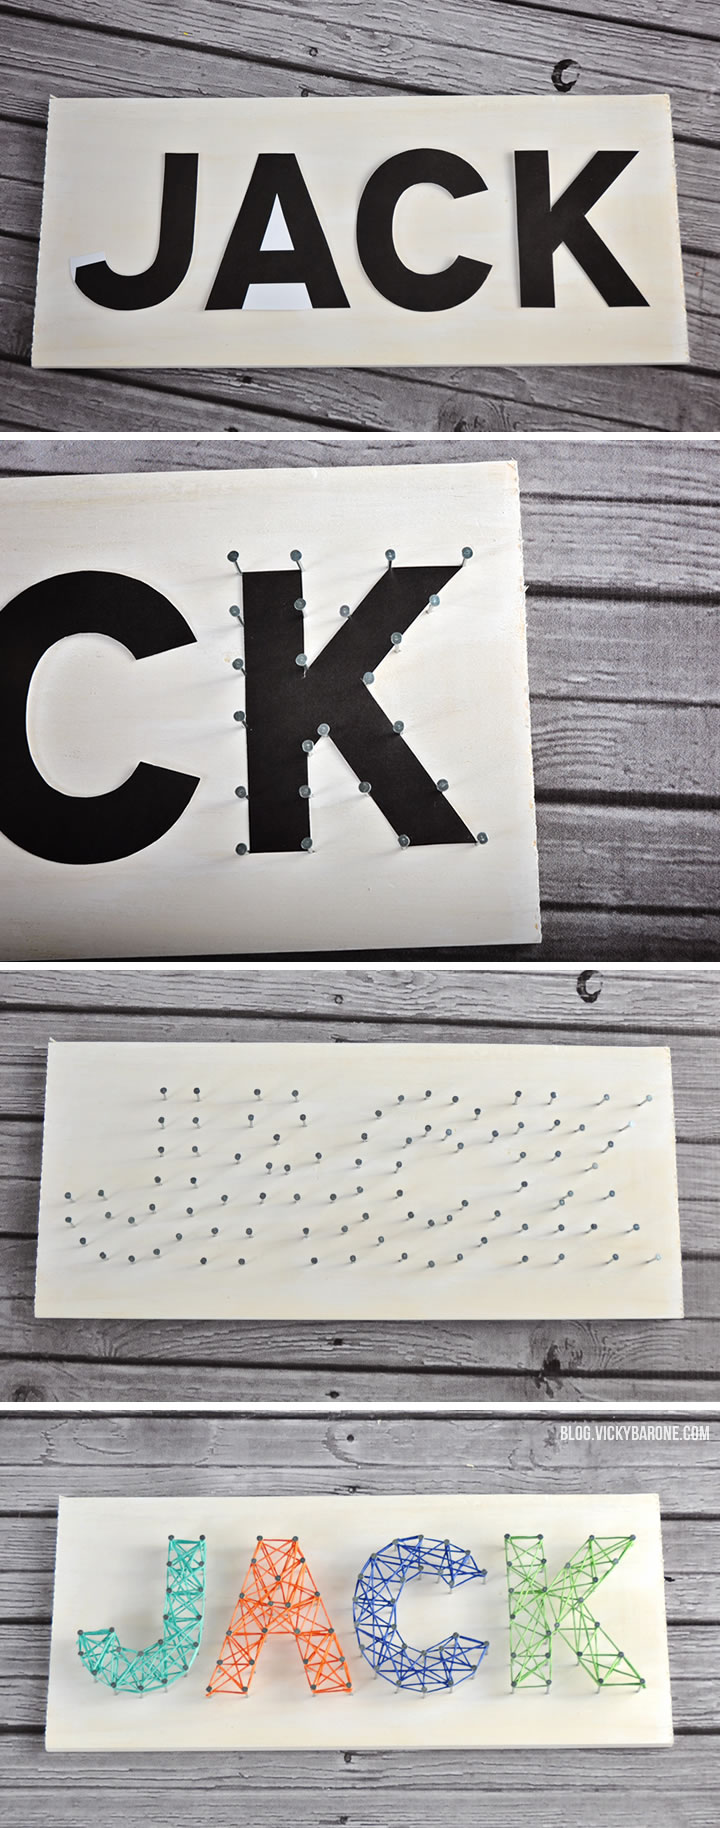
1. Place the letters (or whatever design outline you choose) on to the wood. Keep them lightly in place with a piece of tape or a pin.
2. Add nails around the outside perimeter of the letters, equal distance apart.
3. Remove the paper letters and discard.
4. Tie a piece of embroidery floss to a nail and begin wrapping! Use a haphazard approach to wrapping so the string stays in place. When it looks like the picture above, you can stop, or keep wrapping to make the letters even more full. Have fun with it!