Categories
DIY

DIY Thanksgiving Wreath

This post contains affiliate links. If purchased, I will receive a commission, but the price stays the same for you!

Happy Friday! Today we’re sharing a DIY wreath that’s perfect for Thanksgiving. Here’s how to assemble your own…
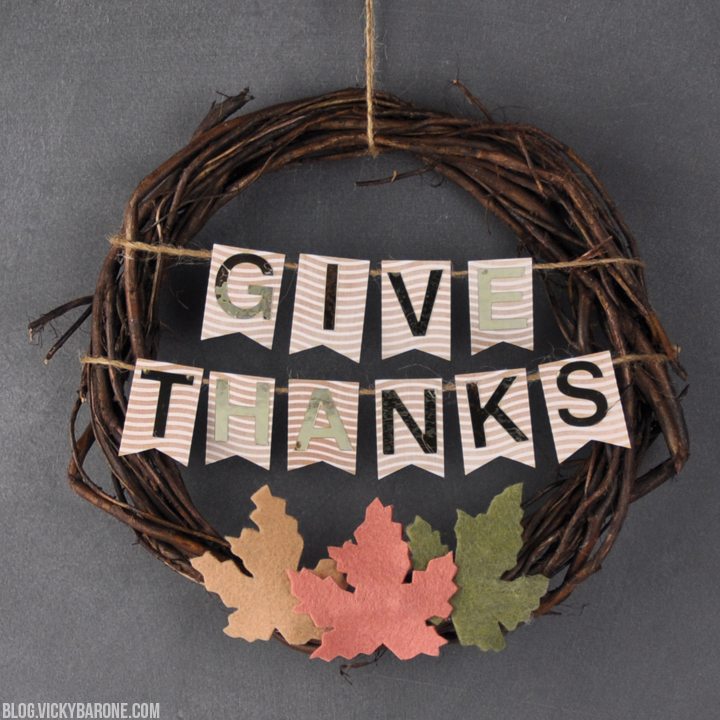
DIY Thanksgiving Wreath | Vicky Barone

Supplies: a wreath (similar), twine, hot glue, patterned scrapbook paper, a paper cutter or scissors, gold foil stickers, and felt leaves.

Directions:
1. Create the bunting by cutting rectangles out of a piece of scrapbook paper that are slightly larger than the gold foil letters.
2. Cut triangles out of the bottoms of each rectangle.
3. Add stickers to each piece of paper.
4. Attach paper flags to two pieces of twine with hot glue.
5. Attach the bunting to the wreath with hot glue on the back. To make it extra secure, weave the extra twine through the wreath on the back, tie knots, and add more hot glue.
6. Follow the instructions here to create the felt leaves. Attach to the bottom of the wreath with hot glue.
7. Hang the wreath with another length of twine.
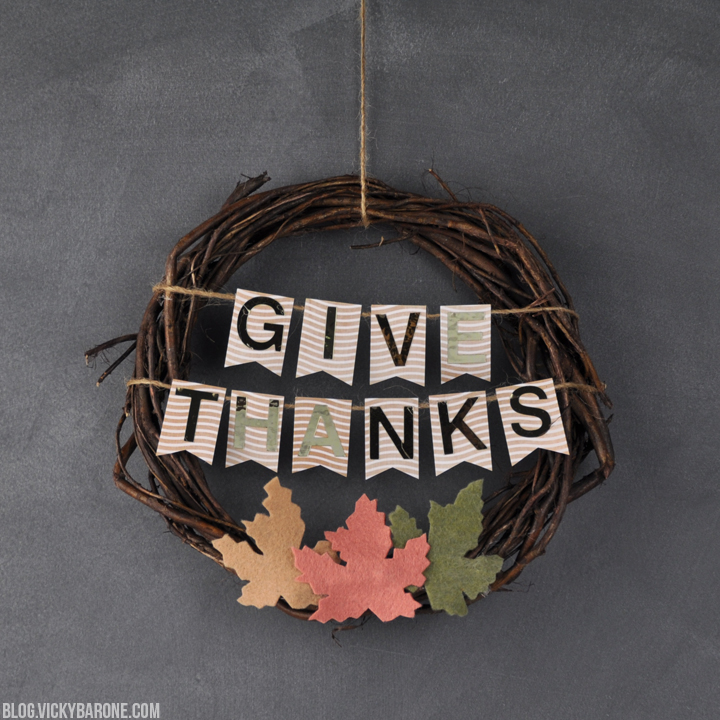
DIY Thanksgiving Wreath | Vicky Barone

That’s it! And if you’d like, simply tie the bunting to the back of the wreath instead of using hot glue so you can make the wreath interchangeable for each holiday!

Wishing you all a wonderful weekend!

Categories
DIY Holidays

DIY No-Sew Felt Thanksgiving Garland

Happy November, friends! We are so excited for this new holiday season and all the fun Thanksgiving crafts and decor we’ll be sharing. We’re also extra excited that it’s finally appropriate to talk about Christmas! Personalized Holiday ornaments are now available in the Etsy shop if you’re in the mood to start your holiday shopping now. 😉

DIY No-Sew Give Thanks Garland | Vicky Barone

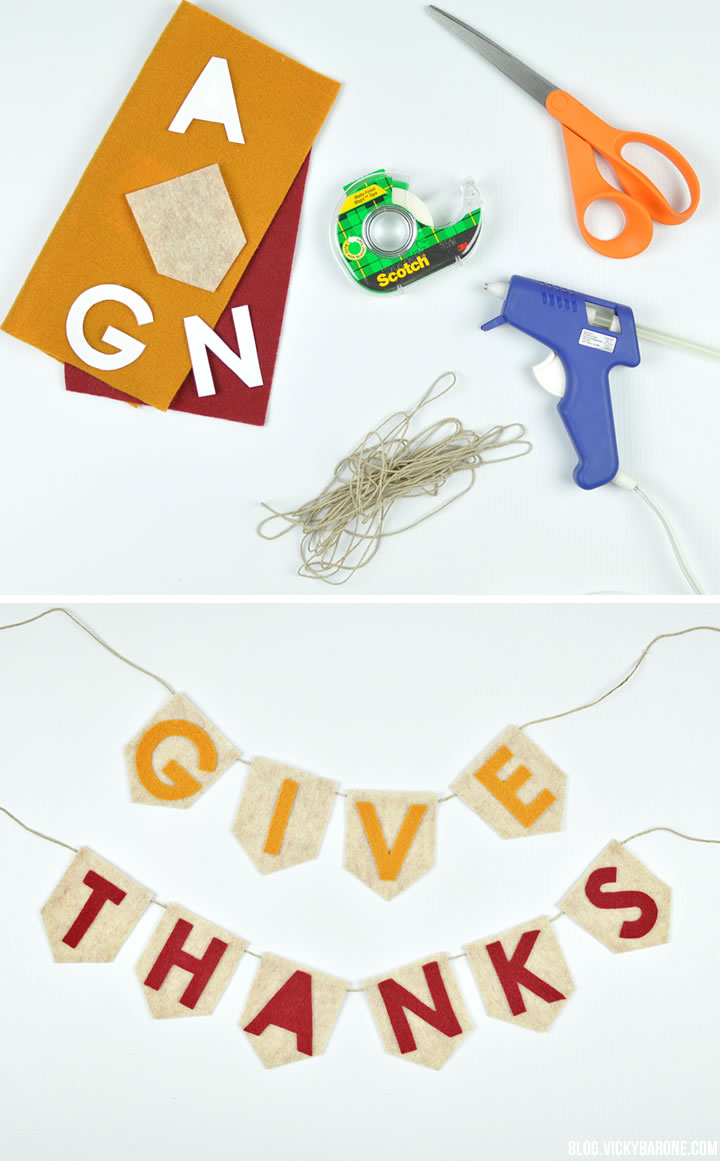
Our “Give Thanks” garland from a few years ago has always been such a hit, that we’ve come up with a new design using felt. This new “Give Thanks” banner requires absolutely no sewing, so grab your hot glue gun and follow us!

DIY No-Sew Give Thanks Garland | Vicky Barone

Supplies: felt, fabric scissors, regular scissors, letter stencils/template, hot glue, and twine.

Directions:
1. Choose a font you like and print out the letters you’ll need for the garland. Cut out each of the letters using regular scissors (You can also use a stencil for this, or just free hand the letters).
2. Tape the paper letters to the colored felt and cut them out using fabric scissors.
3. Cut little flags for each letter out of a neutral colored felt.
4. Glue each letter to a flag and let cool.
5. Line up the flags in reverse order and flip each one over. Put two hot glue dots on the back of each flag and press twine into the dots. Hold in place until the glue cools.
6. Flip the banner over and hang where you’d like!

DIY No-Sew Give Thanks Garland | Vicky Barone

DIY No-Sew Give Thanks Garland | Vicky Barone

We hope everyone has a happy happy Monday and a wonderful week!

Categories
DIY Holidays

DIY “Thankful” Garland

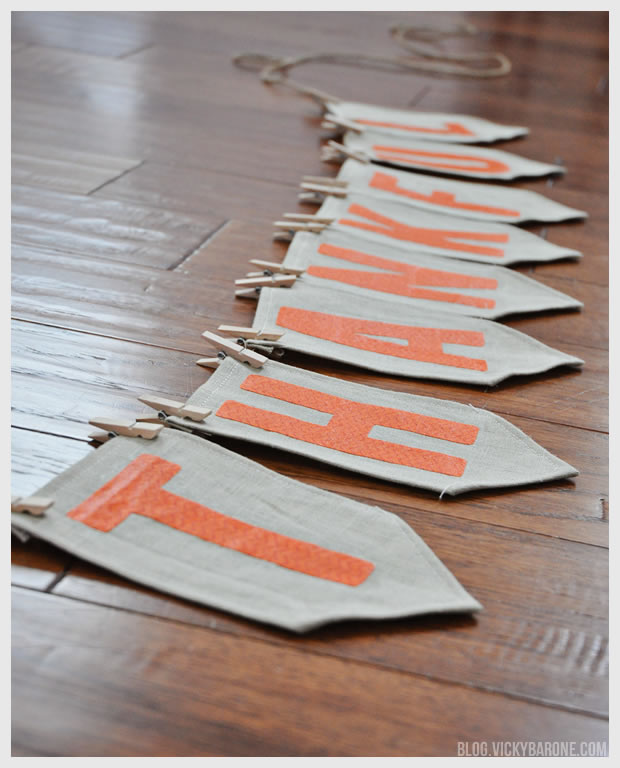
The last Thanksgiving garland we made is still such a hit that we were more than excited to create a new one this year! We made this “Thankful” bunting using fabric and Mod Podge, with the method we used for this Inspirational Pennant. Keep scrolling to see more!

DIY Fabric "Thankful" garland for Thanksgiving | Vicky BaroneSupplies: linen or muslin fabric, orange patterned fabric, fabric scissors, a sewing machine(optional!), Mod Podge, a paint brush, twine, and mini clothes pins.

Directions:
1. Print out a word you’d like the banner to read. This will be your stencil and guide for how big to make each pennant.
2. Cut the linen into rectangles (ours were about 4.5″ by 6.5″).
3. Create a 1/4″ hem on the longer sides of the rectangle and either sew or glue them down. Create the same hem on the top of the rectangle and sew or glue as well.
4. With the rectangle face down, fold the un-sewn bottom up by the corners to create the point. Glue into place or sew along the edge to match the rest of the hems.
5. Paint both sides of the orange fabric with Mod Podge and let dry. This will stiffen the fabric and prevent it from fraying when cut.
6. When the orange fabric is dry, cut out the letters with scissors using the printed stencil you created.
7. Use more Mod Podge to attach the letters to each linen pennant. (Optional: give each pennant an extra coat of Mod Podge to seal the letters).
8. When the pennants are dry, use mini clothes pins to attach them to a piece of twine. Hang your garland and enjoy!

DIY Fabric "Thankful" Garland for Thanksgiving | Vicky Barone

DIY Fabric "Thankful" garland for Thanksgiving | Vicky Barone


If you like what you see here, we’d love for you to follow us on Instagram, Facebook, and Pinterest! We’ll be sharing our Thanksgiving table next week and we’re so excited!