Categories
DIY Holidays

DIY Wine Cork Pumpkin

Happy National Pumpkin Day! Today is the day for all things pumpkin (looking for ideas? Click here!). We are celebrating with pumpkin-flavored everything in sight AND this little pumpkin-inspired DIY…

DIY Wine Cork Pumpkin | Vicky Barone

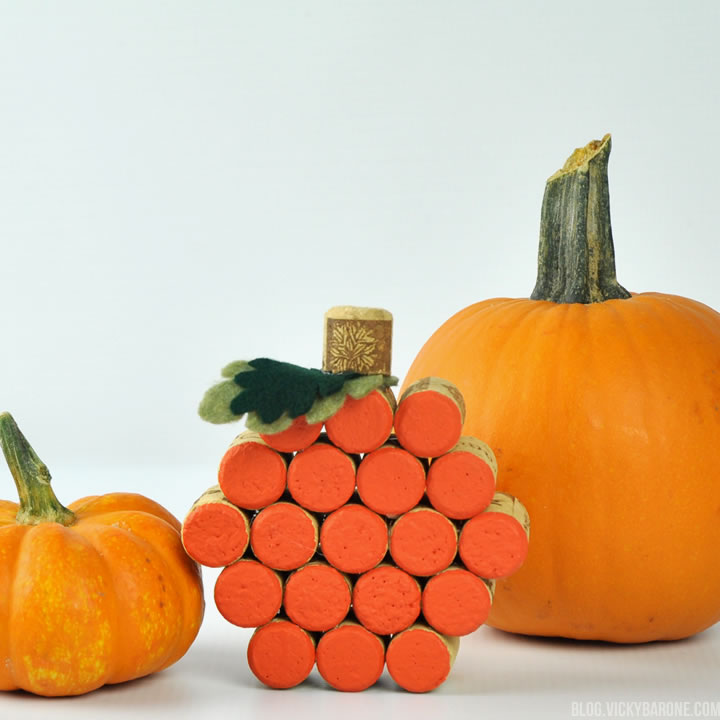
This wine cork pumpkin is super easy to make and adds a cute handmade touch to your Fall decor. Bonus: it will never ever rot 😉

DIY Wine Cork Pumpkin | Vicky Barone

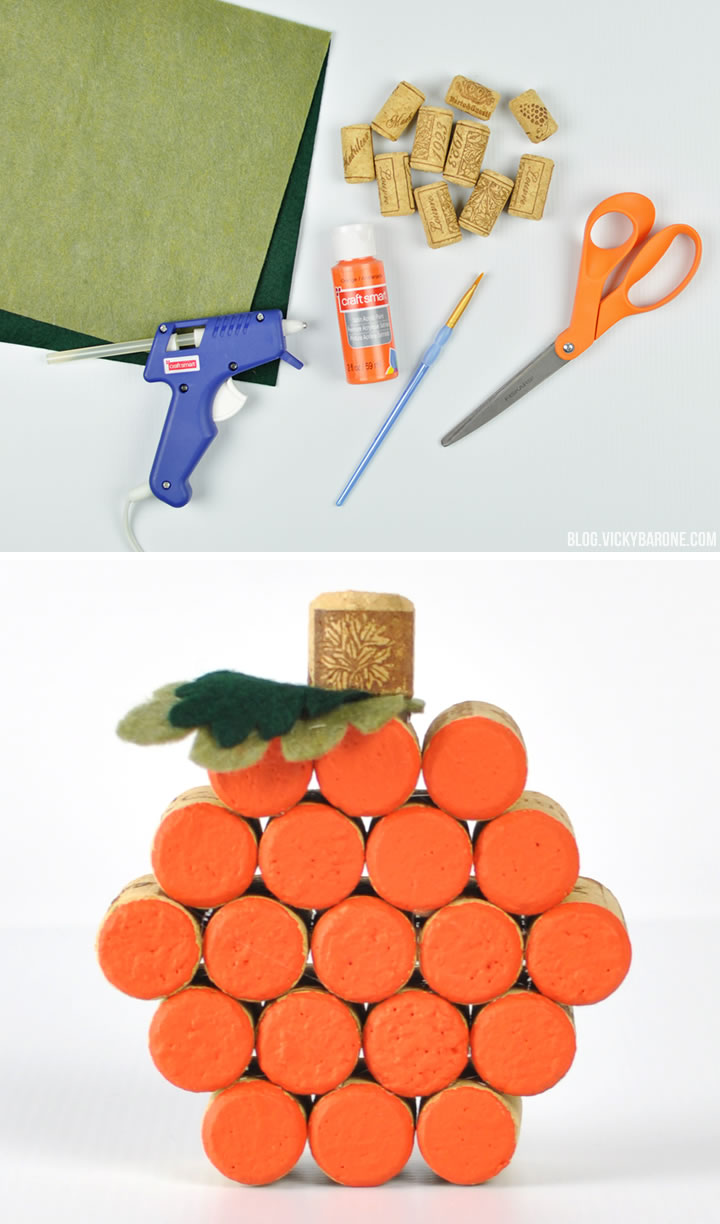
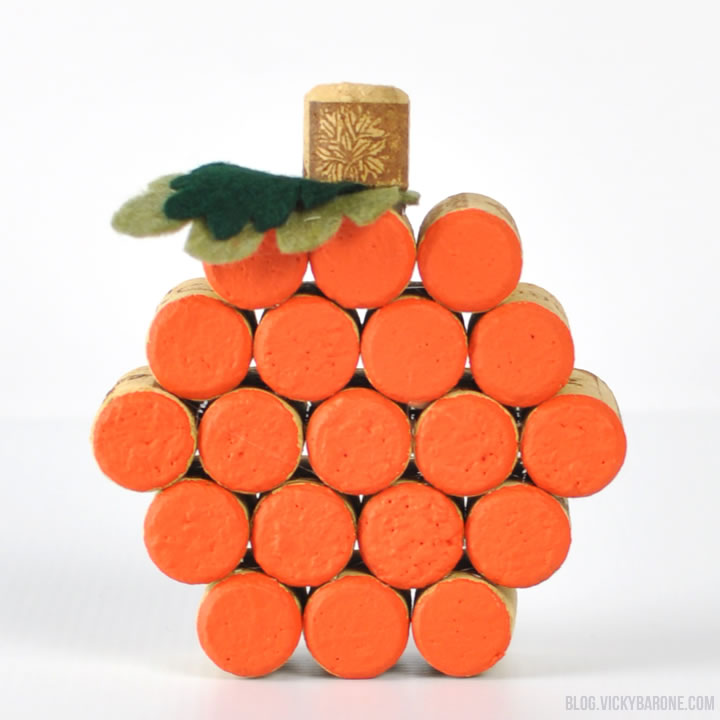
Supplies: wine corks, orange paint, a paint brush, hot glue, green felt, and fabric scissors.

Directions:
1. Choose 19 wine corks that are about the same diameter in size (they can be different lengths – just make sure they are flesh with one another in the front when you glue them together). Our design used 5 corks in the middle, then 4, then 3 on the top and bottom. You can make a bigger pumpkin with 24 corks and start with 6 corks in the middle.
2. Paint the ends of each cork with the orange paint and let dry.
3. Glue the middle 5 corks together with the hot glue gun in a line.
4. Glue a row of 4 corks, one by one, to the top of the line you just created. You will need to create two glue lines on each cork and press it in between two corks on the middle row. Repeat with a row of 4 below the middle as well.
5. Glue a row of three corks to the top and bottom.
6. Cut two leaves out of green felt and hot glue them to the top of the pumpkin.
7. Cut a cork in half and glue it on top of the leaves to create a stem.

DIY Wine Cork Pumpkin | Vicky Barone

DIY Wine Cork Pumpkin | Vicky Barone

DIY Wine Cork Pumpkin | Vicky Barone

DIY Wine Cork Pumpkin | Vicky Barone

How will you celebrate National Pumpkin Day today? Check out some of the things we’ve made on the blog for inspiration and don’t forget to follow Vicky Barone on Instagram!

Categories
DIY Holidays Kids

DIY Shamrock Cork Stamp

All you need for this St. Patrick’s Day craft are some wine bottle corks and paint! The corks come together to make a sweet clover shape that’s perfect for little hands.

DIY Shamrock Cork Stamp | Vicky Barone
(The stamp on the left is made from recycled plastic corks, which create a very distinct circle shape with less paint in the center. On the right is a stamp made from classic cork, which creates a softer impression and full paint circles.)

Materials: 3 wine corks, acrylic paint, tape, and paper.

Directions: Tape three corks together in a clover shape. Stand them up vertically as you tape them to make sure they are level with one another to make a flat stamping surface.

Happy Stamping! Click here for more St. Patrick’s Day ideas!

Categories
DIY Holidays Kids

DIY Cork Reindeer Ornaments

Over the weekend, my boys and I made these cute little reindeer ornaments out of corks! These are a great rainy day activity to do with little ones that they’ll love to see up on the tree.

DIY Cork Reindeer Ornaments | Vicky Barone

Materials: corks, mini red pom poms, googly eyes, tacky glue, a sharp knife, pipe cleaners, ribbon, and straight pins.

Directions:
1. Glue eyes and nose to cork.
2. Cut a pipe cleaner in half. Make a “t” with the two halves and twist the horizontal piece around the vertical piece to create an antler. Repeat this with a second pipe cleaner and you will have two antlers.
3. Use a knife to cut a slit into the top of the cork. Be careful! I placed the cork on its end on a table, which allowed me to get enough force to create a slit deep enough.
4. Push the two antlers into the slit.
5. Cut a length of ribbon and make it into a loop. Use a straight pin to attach it to the top of the cork.

And that’s it! Easy, last minute ornaments your kids will love.

P.S. I bought a package of corks from Michael’s, but I encourage the drinking of your favorite bottle of wine first 🙂 Enjoy!