Categories
Holidays Kids Things I Love

Holiday Gift Guide for Kids

Next up in this year’s gift guide series: gift ideas for kids! From princess bedding to personalized growth charts, these gifts are sure to please this Christmas. We also included a tee-pee (!!!!) because you absolutely cannot go wrong with a teepee. Happy shopping!

Holiday Gift Guide for Kids | Vicky Barone

1. Multi-dot Teepee
2. Personalized Red Heart Chair
3. Princess Bedding
4. Super Santa Personalized Ornament
5. Locomotive Layers Personalized Train Growth Chart
6. Spooner Board

P.S. Here are some of the things I got my boys! Shhhh! Don’t tell them! 😉

Holiday Gift Guide for Boys | Vicky Barone

1. Gobblet
2. How to Speak Droid
3. Mighty Red Locomotive
4. Magnetic Wooden Block Set
5. LEGO Chain Reactions

What are your favorite kid picks? We’d love to hear!

Categories
DIY Holidays Kids

DIY Chalkboard Ornaments

Looking for a fun and easy Holiday DIY to make this weekend? These chalkboard ornaments are super simple and can be personalized however you’d like! They would also make great gifts, stocking stuffers, or even gift tags!

DIY Chalkboard Ornaments | Vicky Barone

Supplies:
– white polymer clay
– cookie cutters (we got ours from the Dollar Store to use specifically for clay. Play it safe and refrain from using the cookie cutters in your kitchen!)
– wooden skewer
– chalkboard paint
– paint brush
– white paint pen
– ribbon

DIY Chalkboard Ornaments | Vicky Barone

Directions:
1. Roll out clay according to directions until you reach a desired thickness. Ours were a little less than 1/8 of an inch thick, but were pretty sturdy when baked.
2. Use cookie cutters to make shapes. Remove excess clay from around cookie cutter before picking it up to reveal the shape. This will help make cleaner edges!
3. Use a wooden skewer to create a hole in each shape. Make sure it goes all the way through. This will be where you tie ribbon to hang the ornament when it’s complete.
4. Place shapes on a cookie sheet lined with aluminum foil. Bake according to directions on package. Let cool completely.
5. Paint shapes with chalkboard paint (2 coats should do). Let dry.
6. Decorate the ornaments with white paint pens however you’d like!
7. Tie a ribbon through the hole and hang on a tree.

DIY Chalkboard Ornaments | Vicky Barone

DIY Chalkboard Ornaments | Vicky Barone

DIY Chalkboard Ornaments | Vicky Barone

DIY Chalkboard Ornaments | Vicky Barone

Have a wonderful weekend, everyone! Happy crafting!

P.S. Speaking of ornaments, don’t forget to order your personalized ornaments from Vicky Barone Designs by December 7, 2015 for guaranteed Christmas delivery!

Categories
DIY Holidays Kids

DIY Christmas Countdown Plate

Happy December! Can you believe it? Before you know it, it will be Christmas day. In the meantime, half the fun is the countdown! We made this chalkboard advent calendar to help keep the excitement going all month long. Here’s how to make your own…

DIY Christmas Countdown Plate | Vicky Barone

Supplies:
– A metallic charger. You can find these at most craft stores for just a few dollars.
– Chalkboard paint. We LOVE Rust-Oleum’s Black Finish Chalk Board paint.
– A paint brush.
– Chalk (and a paper towel!).
– Alphabet stickers.

DIY Christmas Countdown Plate | Vicky Barone

Directions:
1. Gather your supplies. Make sure the charger is clean and dry before painting.
2. Paint the center of the charger with chalkboard paint. Let dry completely.
3. Prep the chalkboard. First, rub chalk onto a paper towel.
4. Gently rub the chalk-covered paper towel onto the chalkboard paint.
5. Add stickers! Say whatever you’d like. We had enough random stickers to spell out “Countdown to Christmas,” but you can also say “Days until Christmas,” “Christmas is Coming,” “Santa Claus is Coming to Town,” or anything you’d like!
6. Use chalk to start your countdown. Each day, wipe the number away with a wet or dry paper towel and write the next number.

DIY Christmas Countdown Plate | Vicky Barone

We displayed ours on a pretty black easel in the foyer (that fabric garland tutorial will be on the blog soon!). It’s so exciting to see the countdown each day! It’s no advent calendar full of candy, but your kids may still fight over who gets to write the numbers each day. 😉

DIY Christmas Countdown Plate | Vicky Barone

DIY Christmas Countdown Plate | Vicky Barone

Here’s Cooper posing with the countdown plate like the majestic beast he is…

DIY Christmas Countdown Plate | Vicky Barone

…aaaand here he is looking awkward.

DIY Christmas Countdown Plate | Vicky Barone

Eek! We can’t wait until the plate reads a number like this!

We hope everyone has a wonderful first day of December! Happy Holidays!

Categories
Holidays Kids Products Things I Love

Black Friday & Cyber Monday Deals!

Thanksgiving is over, which, despite how sad it makes us, means two very wonderful things:
1. Leftovers for days and….
2. BLACK FRIDAY!

Black Friday & Cyber Monday Deals | Growth Charts | Christmas Ornaments | Vicky Barone

Today through Monday, save $10 when you purchase two ornaments! Add this listing to your cart on Etsy and let us know which ornaments you would like as well as names for personalization. Want four ornaments? Save $20! Just add two of this listing to your cart and specify which four ornaments you would like in the ‘note to seller!’

Find all ornaments here.

*Please note that each ornament design is slightly different. Some have “2015” on the front, while some show it on the back, and others do not include a date at all. If you have any questions at all, please send us a message before ordering! We are more than happy to send proofs of each ornament with your desired personalization.

Black Friday & Cyber Monday Deals | Growth Charts | Christmas Ornaments | Vicky Barone

Also available in the shop: FREE personalization on all growth charts! Use the coupon code SAVE2015 to save $10 when you choose personalization!

Find all growth charts here.

These deals will only last until Cyber Monday so get to shopping! Happy Black Friday, everyone!

Categories
Holidays Kids Recipes Things I Love

Happy National Candy Day!

Happy National Candy Day! Just in time for all that Halloween candy you’re not sure what to do with, we’ve collected some delicious recipes where candy is the main ingredient. Here are 12 ways to “recycle” all those sweets (and maybe even package them up as gifts and get them out of the house!).

Happy National Candy Day | What to do with Leftover Halloween Candy | Vicky Barone

1. Snack Mix | 2. M&M Pretzel Kisses | 3. Candy Bark
4. Blondies | 5. Candy Flowers | 6. Rock Candy Champagne
7. Snickers Dip | 8. S’mores Cookie Bars | 9. Dirt Pudding
10. Butterfinger Muddy Buddies |11. Brownie Trifle |12. Chocolate Oreo Turkeys


Categories
DIY Holidays Kids

DIY Finger Puppet Ghosts

These little guys (like anything we glue googly eyes to) crack us up. Just look at their shock and bewilderment! We can’t help but laugh.

Case in point:

We’re having a little too much fun prepping for Halloween ??? #fingerpuppets #halloween #ghost #diy

A video posted by Vicky Barone | Greeting Cards (@vicky_barone) on

These felt finger puppets are super easy to make. You and your little ones will be putting on puppet shows in no time.

DIY Finger Puppet Ghosts | Vicky Barone]

Supplies: white felt, googly eyes, fabric scissors, and hot glue.

Directions:
1. Trace ghost shapes onto a piece of white felt.
2. Stack another piece of white felt underneath and cut out the ghost shapes (you’ll have double of each shape- top and bottom).
3. Take the “bottom” of a ghost shape and draw a line of hot glue around the perimeter, excluding the wavy base of the ghost. Immediately press the “top” of the ghost to the glue, making sure the shapes match up.
4. Use two dots of hot glue to attach the googly eyes.

DIY Finger Puppet Ghosts | Vicky Barone

That’s it! Now you can make a fleet of silly ghosts and put on a show.

DIY Finger Puppet Ghosts | Vicky Barone

DIY Finger Puppet Ghosts | Vicky Barone

Find more easy felt finger puppets here. And don’t forget to follow Vicky Barone on Instagram!

Categories
DIY Holidays Kids

Jack-o-Lantern Apple Stamps

It’s Friday, which means we’re another week closer to Halloween! To keep you and your little ones busy while you wait, we have a super fun DIY that you can make with materials already in your home (and kitchen!).Jack-o-Lantern Apple Stamps | Vicky Barone

These sweet little jack-o-lanterns are made from apples! Similar to our St. Patrick’s Day Shamrock Pepper Stamps, we used produce to create the perfect pumpkin shape.

Jack-o-Lantern Apple Stamps | Vicky Barone

Supplies: apples, a knife, a cutting board, acrylic paint (in orange, black, and green), a paint brush, a paper plate, and a Sharpie (optional).

Directions:
1. Cut an apple in half and remove any seeds that look like they could fall out during the painting process.
2. Pour some orange paint onto a paper plate and dip an apple half into it.
3. Dab off some of the paint and give the apple stamp a few test runs to see how thick you’d like the paint. We had an extra piece of paper to test on.
4. Press the paint-covered apple half onto your work surface as many times as you’d like! You can create a pumpkin patch, or just a hodge podge of floating jack-o-lanterns.
5. When the orange paint has dried completely, use a paint brush and some black paint to create the jack-o-lantern faces and green paint to create leaves and curly vines.
6. I wrote a Happy Halloween message with a black Sharpie, but you can use more black paint if you’re feeling brave!

Jack-o-Lantern Apple Stamps | Vicky Barone

Have fun with it! This is a great project for kids — they will love using fruit as a stamp (just don’t let them take a paint covered bite!).

Jack-o-Lantern Apple Stamps | Vicky Barone

Looking for even more Halloween ideas? Check out my Instagram and Pinterest for tons of fun and festive ideas.

Categories
DIY Holidays Kids

Halloween Bat Pumpkins

Fall is in full swing and pumpkins are taking over! If you’re anything like us, you frequently find yourself leaving the grocery store, farmer’s market, and craft store with more and more mini pumpkins. We don’t blame you! They’re irresistible (especially to little ones tagging along on your errands). Thankfully, there are endless things to do with those little orange wonders to give them a multitude of purposes around the house.

Halloween Bat Pumpkins | Vicky Barone

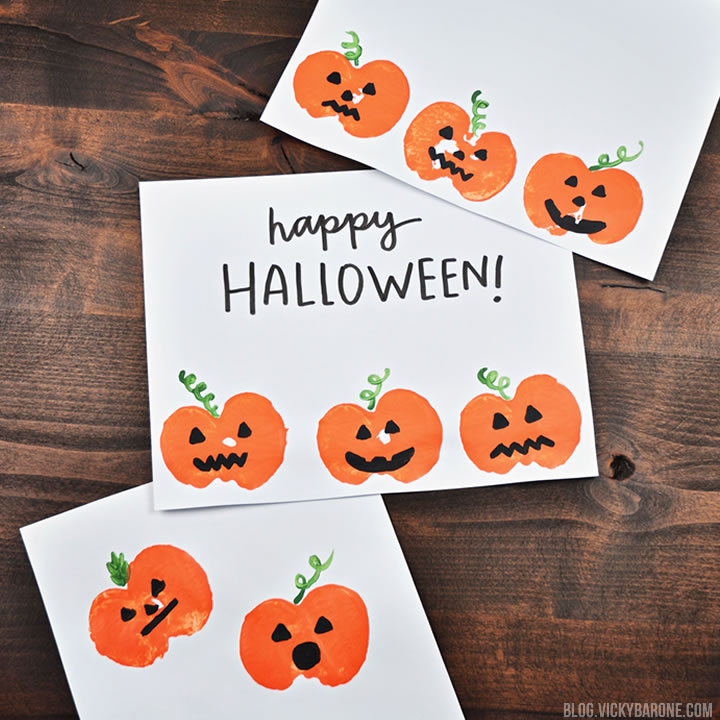
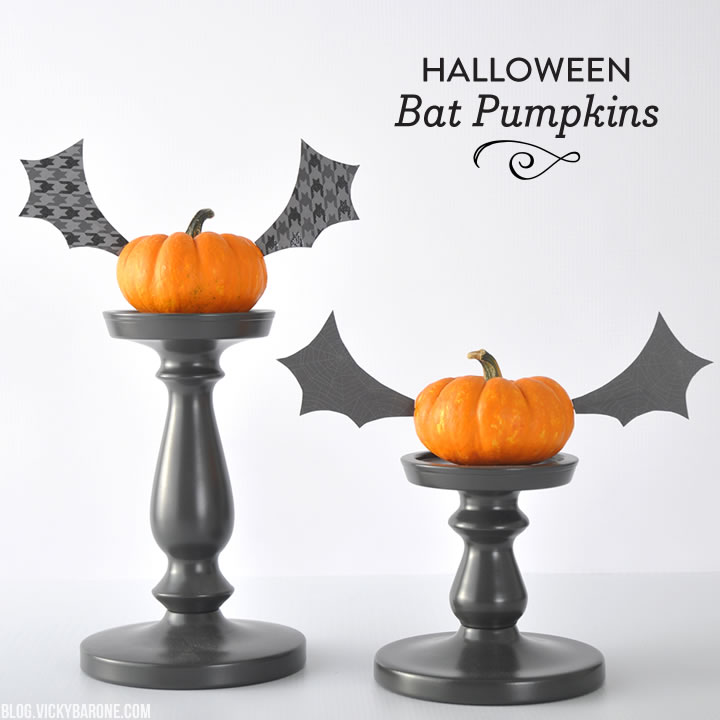
Today we’re sharing a super simple DIY to turn your mini pumpkins into bats for Halloween!

Halloween Bat Pumpkins | Vicky Barone

Supplies: mini pumpkins, a thumb tack, patterned black and gray scrapbook paper, scissors, toothpicks, and tape.

Directions:
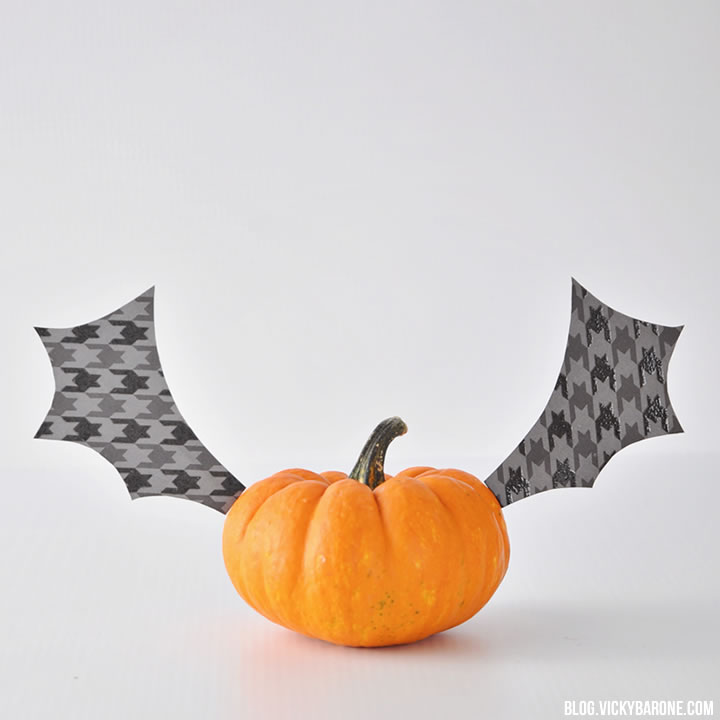
1. Cut bat wings out of scrapbook paper. We made a template to trace by holding a pumpkin on its side and sketching some wings to the left and right. One curved swoop out, and four curved swoops in. Once you get the shape you like, cut out the wings and use them to trace the shape onto the back of the patterned scrapbook paper. Cut the scrapbook paper wings with scissors.
2. Tape a toothpick to the back of each wing, leaving 1/4 inch of toothpick sticking out past each wing.
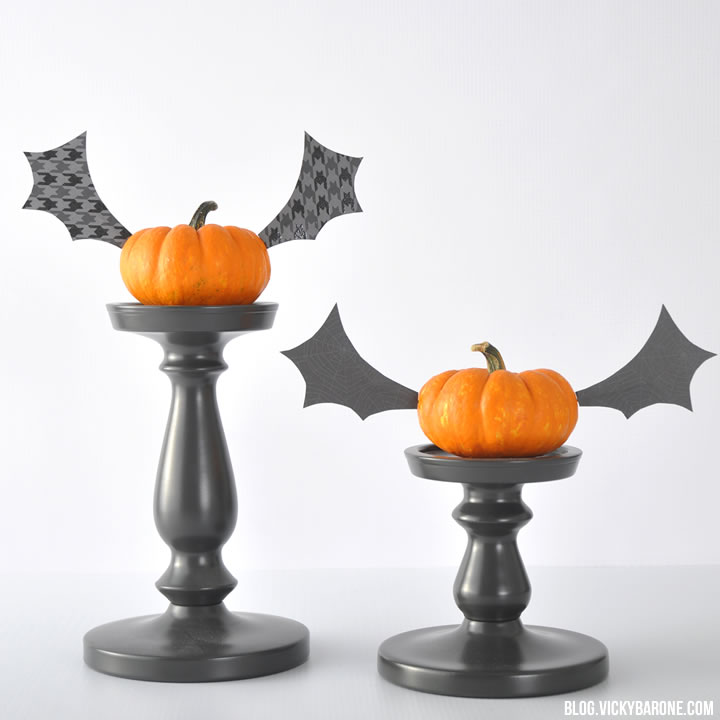
3. Use a thumbtack to make two holes in the sides of a pumpkin. To make the wings stick out at different angles, make the thumbtack hole in the center, the top, or the bottom.
4. Insert the wings into the holes, pressing them in until the paper meets up with the pumpkin and you can’t see the toothpick.

Halloween Bat Pumpkins | Vicky Barone

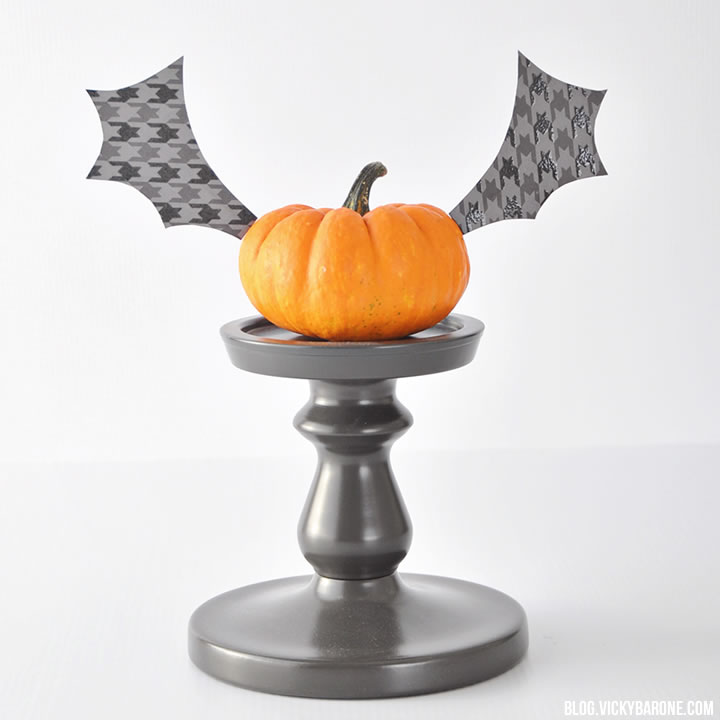
Decorate your home with your bat pumpkins! We put ours on candle sticks on the dining room table for a Halloween-themed tablescape.

Halloween Bat Pumpkins | Vicky Barone

If you like these bat pumpkins, you’ll love our spider pumpkins!

Are you decorating for Halloween yet? How about Christmas? 😉