
This post contains affiliate links. If purchased, I will receive a commission, but the price stays the same for you!
We made another garland for Christmas! Our Thanksgiving garland was so popular, we decided to make another for Christmas. This time we used red and green textured scrapbook paper and ivory scrap-booking letters. It was very easy to make and we are so happy with the end result!
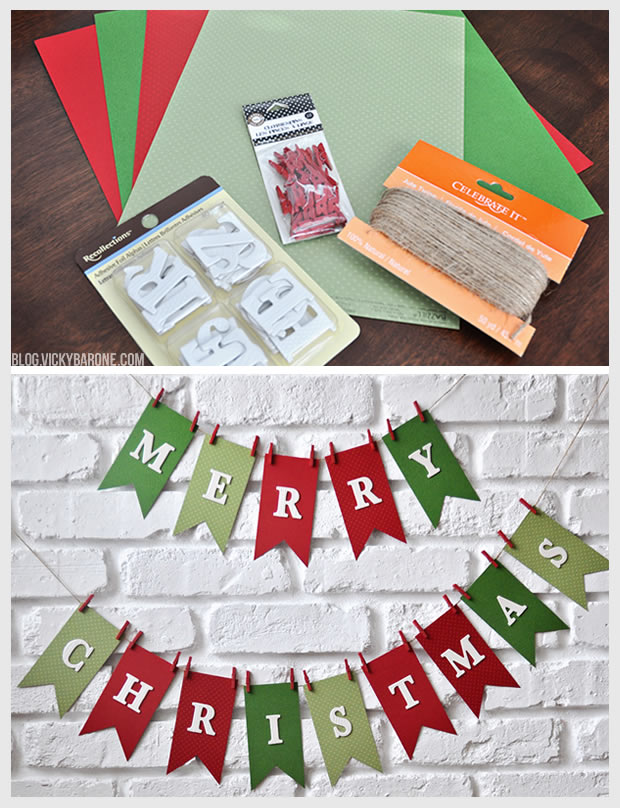
Materials: Green and red scrapbook paper, adhesive chipboard alphabet letters (similar), a paper cutter and/or scissors, mini clothespins, and twine. You can find all of these materials in your local craft store!
The above supplies contain affiliate links. If purchased, I will receive a commission, but the price stays the same for you!
Directions:
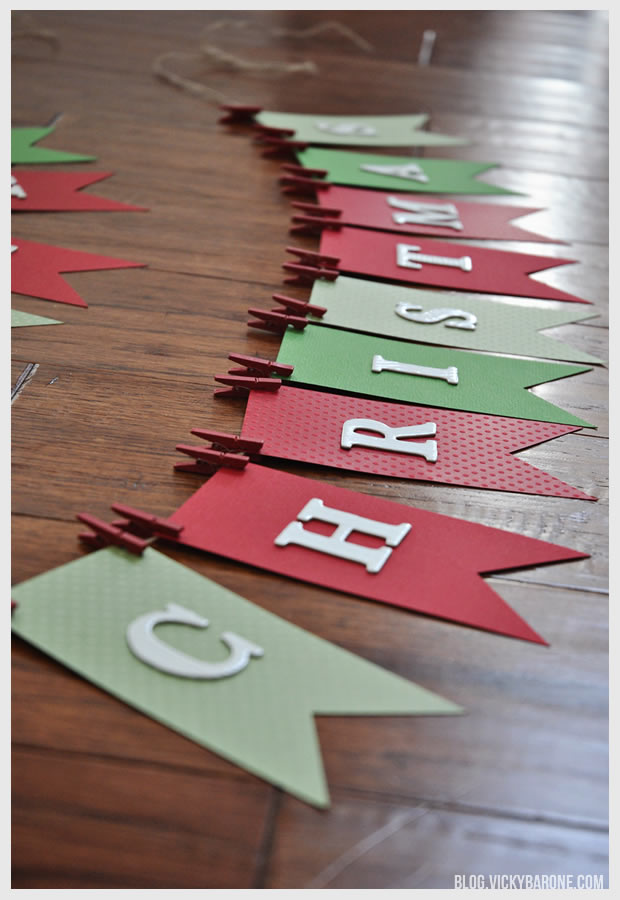
1. Using a paper cutter, cut scrapbook paper into 2.5 x 5 inch rectangles.
2. Cut a triangle out of the bottom of each paper rectangle using scissors. We made a stencil out of scrap paper to make sure each triangle cut was the same.
3. Remove the backing from the letters and attach to each paper flag.
4. Cut one long piece of twine (or two medium length pieces) and attach each flag with two mini clothespins, leaving equal space between the flags and extra twine on each end for hanging.
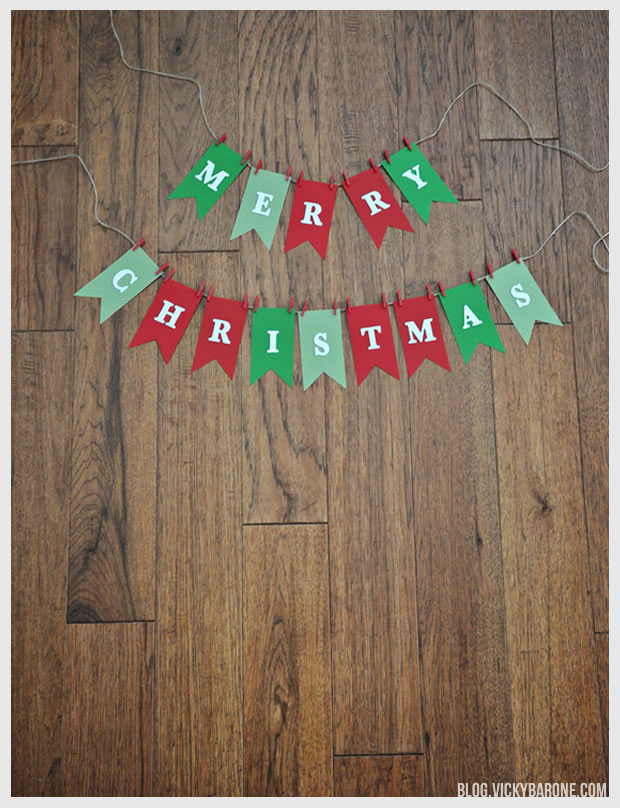
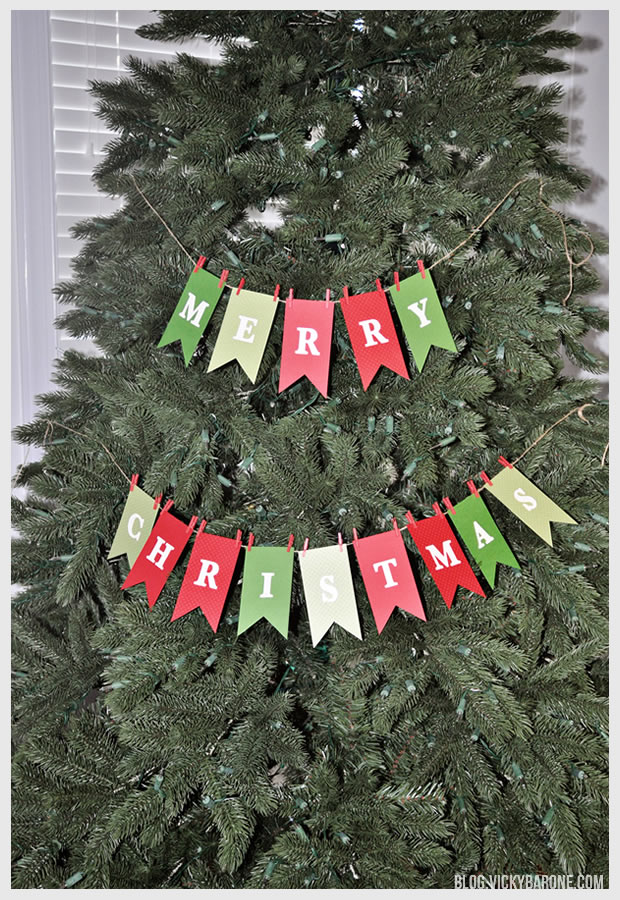 As you can see by our extensive photo shoot, this garland goes great all over the house! Hang it from your mantle, on your Christmas tree, or on any wall for a festive touch to your home.
Happy Holidays!
23 replies on “DIY Merry Christmas Garland”
Looks great! The slightly 3D letters really make it pop!
Thanks, Lauren!!
[…] Year’s Eve party! It’s our go-to bunting that works for every holiday. Check out our Christmas and Thanksgiving garlands […]
[…] red and green, the traditional color for Christmas to decorate first. I luckily found out this free tutorial of the garland from this talented designer vickybarone. This project is pretty and also easy to […]
[…] in the start of the season with this super cute garland from Vicky […]
[…] 11 Merry Christmas Garland from Vicky Barone […]
[…] Si no eres de las que pones árbol de Navidad en casa por falta de espacio una guirnalda puede ser tu solución para dar un toque navideño a tu hogar. La primera idea con moldes de magdalenas queda muy vistosa y orginal y también es muy sencilla para poder hacer con los peques. La segunda, una guirnalda vertical, la puedes hacer tanto con cartulina (que luego pueden decorar los peques con pintura y purpurina) o hacerla directamente con gomaeva decorada y entonces solo tendrán que recortar. La tercera me parece perfecta para colocar en la puerta de la calle o en un ventana. […]
[…] in the start of the season with this super cute garland from Vicky […]
[…] making popcorn garlands as a child, but times have definitely changed. This simple yet classic DIY Christmas garland by Vicky Barone would be perfect for a family craft […]
[…] https://vbblog.mystagingwebsite.com/2013/12/06/diy-merry-christmas-garland/ […]
[…] DIY Christmas Garland […]
[…] photo & idea credit: vickybarone […]
[…] https://vbblog.mystagingwebsite.com/2013/12/06/diy-merry-christmas-garland/ […]
[…] them to a string and hang it up in your room. SUPER fun idea, I think I might do this myself. ? Here and here are good examples of […]
[…] Every home needs a garland to celebrate the season with, especially when there are kiddos inside. Learn how to make this one with the help of Vicky Barone. […]
[…] DIY Merry Christmas Garland by Vicky Barone […]
[…] source: Vicky Barone […]
[…] blog.vickybarone.com […]
[…] Instructions and Photo via Vicky Barone […]
[…] blog.vickybarone.com […]
[…] fonte de pesquisa […]
[…] blog.vickybarone.com […]
[…] you like this garland, be sure to check out our Thanksgiving, Christmas, and New Year’s Eve garlands as […]