Categories
DIY Projects

DIY Metallic Confetti Tumblers

Here’s how we made the metallic confetti tumblers from our Summer party!
We love the way Zandi from Radical Possibility made her Anthropologie knock-off confetti tumblers, and decided to make our own version to match our Summer party!

7_29_13_MetallicConfettiTumbers

Materials:
-Glass tumblers
-Metallic glass paint (we used Martha Stewart’s Opaque Glass Paint in “Champagne”)
-Rubbing alcohol and a paper towel

What to do:
1. Clean the tumblers using a paper towel and rubbing alcohol.
2. Using your glass paint with the detail tip, start making concentrated dots at the base of the tumbler and spread them out as you move up (we suggest you practice a dotting technique on a paper plate first so you get into the rhythm of it, otherwise your first dots may be a different size than the rest).
3. Follow the directions on your glass paint for how to set the paint. We let ours air cure for 21 days, but you can also bake them in the oven to set them!
4. Make a fancy cocktail and pour into your pretty new tumblers!

Check out some of the other fun DIY projects we made for our Summer party too!

Categories
DIY Freebies Printables

Cupcake Flags – Free Printable

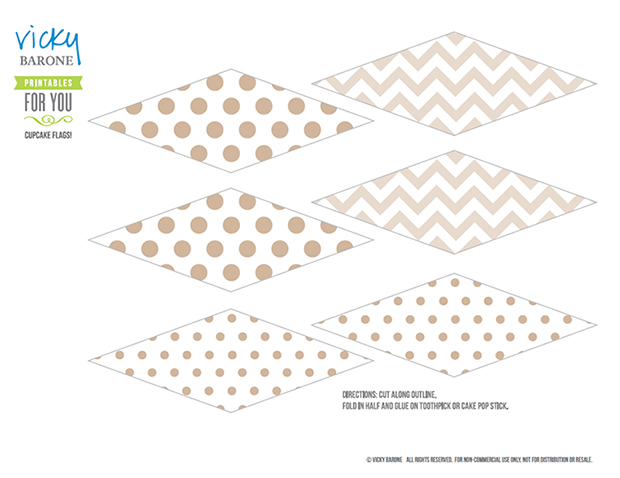
Here’s a fun detail from our Summer Party! A free printable featuring the cute little flags we used to fancy up our cupcakes! Just click on the image below to download the PDF. After you print as many sheets as you need, cut out the flags, fold them over a toothpick or cake pop stick with a little glue or tape, and stick them in your cupcakes!


WhiteCupcakeFlagPDF


Check out the other fun DIY projects from our Summer party too!

Categories
Press Products

New Summer Greeting Cards

Check out some of my new Birthday greeting cards out this Summer! You can find them wherever Recycled Paper Greetings Cards are sold or at independent retailers nationwide.

Happy Summer!

Categories
Recipes

“Pup”sicles – Popsicles for Dogs

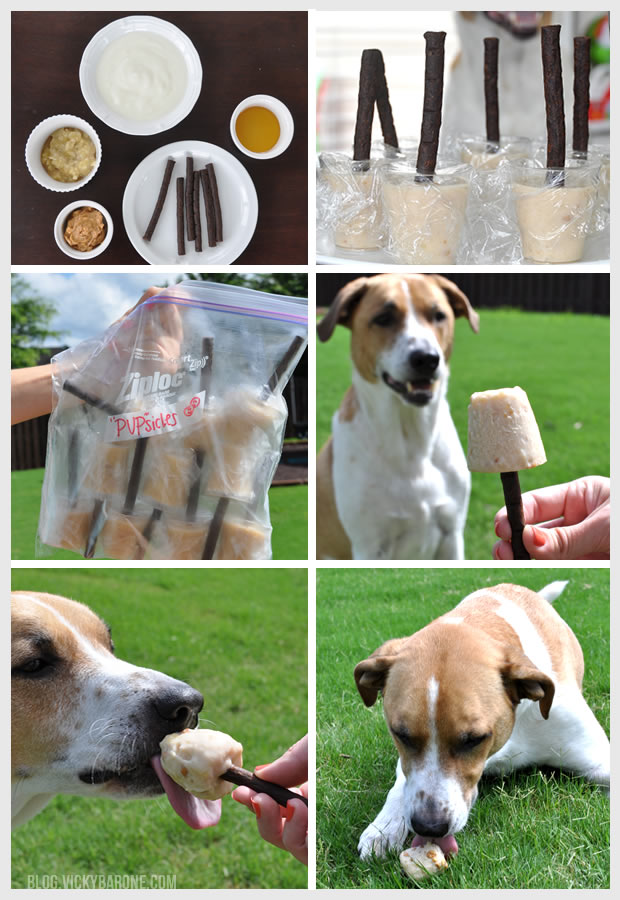
We’ve been on a wild Popsicle kick this Summer and it looks like the rest of the Pinterest world is in the same boat. As we stock up on Popsicle pins, we came across a few recipes for “Pup”sicles and got really excited. Popsicles for Cooper Dog! How thrilled he will be.

7_15_13_PupPopsHighlights

While there are dozens of recipes to choose from out there, we quite preferred this one as it has lots of Cooper’s favorite foods. We adjusted their recipe to make just eight Pupsicles, which should last Cooper a while.

What you need:
16 oz yogurt (we used fat free vanilla yogurt)
2 Tablespoons peanut butter
2 Tablespoons honey
1 banana (mashed)
8 plastic cups (we used 2oz cups like these)
8 dog treat sticks
Plastic wrap

What to do:
1. Mix together yogurt, peanut butter, honey, and banana in a bowl.
2. Divide mixture between eight cups.
3. Cover each cup tightly with a small sheet of plastic wrap.
4. With a sharp knife, make a small cut in the center of each piece of plastic.
5. Insert one treat  stick into each cup.
6. Freeze!

*Like any treat with peanut butter and honey, make sure you keep these pupsicles sealed in a labeled container away from any food you might serve your little ones

Cooper is the best dog model we’ve ever worked with, but he was so excited for his Pupsicle he just couldn’t take it anymore!

7_15_13_CooperBarking

P.S. Check out the doggie Birthday cake we made for Cooper this year!


Categories
DIY My Projects Projects

DIY Button Bouquet

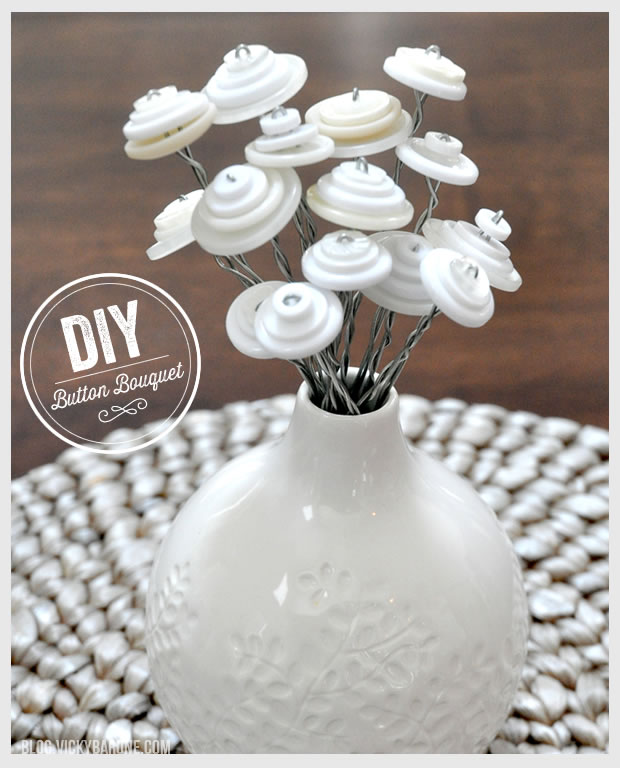
Here’s a cute and easy detail from our all-white Summer party!

7_8_13_ButtonFlowers

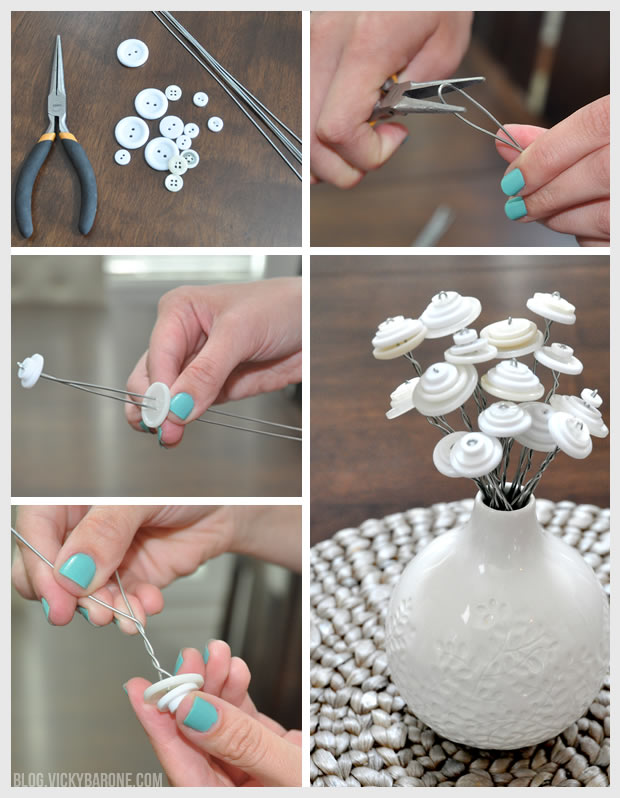
Materials: Buttons in different sizes, floral stem wire (we used 18 gauge), and a pair of pliers.

What to do:
1. Fold one of your wire stems in half and pinch it tight with the pliers.
2. Put each end of your folded wire into the two holes of a small button and push the button to the fold.
3. Repeat with two to three more buttons from smallest to largest.
4. Twist the floral wire to keep the buttons in place and to create a twisted stem.
5. Fold the bottom of each stem at different places to vary the height of each button flower and arrange in a vase.

Now you have a pretty little bouquet that will never wilt!

These could also make great wedding centerpiece as well, or even be turned into a larger bouquet for your bridesmaids!

You can also use colored buttons like the ones I made here (follow me on Instagram!).
If you like this decoration, be sure to check out the rest of the DIY projects we did for our Summer party!

[This post was shared at The Makers Link Party!]

Categories
Kids Recipes

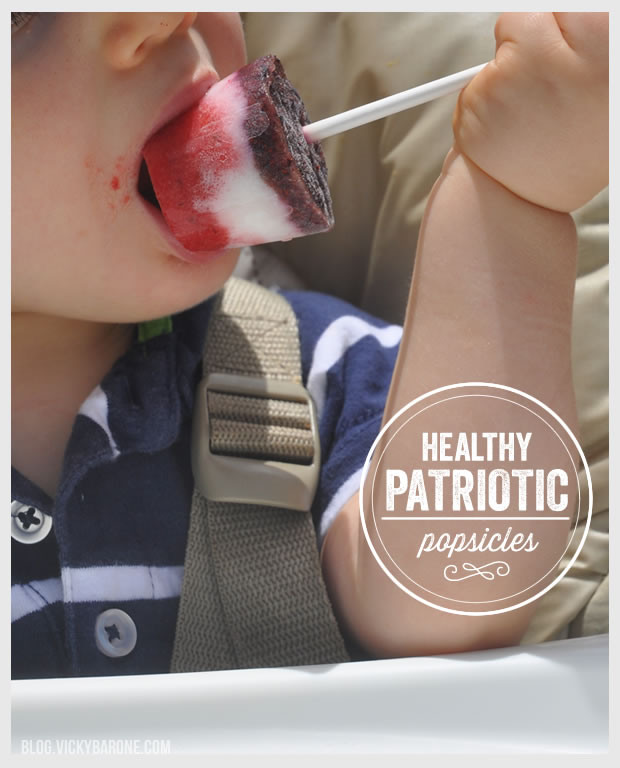
Healthy Patriotic Popsicles

Despite the gloomy weather we’re having here, we are still gearing up for the 4th of July!

We’re hoping for sunshine tomorrow and we’re already planning to cool off with some patriotic popsicles!  While store-bought popsicles are convenient, they are just water, sugar, and food coloring. By making your own popsicles, you can make them healthy and delicious. That’s just what we did with these red, white, and blue popsicles! We also made them in 2oz cups with longer sticks to make them easier for the kids to eat!

7_3_13_FourthPops

Ingredients (to make approximately 12-15 popsicles):
8oz pureed strawberries
8oz pureed blueberries
6oz vanilla yogurt
2oz milk

We used organic fruit, non-fat greek yogurt, and 2% milk, but you can use whatever you and your family enjoy! We made ours as simple as we could since we’ll be sharing them with the little ones, but you can add sweeteners like honey or agave to your yogurt and milk layer to make it even sweeter.

For the popsicle forms, we used 2oz plastic party cups (aka plastic shot glasses) and lollipop sticks. You can also use Dixie cups and popsicle sticks or any other popsicle form you might have from the Dollar store, etc.

What to do:
1. Using a blender (we used a baby food maker!), puree your fresh fruit.
2. Mix together yogurt and milk.
3. In whatever order you’d like, pour a layer of strawberry puree, yogurt, and blueberry puree into each cup (each layer is thick enough that you won’t even need to freeze each one individually so that they don’t run together like fruit juice would!)
4. Place a sheet of plastic wrap over each cup and wrap tightly
5. Using a sharp knife, make a small slit in the center of the plastic wrap and insert the lollipop stick (the plastic wrap will help the lollipop stick stand straight up until the popsicle freezes).
6. Freeze!
7. To remove from the plastic cup, place each popsicle in a bowl of warm water for 15 seconds (if you used a paper cup, you can just rip it and peel it away!)

And that’s it! Now you and your little ones can enjoy your healthy popsicles!

Check out our Popsicle Pinterest board for more ideas!

Happy Independence Day!